
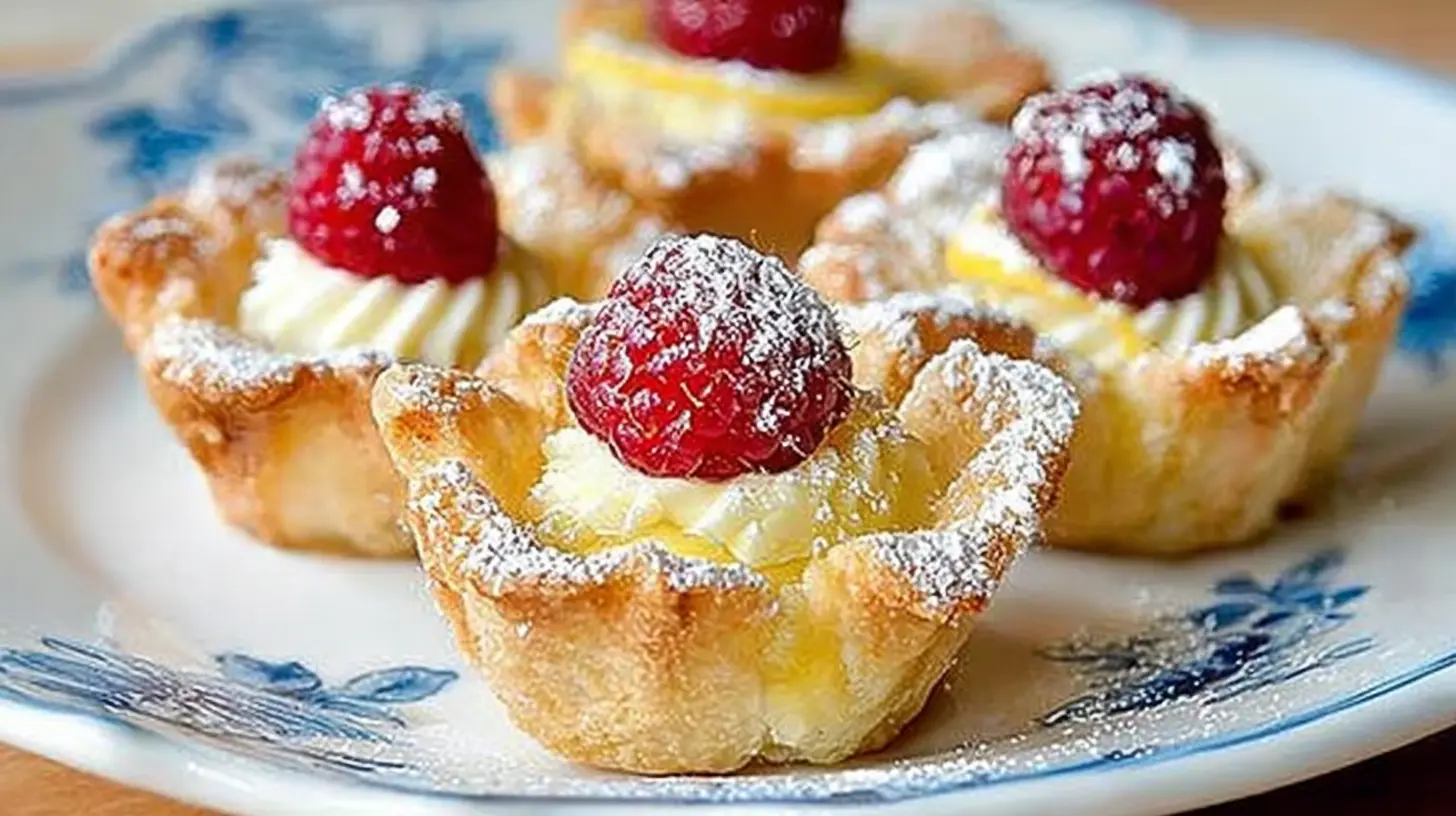
Lemon Tartlets deliver everything you love about classic lemon pie—bright citrus, creamy curd, and a crisp, buttery crust—shrunk into elegant, two-bite treats that are perfect for parties, brunches, and bake sales. These petite desserts use convenient mini tart shells (or quick-baked crust rounds) and a silky, stovetop lemon curd you can make in advance, so assembly is fast and fuss-free when guests arrive. Add a swirl of whipped topping and a single raspberry, and you’ve got a tray of sunshine that looks bakery-beautiful with minimal effort.
Why You’ll Love This Lemon Tartlets Recipe
- Vibrant flavor, tiny package: Bold lemon tang balanced by gentle sweetness, tucked into crisp mini shells for irresistible bite-size portions.
- Quick but impressive: Store-bought crusts or pre-baked mini shells save time, while the homemade curd tastes authentically from-scratch.
- Make-ahead friendly: Lemon curd keeps beautifully, so you can prep days ahead; assemble just before serving for the best texture.
- Party perfect: A neat, handheld dessert—no slicing or plates required—that looks polished on any dessert table.
- Adaptable: Easily swap toppings, berries, or shell styles (gluten-free or dairy-free) to suit your guests.

Ingredients for Lemon Tartlets
For the Mini Tart Shells
- 3 refrigerated pie crusts (or 34–36 pre-baked mini tart shells)
- All-purpose flour, for dusting (if rolling)
- Nonstick spray or softened butter, for the mini muffin pan (if baking crusts)
For the Lemon Curd Filling
- 6 large egg yolks
- 1 large whole egg
- 1¼ cups granulated sugar
- ½ cup freshly squeezed lemon juice (about 3–4 lemons)
- 1 tablespoon finely grated lemon zest (optional, for extra zing)
- 1 cup unsalted butter, cut into small cubes
- Pinch of fine sea salt
For Topping & Garnish
- 1 cup whipped topping (store-bought) or lightly sweetened whipped cream
- 34–36 fresh raspberries (one per tartlet)
- Powdered sugar, for dusting (optional)
- Extra lemon zest strips or mint leaves (optional)
Ingredient Notes (Substitutions, Healthy Swaps)
- Crust options:
- Time-saver: Use pre-baked mini tart shells from the bakery aisle.
- Homemade look: Cut circles from refrigerated pie dough and bake in a mini muffin tin to create “cup” shells.
- Gluten-free: Choose certified GF tart shells or use gluten-free pie dough.
- Dairy-free: Replace the butter with a high-quality plant-based butter and top with coconut whipped topping.
- Lighter topping: Swap store-bought whipped topping for fresh whipped cream, stabilized with a spoonful of Greek yogurt or skyr for a protein boost and pipeable texture.
- Citrus variations: Meyer lemons give a gentler, floral tang; you can also blend in a little lime or orange juice (keep total juice at ½ cup).
- No alcohol & no pork: This recipe contains neither. If a different garnish calls for liqueur, simply omit or use a splash of lemon juice.

Step-by-Step Instructions
Step 1 – Prepare the Tart Shells
- Preheat & ready the pan: Heat the oven to 375°F (190°C). Lightly grease a 24-cup mini muffin pan (or use nonstick).
- Cut the dough: On a lightly floured surface, unroll the refrigerated pie crusts. Use a 2½-inch round cutter (or a glass/mason jar ring) to punch out circles. Gather and re-roll scraps as needed to get about 34–36 rounds.
- Form the cups: Gently press each dough round into a mini muffin cup, letting the edges come just above the rim to form a shallow “bowl.” Prick the bottoms with a fork.
- Blind-bake: Cut small squares of parchment, place them over each dough cup, and add a few baking beads or dried beans (optional but helps prevent puffing). Bake 8–10 minutes, remove weights and parchment, then bake 2–4 minutes more until lightly golden.
- Cool completely: Let shells sit in the pan 5 minutes, then transfer to a rack. Cool fully before filling to keep them crisp.
Using pre-baked shells? Skip to Step 2. If the shells seem soft, refresh in a 325°F (165°C) oven for 3–4 minutes to re-crisp; cool before filling.
Step 2 – Make the Silky Lemon Curd
- Whisk the base: In a medium, heavy-bottomed saucepan, whisk the egg yolks, whole egg, sugar, lemon juice, lemon zest (if using), and salt until smooth.
- Cook low and slow: Place over medium-low heat, whisking constantly. The curd should gradually thicken in 6–10 minutes. Don’t rush this step—gentle heat prevents scrambling.
- Finish with butter: When the mixture coats the back of a spoon (about 170–175°F/77–79°C), remove from heat. Whisk in the butter a few cubes at a time until fully melted and glossy.
- Strain for silkiness: For an ultra-smooth texture, pass the curd through a fine-mesh sieve into a clean bowl.
- Chill: Press plastic wrap directly on the surface to prevent a skin, then refrigerate until cold and thickened, at least 2 hours (or up to 5 days).
Texture tip: Properly thick curd mounds softly on a spoon and holds gentle swirls when stirred. If it seems loose, chill it longer.
Step 3 – Assemble and Garnish
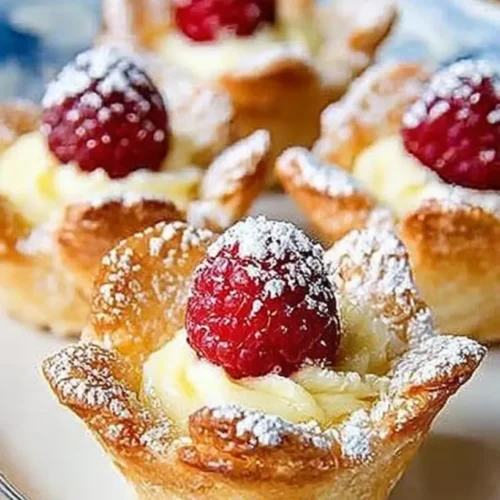
- Fill the shells: Spoon or pipe cooled lemon curd into each tart shell, leaving a slight dome.
- Top with cream: Pipe or dollop a small swirl of whipped topping or whipped cream.
- Crown with berries: Press a single raspberry on each tartlet.
- Finish: Dust lightly with powdered sugar and add a tiny lemon zest strip or mint leaf if desired. Serve chilled or at cool room temperature.
Assembly timing: For the crispest shells, fill within 2–3 hours of serving. If you need to hold longer, brush the baked shells with a whisper-thin layer of melted white chocolate and let set; it forms a moisture barrier.
Pro Tips for Success
- Low heat = silky curd: Keep the burner modest and whisk constantly. If you see steam clouds or sputtering, reduce heat.
- Strain for a luxe finish: Even if you don’t see egg bits, straining creates patisserie-level smoothness.
- Balance the tartness: Taste the curd before chilling. For sweeter results, whisk in 1–2 extra tablespoons of sugar while the curd is still hot.
- Keep shells crisp: Cool shells completely and avoid overfilling. A chocolate “seal” or a quick re-crisp in the oven can help in humid weather.
- Pipe for polish: Use a small star tip to pipe the whipped topping—fast, neat, and impressive.
- Chill to set: Cold curd is thicker and easier to portion cleanly, especially when piping.
Flavor Variations
- Meyer Lemon Velvet: Use Meyer lemon juice and zest for a softer, floral citrus profile; top with candied lemon peel.
- Lemon-Lime Spark: Replace 2–3 tablespoons of lemon juice with fresh lime juice and garnish with a lime twist.
- Berry Swirl: Marble in a teaspoon of thick raspberry jam before garnishing; add a mixed-berry crown.
- Coconut Kiss: Stir 1–2 tablespoons of coconut cream into the cooled curd and top with toasted coconut flakes.
- Lavender Lemon: Infuse the sugar with a pinch of culinary lavender (rub into the sugar before whisking) for a delicate, aromatic note.
Serving Suggestions
- Dessert boards: Arrange tartlets with strawberries, shortbread, and white chocolate squares for a color-coordinated spread.
- Tea time: Pair with earl grey or green tea; the citrus cuts through rich tannins beautifully.
- Brunch buffet: Balance savory quiche and salty bacon alternatives (e.g., smoked turkey) with the bright, sweet bite of lemon desserts.
- Special events: Weddings, baby showers, and graduations—these travel well in a shallow lidded container and plate up elegantly.
Storage and Freezing Instructions
- Refrigeration: Store assembled tartlets in a single layer in an airtight container up to 24 hours for best texture (shells slowly soften over time).
- Separate components: For longer storage, refrigerate the lemon curd up to 5 days and the baked shells up to 3 days in an airtight container at room temperature (cool, dry spot). Assemble just before serving.
- Freezing lemon curd: Freeze curd in a freezer-safe container up to 2 months. Thaw overnight in the fridge, whisk smooth, and use as directed.
- Freezing shells: Baked shells freeze well for 1 month. Cool completely, then freeze in a zip-top bag with parchment between layers. Re-crisp in a 325°F (165°C) oven for 3–5 minutes; cool before filling.
Nutrition Facts (Per Serving)
Approximate values for 1 of 36 tartlets; will vary based on shell brand and topping choice.
| Calories | Protein | Carbs | Fat | Fiber | Sodium |
|---|---|---|---|---|---|
| 105 | 1 g | 12 g | 6 g | 0 g | 60 mg |
FAQ About Lemon Tartlets
How do I keep the crust from shrinking or puffing?
Use a light hand when pressing dough into the cups and avoid stretching. Prick the bottoms with a fork and, if possible, use parchment squares with a few pie weights to hold shape during the first minutes of baking. Removing the weights halfway lets the bottoms brown lightly without puffing.
Why did my lemon curd turn grainy?
Curd goes grainy when the eggs scramble from high heat. Whisk constantly over medium-low heat and pull the pan as soon as the curd thickens and coats a spoon. If you see small curds, immediately strain through a fine-mesh sieve. The butter whisked in off-heat helps emulsify the texture back to silky.
Can I make lemon curd without a thermometer?
Yes. The visual cue is key: when a spatula dragged across the saucepan leaves a clean trail for 1–2 seconds and the curd coats the back of a spoon, it’s ready. If you do use a thermometer, aim for 170–175°F (77–79°C).
What’s the best way to pipe the filling neatly?
Chill the curd fully, then scoop it into a piping bag fitted with a medium round or French tip. Squeeze a short spiral into each shell. Cold curd holds shape; warm curd slumps and can soften the crust.
Can I make these gluten-free or dairy-free?
Absolutely. Use gluten-free mini tart shells or a GF pie dough. For dairy-free, choose plant-based butter for the curd and top with coconut whipped cream. The method and timing stay the same.
How far ahead can I assemble lemon tartlets?
For the crispest shells, assemble within 2–3 hours of serving. If you need longer, paint the inside of each cooled shell with a thin layer of melted white chocolate; once set, fill and garnish. This moisture barrier keeps shells crisp for several hours.
Can I scale this recipe for a large event?
Yes. The curd doubles cleanly; use a wider, heavy saucepan for even heating. Bake shells in batches and cool thoroughly. Keep filled tartlets chilled on sheet trays; garnish with berries just before plating for a fresh look.
What other toppings work besides raspberries?
Try blueberries, sliced strawberries, blackberries, or candied lemon peel. Tiny meringue kisses also look charming; torch lightly for color if you like. Just keep toppings light so each tartlet stays tidy and easy to eat in one or two bites.
Final Thoughts
Lemon tartlets are proof that small desserts can deliver big joy. With a silky, homemade lemon curd and quick, crisp shells, you get the best of both worlds: fresh, remarkable flavor with practical shortcuts that make them weeknight- or party-friendly. The bright citrus sings on its own, yet the recipe welcomes creative twists—berries, herbs, even a hint of coconut—so you can tailor the finishing touches to your menu and season. Prep the curd in advance, bake or buy your favorite shells, and in minutes you’ll be plating a tray of beautiful bites that sparkle like sunshine.
Lemon Tartlets
Ingredients
For the Mini Tart Shells
- 3 refrigerated pie crusts or 34–36 pre-baked mini tart shells
- all-purpose flour for dusting if rolling
- nonstick spray or softened butter for the mini muffin pan if baking crusts
For the Lemon Curd Filling
- 6 large egg yolks
- 1 large whole egg
- 1.25 cups granulated sugar
- 0.5 cup freshly squeezed lemon juice about 3–4 lemons
- 1 tablespoon finely grated lemon zest optional, for extra zing
- 1 cup unsalted butter cut into small cubes
- 1 pinch fine sea salt
For Topping & Garnish
- 1 cup whipped topping or lightly sweetened whipped cream
- 36 fresh raspberries one per tartlet
- powdered sugar for dusting, optional
- extra lemon zest strips or mint leaves optional for garnish
Instructions
- Step 1 – Prepare the Tart Shells: Preheat oven to 375°F (190°C). Lightly grease a mini muffin pan. Roll out pie dough and cut into 2½-inch rounds. Press into muffin cups, prick bottoms, and blind-bake with parchment and weights for 8–10 minutes. Remove weights and bake 2–4 more minutes until golden. Cool completely.
- Step 2 – Make the Lemon Curd: In a saucepan, whisk together yolks, whole egg, sugar, lemon juice, zest, and salt. Cook over medium-low heat, whisking constantly, until thickened (6–10 minutes). Remove from heat and whisk in butter until smooth. Strain through a fine-mesh sieve. Chill with plastic wrap pressed on surface for at least 2 hours.
- Step 3 – Assemble and Garnish: Spoon or pipe cold lemon curd into cooled shells. Top with whipped cream and a raspberry. Dust with powdered sugar and garnish with zest or mint if desired. Serve chilled or at cool room temp.