

Spring celebrations are the perfect excuse to indulge in delicious desserts that capture the essence of Italian cuisine, and I’m thrilled to share my favorite easy recipes with you! Whether you’re hosting a family gathering or simply treating yourself to something sweet, these simple yet delightful treats will impress your guests and brighten your festivities. From Mini Cannoli Cups that promise a delightful crunch to the zesty freshness of an Italian Lemon Cream Cake, each recipe in my list is designed to bring joy and flavor to your spring table. Get ready to whip up some Italian magic in your kitchen as I guide you through these delightful creations!
1. Mini Cannoli Cups Easy No Bake Dessert Bites

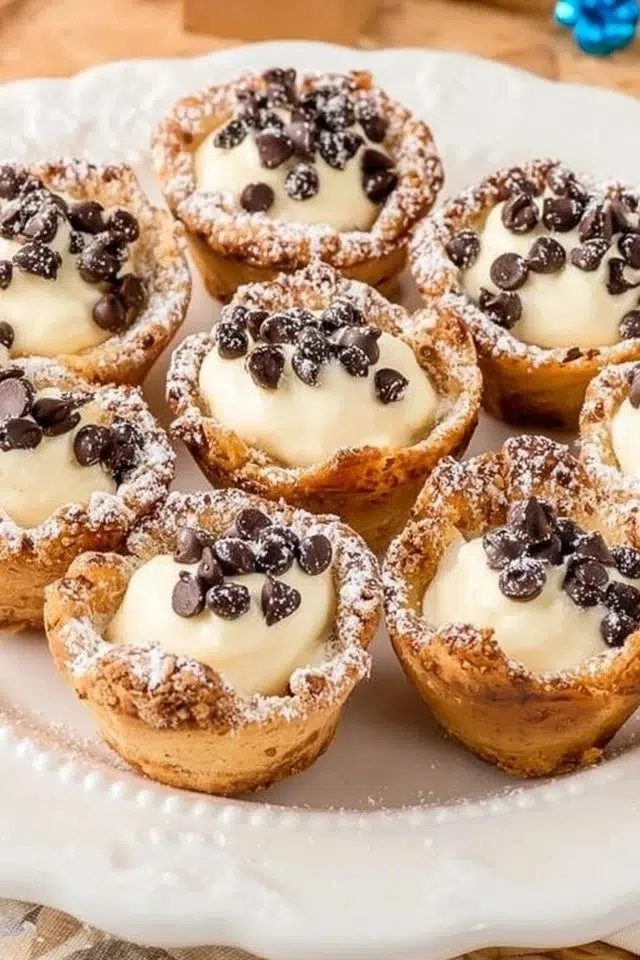
Mini Cannoli Cups are a small, crisp bite filled with a sweet, creamy ricotta filling and little chocolate chips for a pop of texture. The phyllo cups give a flaky, crunchy shell while the ricotta mix stays smooth and slightly sweet. They taste like a classic cannoli without the work of frying or rolling dough. This recipe is quick and special because you only need to mix the filling, spoon it into ready-made cups, and finish with a sprinkle of pistachios or powdered sugar. Serve them at a party, as a simple dessert after dinner, or pair with coffee for a light treat — they work well with other small bites like Blueberry Lemon Pancake Bites for a varied spread.
Why You’ll Love This Mini Cannoli Cups
- Ready-made mini phyllo cups save time and cleanup.
- Light, creamy ricotta filling is less rich than heavy cream desserts.
- Mini chocolate chips add texture and small bursts of chocolate.
- Easy to scale up for parties or make a small batch for two.
- Optional pistachios add color, crunch, and a nutty balance.
- No baking required for the filling — spoon and serve.
- Quick chill time if you want them colder for summer gatherings.
- Dusting of powdered sugar adds a pretty, bakery-style finish.
What Is Mini Cannoli Cups?
Mini Cannoli Cups are bite-sized desserts that take the essence of traditional Italian cannoli and simplify it. Instead of rolling fried shells and piping filling, this version uses mini phyllo pastry cups as the shell and a sweet ricotta mixture as the filling. The taste is mildly sweet, creamy, and tangy from the ricotta, with small chocolate chips that add crunch and chocolate flavor. The texture contrast — flaky shell and smooth filling with chocolate bits — is what makes these cups feel special.
Cooking method is mostly assembly: mix, fold, spoon, and garnish. The vibe is casual but refined — great for weeknight desserts, brunch spreads, holiday parties, potlucks, or anytime you want a neat, handheld sweet. They feel like comfort food with a light, elegant touch.
Ingredients for Mini Cannoli Cups
Main Ingredients
- 1 package mini phyllo pastry cups
- 15 oz ricotta cheese
- 1 cup powdered sugar
- 1 tsp vanilla extract
- 1/2 cup mini chocolate chips
Optional Garnish
- 1/4 cup chopped pistachios (optional)
- Powdered sugar for dusting
Ingredient Notes (Substitutions, Healthy Swaps)
- Ricotta cheese: Use whole-milk ricotta for a richer texture. For a lighter option, use part-skim ricotta, but drain excess liquid on paper towels or in a fine mesh sieve for 30 minutes to avoid a watery filling.
- Powdered sugar: You can reduce to 3/4 cup if you prefer less sweetness. For a slightly less processed option, superfine sugar works, but powdered sugar blends most smoothly.
- Vanilla extract: Pure vanilla gives the best flavor. Imitation vanilla is fine if that’s what you have.
- Mini chocolate chips: Use chopped dark chocolate or mini white chips for a different look. Keep chips small so they fit well in each cup.
- Phyllo pastry cups: If unavailable, small tart shells or mini graham-cracker cups can work but change the texture. Phyllo cups are best for the flaky crispness.
- Pistachios: Optional for a nut-free dish. Toast lightly for deeper flavor if desired.
- Make it dairy-free: Use a dairy-free ricotta alternative (made from almonds or tofu) and taste-test sweetness and texture before filling the cups.
Step-by-Step Instructions
Step 1 – Drain the ricotta if needed
If your ricotta is very wet or watery, place it in a fine mesh sieve lined with paper towel and let it drain for 15–30 minutes. This gives a thicker, firmer filling. If your ricotta is already thick, you can skip draining.
Visual cue: Filling should be thick but scoopable, not runny.
Step 2 – Mix the filling
In a mixing bowl, combine the ricotta cheese, 1 cup powdered sugar, and 1 tsp vanilla extract. Use a spoon or electric mixer on low speed to blend until smooth and even.
Step 3 – Fold in chocolate chips
Gently fold in 1/2 cup mini chocolate chips so they are evenly distributed. Don’t overmix; you want chips throughout the mixture.
Step 4 – Fill the phyllo cups
Spoon or pipe the ricotta mixture into each mini phyllo pastry cup. Fill to the top but avoid overfilling so the cups stay neat.
Visual cue: Each cup should hold a small mound of filling without spilling over.
Step 5 – Garnish
Sprinkle chopped pistachios on top if desired and lightly dust with powdered sugar for a bakery finish.
Pro cue: If you want cleaner dusting, chill the filled cups briefly for 10–15 minutes before dusting so the sugar sits on top.
Step 6 – Serve or chill
Serve immediately or refrigerate until ready to serve. If chilling, cover loosely so the shells stay crisp as long as possible.
Pro Tips for Success
- Use thick ricotta or drain it first to prevent a watery filling that can soften the cups.
- Gently fold chocolate chips in by hand to keep the filling light and airy.
- Fill cups just before serving for the best crunch; pre-filled cups soften faster.
- If you must prep ahead, store filling and phyllo cups separately and assemble within a few hours of serving.
- Toast pistachios lightly on a dry skillet for 1–2 minutes to deepen the flavor. Cool before topping.
- Dust powdered sugar at the last minute so it looks fresh and doesn’t melt into the filling.
- Use a piping bag with a wide tip for neater presentation when filling many cups.
- Keep cups chilled if serving on a warm day; cold ricotta filling tastes cleaner and brighter.
Flavor Variations
- Chocolate Orange (optional): Add 1 tsp orange zest to the ricotta and use dark chocolate chips. Zest brightens the ricotta and pairs well with chocolate.
- Lemon-Blueberry (optional): Fold in 1 tsp lemon zest and a small spoonful of very finely chopped dried blueberries or freeze-dried blueberry powder. This adds a bright, fruity note.
- Nutty Honey (optional): Mix 1–2 tbsp of honey into the ricotta and top with crushed pistachios for a honeyed, nutty finish.
- Espresso Chip (optional): Stir 1/2 tsp instant espresso powder into the ricotta for a coffee twist, then add mini chocolate chips.
- Cannoli-Style Cinnamon (optional): Add 1/4 tsp ground cinnamon to the filling for a warm spice element.
- White Chocolate & Cranberry (optional): Swap mini chocolate chips for mini white chips and top with a few finely chopped dried cranberries.
Serving Suggestions
- Party platter: Arrange on a tiered tray with fresh berries and small tarts for variety.
- After-dinner treat: Serve two to three cups per person with espresso or decaf.
- Brunch sweet: Pair with light pastries and a fruit salad for a balanced brunch table.
- Holiday platter: Add colored sprinkles or finely chopped candied fruit for seasonal flair.
- Gift plate: Pack a small box with parchment for neighbors or guests. Keep chilled until given.
- Kid-friendly dessert: Leave out nuts and present on a colorful platter for easier sharing.
Make-Ahead, Storage & Reheating
- Make-ahead: Prepare the ricotta filling up to 24 hours in advance and keep covered in the fridge. Do not fill the phyllo cups until ready to serve to keep them crisp.
- Short-term storage: Once filled, keep in the fridge and eat within 24 hours for best texture. The phyllo cups will start to soften after a day.
- Reheating: These are best served cold or at room temperature. Reheating is not recommended because the phyllo cups will lose their crispness and the ricotta can change texture. If you must warm them slightly, remove the filling, warm the empty cups in a 300°F oven for 3–5 minutes, then refill.
- Texture changes: Expect phyllo cups to soften as they sit with the filling. Assemble just before serving when possible.
Storage and Freezing Instructions
- Refrigeration: Store leftover filled cups in an airtight container in the fridge for up to 24 hours. Place them in a single layer to avoid squashing the filling.
- Freezing: Freezing filled Mini Cannoli Cups is not recommended. The ricotta filling can change texture after freezing and thawing, becoming watery or grainy, and the phyllo cups will lose crispness. Instead, freeze the leftover ricotta filling (without cups) in a freezer-safe container for up to 1 month. Thaw in the fridge, stir gently, and refill fresh phyllo cups when ready to serve.
- Best practice: If you expect leftovers, store filling separately from shells and assemble within a day for best quality.
Nutrition Facts (Per Serving)
Calories | Protein | Carbs | Fat | Fiber | Sodium
—|—:|—:|—:|—:|—:
100 kcal | 2 g | 8 g | 7 g | 1 g | 50 mg
Estimates vary by brands and portions.
FAQ About Mini Cannoli Cups
Q: Why is my filling too runny?
A: The ricotta may be watery. Drain it in a sieve for 15–30 minutes, or use part-skim ricotta drained well. Also make sure you measured powdered sugar correctly.
Q: Can I use mascarpone instead of ricotta?
A: Yes, mascarpone will make a richer filling. Use it alone or mix half ricotta, half mascarpone for balance.
Q: How long do the filled cups stay crisp?
A: Best within a few hours; after about 24 hours they will soften. Fill close to serving time.
Q: Can I make the filling ahead of time?
A: Yes — make the filling up to 24 hours ahead and keep refrigerated. Mix well before filling cups.
Q: Can I use regular chocolate chips?
A: Mini chips fit better in these small cups. If you only have regular chips, chop them small first.
Q: Are these gluten-free?
A: Not as written. Use gluten-free phyllo or gluten-free mini cups to make them gluten-free.
Notes
- Use a small cookie scoop or piping bag for even, neat portions.
- If you want a smoother filling, blend the ricotta briefly in a food processor before adding chips.
- Chill the cups for 10 minutes before serving for a fresher mouthfeel.
- Pick a brightly colored garnish (pistachio or lemon zest) for a pretty contrast.
- For a party, label nut-containing plates to alert guests.
Troubleshooting
- Problem: Filling tastes bland.
Fix: Add a little more vanilla or a pinch of fine salt to lift flavors. A touch of lemon zest helps too. - Problem: Cups got soggy.
Fix: Fill just before serving. If prefilled, eat within a few hours and keep chilled. - Problem: Filling too sweet.
Fix: Reduce powdered sugar to 3/4 cup next time or add a bit of unsweetened ricotta or lemon zest to balance sweetness. - Problem: Chocolate chips sink to the bottom.
Fix: Toss chips in a tiny dusting of powdered sugar before folding in to help them suspend in the filling. - Problem: Cups crack or break when handling.
Fix: Handle phyllo cups gently; transfer with a flat spatula and fill on a flat surface to avoid breaking. - Problem: Ricotta is grainy.
Fix: Blend ricotta in a food processor or whisk vigorously to smooth it before adding sugar and chips.
Final Thoughts
Mini Cannoli Cups are an easy, elegant dessert that brings the flavors of classic cannoli into bite-sized form with very little effort. They are quick to make, simple to adapt, and ideal for gatherings or a small sweet treat. For more small-bite ideas and pairing suggestions, check a similar light recipe like Mini Cannoli Bites (6 Ingredient Recipe) – Kathryn’s Kitchen.

Mini Cannoli Cups
Ingredients
Main Ingredients
Optional Garnish
Instructions
Preparation
- Step 1: If your ricotta is very wet, drain it in a fine mesh sieve lined with paper towel for 15–30 minutes.
- Step 2: In a mixing bowl, combine ricotta cheese, powdered sugar, and vanilla extract, and blend until smooth.
- Step 3: Gently fold in mini chocolate chips until evenly combined.
- Step 4: Spoon or pipe the ricotta mixture into each mini phyllo pastry cup, filling them to the top.
- Step 5: Sprinkle with chopped pistachios and dust lightly with powdered sugar.
- Step 6: Serve immediately or refrigerate until ready to serve.
Notes
2. Italian Lemon Cream Cake Easy Spring Dessert
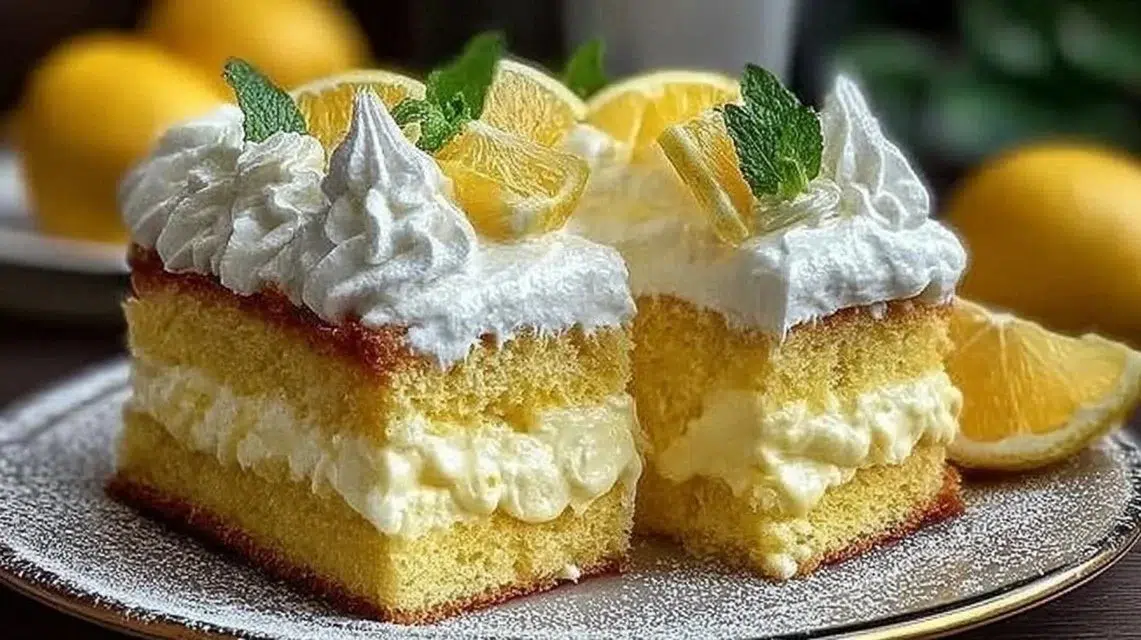
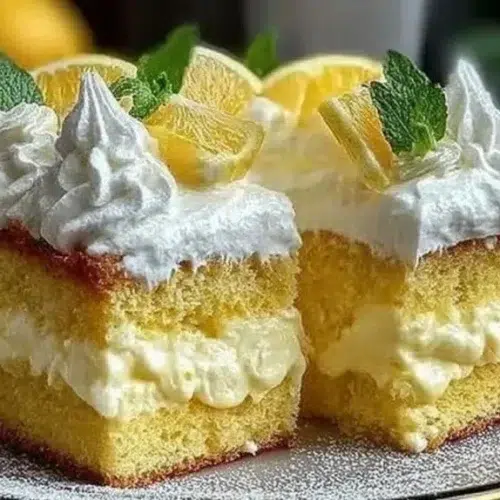
This Italian Lemon Cream Cake is bright, creamy, and light on the palate. The base is a tender white cake with a gentle crumb topping, and the center is filled with a smooth lemon cream made from cream cheese and whipped cream. You get a soft, moist cake with a fresh lemon tang and a silky, cloud-like filling that is perfect for brunch or a simple dessert after dinner. It’s easy because you start with a boxed cake mix and finish with quick hands-on steps — ideal for busy cooks who want a special result. Serve chilled with a dusting of confectioners’ sugar and fresh lemon slices for a clean, pretty plate, and for a full meal idea try pairing it with a light fish entrée like baked cod in coconut lemon cream sauce.
Why You’ll Love This Italian Lemon Cream Cake
- Bright lemon flavor balances sweet cream for a fresh finish.
- Smooth, airy lemon cream filling adds a restaurant-quality texture.
- Uses a boxed cake mix for an easy, reliable base.
- Crumb topping from reserved mix adds a pleasant crunchy contrast.
- Chills well, so you can make it ahead for parties or brunch.
- Works for family meals or special occasions with minimal fuss.
- Simple ingredients you likely have or can find at any grocery store.
- No fancy tools required—just a mixer, a springform pan, and basic bowls.
What Is Italian Lemon Cream Cake?
Italian Lemon Cream Cake is a layered dessert built from a white cake base and a lemon-scented cream filling. It blends the simplicity of a boxed cake mix with a fresh homemade filling of cream cheese and whipped heavy cream, sweetened with confectioners’ sugar and brightened with lemon juice and zest. The cake bakes in a springform pan and is sliced horizontally to hold the lemon cream center. The result is delicate cake layers with a cool, whipped filling that tastes light but rich. The vibe is bright and comforting—great for brunch, afternoon tea, holidays, or a weeknight dessert when you want something a little special without extra fuss.
Ingredients for Italian Lemon Cream Cake
For the Base
- 1 15.25-ounce package white cake mix (reserve 1 cup for the crumb topping)
- ¾ cup milk
- 1 tablespoon milk
- 3½ tablespoons vegetable oil
- 2 eggs
For the Crumb Topping
- 2 tablespoons unsalted butter, melted
- ½ teaspoon vanilla extract
- 1 cup reserved cake mix (from above)
For the Lemon Cream Filling
- 4 ounces cream cheese, softened
- ⅓ cup confectioners’ sugar (from the ⅔ cup divided)
- 3 tablespoons lemon juice
- 1 teaspoon grated lemon zest
- 2 cups heavy whipping cream
- ⅓ cup confectioners’ sugar (remaining from the ⅔ cup divided)
To Serve
- Additional confectioners’ sugar for dusting
Ingredient Notes (Substitutions, Healthy Swaps)
- Cake mix: Use white cake mix as listed for texture. You can use yellow mix for a slightly richer color, but it will change the classic white look.
- Milk: Swap whole milk with 2% if desired; texture will be nearly the same. For dairy-free, use unsweetened oat or almond milk, but the filling may be slightly less rich.
- Vegetable oil: Can use light olive oil or neutral avocado oil in the same amount.
- Cream cheese: For lower fat, use reduced-fat cream cheese, but the filling will be a bit less silky.
- Heavy whipping cream: For a lighter filling, use a 1:1 blend of whipped Greek yogurt and whipped cream, but this alters the classic texture. Keep this as an optional swap.
- Confectioners’ sugar: If you need a sugar-free option, use a powdered erythritol blend measured to taste; results will vary.
- Lemon: Fresh lemon juice and zest give the best bright flavor. Bottled lemon juice is a backup but less vibrant.
Step-by-Step Instructions
Keep steps simple and follow the order for best texture.
Step 1 – Prep the pan and reserve the cake mix
- Preheat the oven to 350°F (175°C). Lightly coat the bottom of a 10-inch springform pan with cooking spray.
- Remove 1 cup of the cake mix from the package and set it aside for the crumb topping.
Visual cue: The pan should be evenly greased and the reserved cup of mix set aside in a small bowl.
Step 2 – Make the cake batter
- In a large bowl, combine the remaining cake mix with ¾ cup plus 1 tablespoon of milk, 3½ tablespoons vegetable oil, and 2 eggs.
- Beat with an electric mixer for about 2 minutes until batter is smooth.
- Pour the batter into the prepared springform pan and smooth the top with a spatula.
Step 3 – Make and add the crumb topping
- In a separate bowl, mix 2 tablespoons melted butter and ½ teaspoon vanilla extract.
- Stir in the reserved 1 cup cake mix until coarse crumbs form.
- Sprinkle the crumbs evenly over the cake batter.
Step 4 – Bake and cool
- Bake the cake for 30 to 35 minutes, or until a toothpick inserted into the center comes out clean.
- Allow the cake to cool completely in the pan on a wire rack before slicing.
Pro cue: If the top browns quickly, loosely tent with foil for the last 10 minutes of baking to prevent overbrowning.
Step 5 – Make the lemon cream filling
- In a bowl, beat 4 ounces softened cream cheese with ⅓ cup confectioners’ sugar, 3 tablespoons lemon juice, and 1 teaspoon lemon zest until smooth and free of lumps.
- In a separate chilled bowl, whip 2 cups heavy whipping cream with the remaining ⅓ cup confectioners’ sugar until stiff peaks form.
- Gently fold the whipped cream into the cream cheese mixture until fully combined and smooth.
Step 6 – Assemble and chill
- Slice the cooled cake horizontally into two even layers.
- Spread the lemon cream filling over the bottom layer in an even layer.
- Place the top layer back on and press lightly.
- Chill the whole cake for at least 4 hours before serving. Dust the top with additional confectioners’ sugar just before slicing.
Pro Tips for Success
- Use room-temperature eggs and cream cheese for smooth batter and filling with no lumps.
- Chill the bowl and beaters before whipping cream to get stiffer peaks faster.
- Cool the cake fully before slicing to avoid crumbs in the filling.
- When cutting the cake layers, run a long serrated knife through slowly to keep layers even.
- Reserve the crumb topping exactly as directed—this is key to the cake’s texture contrast.
- If your whipped cream softens while folding, chill for 10–15 minutes and rewhip briefly on low.
- Taste the lemon filling before folding—add a little more lemon juice or zest if you want a brighter lemon punch.
- Allow at least 4 hours chilling to let flavors meld and filling set for clean slices.
Flavor Variations
- Optional: Limoncello twist — add 1 tablespoon limoncello to the cream cheese mixture for a boozy lemon note (skip if avoiding alcohol).
- Optional: Blueberry layer — add a thin spread of cooked blueberry compote between cake and cream for a fruity balance.
- Optional: Almond addition — mix ½ teaspoon almond extract into the batter for a nutty depth that pairs with lemon.
- Optional: Citrus mix — swap half the lemon zest for orange zest for a milder citrus profile.
- Optional: Lemon glaze — make a quick glaze with ½ cup powdered sugar and 1–2 teaspoons lemon juice to drizzle over the chilled cake.
Serving Suggestions
- Serve chilled with a small spoon of mascarpone or vanilla gelato on the side.
- Plate with fresh berries (strawberries or raspberries) for color and tartness.
- Offer coffee or tea—Earl Grey or a light roast coffee pairs well with lemon.
- Cut into thin slices for a lighter dessert after a rich meal.
- Bring to brunch with a platter of pastries and fresh fruit.
- For a party, arrange slices on a tiered stand and dust each with extra powdered sugar.
Make-Ahead, Storage & Reheating
- Make-ahead: Bake the cake and prepare the filling up to one day in advance. Assemble and chill for at least 4 hours or overnight for best flavor.
- Storage: Store the assembled cake covered in the refrigerator for up to 4 days.
- Reheating: This cake is best served cold or at cool room temperature. If you prefer it slightly less cold, let it sit at room temperature for 15–20 minutes before serving. Do not microwave slices; the cream will lose texture.
- Texture note: The filling will firm up in the fridge. The cake may absorb moisture over time and become softer after 2–3 days.
Storage and Freezing Instructions
- To freeze unassembled cake layers: Wrap cooled layers tightly in plastic wrap and place in a freezer bag for up to 2 months. Thaw in the refrigerator overnight before assembling.
- To freeze assembled cake: Not recommended because whipped filling loses texture and may weep when thawed. If you must freeze, freeze individual slices wrapped well and thaw in the fridge; expect a change in cream texture.
- If you want to keep a long-term option, freeze just the baked layers and make the lemon cream fresh on the day you serve.
Nutrition Facts (Per Serving)
Calories | Protein | Carbs | Fat | Fiber | Sodium
— | —: | —: | —: | —: | —:
430 | 5 g | 48 g | 25 g | 1 g | 320 mg
Estimates vary by brands and portions.
FAQ About Italian Lemon Cream Cake
Q: Why is my lemon cream too runny?
A: The whipped cream may not have reached stiff peaks, or the cream was too warm. Chill the bowl and beaters and rewhip to stiffer peaks before folding.
Q: How do I know when the cake is done baking?
A: A toothpick inserted into the center should come out clean. Edges should be set and slightly pulling from the pan.
Q: Can I use a different pan size?
A: A 9-inch round will work but baking time may change. Check for doneness after 25 minutes and adjust as needed.
Q: Can I make the cake gluten-free?
A: Use a gluten-free white cake mix that measures and bakes like a regular mix. The crumb topping should also be gluten-free if the mix is.
Q: My filling tastes bland — what can I do?
A: Add more lemon zest (½ teaspoon at a time) or ½ tablespoon more lemon juice to lift the flavor. Taste as you add.
Q: How long does it need to chill before serving?
A: At least 4 hours for the filling to set. Overnight chill gives the best texture and flavor.
Notes
- Use fresh lemons for zest and juice for the cleanest bright flavor.
- Chill your mixing bowls if you plan to whip heavy cream in warm kitchens.
- Slice with a sharp serrated knife and wipe the blade between cuts for neat slices.
- If you want a finer crumb topping, pulse the reserved mix with butter briefly—but keep some coarse bits.
- For a fancier look, pipe a few rosettes of whipped cream around the top edge before dusting.
Troubleshooting
- Cake sank in the middle: Oven temperature may be too low or you opened the oven too early. Ensure proper preheat and don’t open during the first 20 minutes.
- Crumb topping sank into batter: Batter may have been too runny or crumbs too heavy; sprinkle crumbs gently and avoid pressing them into the batter.
- Filling separated or weepy: Overwhipping or underwhipping the cream can cause issues. Re-chill and rewhip briefly if needed.
- Cake too dry: Bake slightly less time or check oven accuracy. Also make sure not to overmix batter which can dry out the cake.
- Filling too stiff and hard to spread: Fold whipped cream slowly and gently to avoid knocking out air. If it is too stiff, let it sit at room temperature a few minutes and fold gently.
Final Thoughts
This Italian Lemon Cream Cake gives you bright lemon flavor and a smooth, airy cream filling with very simple steps. It feels special but stays easy thanks to the boxed cake mix and a straightforward filling. Make it a day ahead for best texture and ease when serving. For a classic reference and a similar method, see the Allrecipes Italian Lemon Cream Cake recipe.
Italian Lemon Cream Cake
Ingredients
For the Base
For the Crumb Topping
For the Lemon Cream Filling
To Serve
Instructions
Preparation
- Preheat the oven to 350°F (175°C). Lightly coat the bottom of a 10-inch springform pan with cooking spray.
- Remove 1 cup of the cake mix from the package and set it aside for the crumb topping.
Make the Cake Batter
- In a large bowl, combine the remaining cake mix with ¾ cup plus 1 tablespoon of milk, 3½ tablespoons vegetable oil, and 2 eggs.
- Beat with an electric mixer for about 2 minutes until batter is smooth.
- Pour the batter into the prepared springform pan and smooth the top with a spatula.
Make and Add the Crumb Topping
- In a separate bowl, mix 2 tablespoons melted butter and ½ teaspoon vanilla extract.
- Stir in the reserved 1 cup cake mix until coarse crumbs form.
- Sprinkle the crumbs evenly over the cake batter.
Bake and Cool
- Bake the cake for 30 to 35 minutes, or until a toothpick inserted into the center comes out clean.
- Allow the cake to cool completely in the pan on a wire rack before slicing.
Make the Lemon Cream Filling
- In a bowl, beat 4 ounces softened cream cheese with ⅓ cup confectioners’ sugar, 3 tablespoons lemon juice, and 1 teaspoon lemon zest until smooth and free of lumps.
- In a separate chilled bowl, whip 2 cups heavy whipping cream with the remaining ⅓ cup confectioners’ sugar until stiff peaks form.
- Gently fold the whipped cream into the cream cheese mixture until fully combined and smooth.
Assemble and Chill
- Slice the cooled cake horizontally into two even layers.
- Spread the lemon cream filling over the bottom layer in an even layer.
- Place the top layer back on and press lightly.
- Chill the whole cake for at least 4 hours before serving.
- Dust the top with additional confectioners’ sugar just before slicing.
Notes
3. Quick & Easy Italian Love Cake
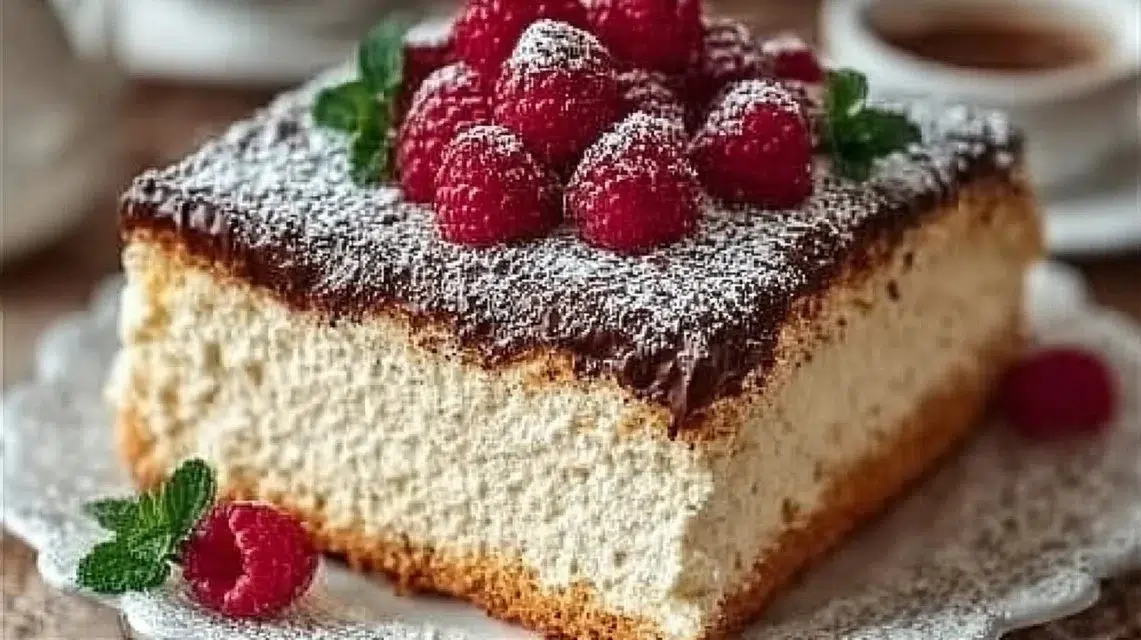
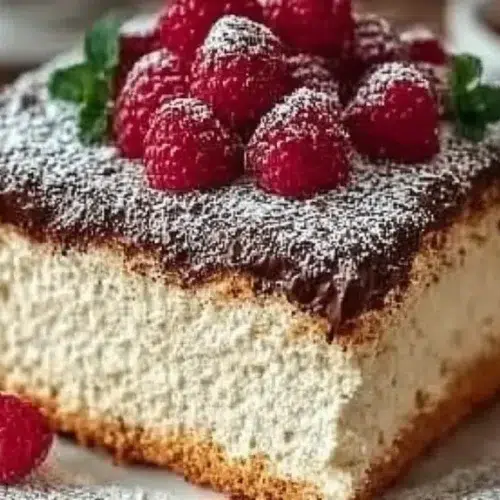
Quick, rich, and comfortingly familiar, this Quick & Easy Italian Love Cake layers moist chocolate cake, a silky ricotta custard, and a top coat of instant chocolate pudding for a truly indulgent bite. The texture is a mix of tender crumb, creamy ricotta, and a smooth pudding finish, finished with whipped cream and chocolate shavings for a pretty, classic look. It’s special because you use a boxed mix and simple pantry items to get a bakery-style dessert with minimal effort. Serve slices chilled for clean cuts, or warm with a scoop of vanilla ice cream for a cozy treat. If you enjoy dramatic chocolate cakes with a creamy twist, you might also like this take on dark chocolate desserts like the Blackberry Velvet Gothic Cake for another striking dessert idea.
Why You’ll Love This Quick & Easy Italian Love Cake
- Uses a boxed chocolate cake mix so the base is fast and reliable.
- Ricotta layer adds a silky, slightly tangy custard that cuts through the chocolate.
- Instant pudding makes the topping smooth and quick — no stovetop needed.
- Whipped cream and chocolate shavings give a bakery finish without fuss.
- Chills well, so you can make it ahead for parties or weeknight desserts.
- Versatile: simple swaps let you lighten or intensify the chocolate.
- Great for beginner bakers — clear steps and forgiving textures.
- Elegant enough for guests, cozy enough for an everyday treat.
What Is Quick & Easy Italian Love Cake?
This Italian Love Cake is a layered dessert built on a fast chocolate cake base and a ricotta custard layer, finished with instant chocolate pudding and whipped cream. It tastes like rich chocolate with a mild, creamy ricotta middle that keeps each bite balanced and not overly sweet. The cooking method is simple: bake the cake, pour a ricotta mixture over the batter, then bake again briefly and chill. The overall vibe is comfort food with a slightly upscale Italian touch — perfect for weeknights, potlucks, or a low-effort dinner party dessert.
Ingredients for Quick & Easy Italian Love Cake
For the Base
- 1 box chocolate cake mix
- Ingredients called for on the cake mix box (follow the package for eggs/oil/water if needed)
For the Ricotta Layer
- 1 cup ricotta cheese
- 1/2 cup sugar
- 2 large eggs
For the Pudding Topping
- 1 cup milk (for pudding preparation)
- 1 package instant chocolate pudding mix
To Serve
- 1 cup whipped cream
- Chocolate shavings or cocoa powder for garnish
Ingredient Notes (Substitutions, Healthy Swaps)
- Ricotta: Use part-skim ricotta for fewer calories and a lighter texture. Drain excess liquid on paper towel if the ricotta is watery.
- Cake mix: Any brand of chocolate cake mix works; use a dark chocolate mix for deeper flavor. Gluten-free boxed mixes can be used to make the cake gluten-free.
- Sugar: You can reduce sugar by 1–2 tablespoons in the ricotta layer if you prefer less sweet.
- Instant pudding: Use sugar-free or reduced-sugar instant pudding mixes to lower sugar content; note flavor intensity may be lighter.
- Milk: Swap whole milk for 2% or a plant-based milk (almond, oat) in the pudding mix if desired; pudding may set slightly softer with non-dairy milks.
- Whipped cream: Use stabilized whipped cream if you want a firmer topping for longer display or warm climates.
Step-by-Step Instructions
Step 1 – Preheat and prepare your pan
Preheat the oven to 350°F (175°C). Grease and flour a cake pan (9×13 or a similar size). Follow your cake mix box if it specifies a pan size.
Visual cue: The pan should be evenly greased and lightly floured so the cake releases easily.
Step 2 – Make the cake batter
Prepare the chocolate cake mix according to the package instructions, using the eggs/oil/water the box calls for. Pour the batter into the prepared pan and spread it evenly.
Step 3 – Mix the ricotta layer
In a medium bowl, whisk together 1 cup ricotta cheese, 1/2 cup sugar, and 2 large eggs until smooth and no lumps remain.
Step 4 – Add the ricotta layer
Carefully pour the ricotta mixture over the top of the cake batter. Gently spread or let it settle; it will sink slightly as it bakes.
Step 5 – Bake
Bake at 350°F (175°C) for 30–35 minutes, or until a toothpick inserted into the center comes out clean.
Pro cue: The top will be set and slightly golden. Avoid overbaking to keep the ricotta layer tender.
Step 6 – Cool completely
Remove the cake from the oven and let it cool completely at room temperature. Cooling fully helps the pudding topping set neatly.
Step 7 – Prepare pudding and top the cake
Prepare the instant chocolate pudding mix using 1 cup milk, following the package instructions. When thickened, spread the pudding over the cooled cake in an even layer.
Step 8 – Finish and chill
Top the pudding with 1 cup whipped cream and garnish with chocolate shavings or a light dusting of cocoa powder. Chill the cake for at least 2 hours before serving for best slices and flavor melding.

Pro Tips for Success
- Use room-temperature eggs for the ricotta mix so they blend smoothly without clumps.
- If ricotta is very wet, place it in a fine sieve over a bowl for 10–15 minutes to remove excess whey.
- Don’t overmix the cake batter — fold gently to keep the cake light.
- Cool the cake fully before adding pudding; warm cake will make the pudding thin and runny.
- For cleaner slices, use a sharp knife dipped in hot water and wiped between cuts.
- If your whipped cream is soft, stabilize it with a small pinch of powdered sugar or a teaspoon of instant pudding powder before spreading.
- Test doneness near the center — the ricotta layer may hide moist crumbs so check with the toothpick carefully.
Flavor Variations
- Optional: Espresso kick — add 1–2 teaspoons instant espresso powder to the cake batter or pudding mix for a mocha lift.
- Optional: Orange zest — fold 1–2 teaspoons orange zest into the ricotta mix for a bright citrus contrast.
- Optional: Nutty crunch — sprinkle chopped toasted hazelnuts or almonds over the whipped cream for texture.
- Optional: Berry swirl — top with a light spoonful of raspberry or cherry preserves swirled into the pudding for fruit brightness.
- Optional: Mint-chocolate — add a few drops of mint extract to the whipped cream for a fresh mint finish (use sparingly).
Serving Suggestions
- Serve chilled slices on simple dessert plates for clean presentation.
- Pair with a small scoop of vanilla or espresso ice cream for a decadent contrast.
- Offer fresh berries on the side to cut richness and add color.
- Plate with a drizzle of chocolate sauce for gatherings or a restaurant-style look.
- Bring to potlucks in the pan and cut after chilling for easy transport.
- Garnish individual slices with extra ricotta dollops and a few toasted nuts for texture.
Make-Ahead, Storage & Reheating
- Make-ahead: You can bake the cake and add the ricotta layer up to one day ahead. Keep it chilled once the pudding and whipped cream go on.
- Storage: Store covered in the refrigerator for up to 4 days. Keep the whipped cream covered to prevent drying or absorbing fridge odors.
- Reheating: This cake is best served cold or at room temperature. If you prefer a warm slice, remove the whipped cream and microwave a single serving for 10–15 seconds — add whipped cream back or top with ice cream.
- Texture note: The pudding topping firms as it chills and the cake becomes easier to slice; flavors meld and improve after a few hours.
Storage and Freezing Instructions
- Refrigeration: Store leftover slices in an airtight container or cover the pan tightly with plastic wrap. Use within 4 days for best texture.
- Freezing: Freezing is not recommended with the pudding and whipped cream layer because the texture of the pudding and whipped cream will change after thawing (becomes watery or grainy). If you must freeze, remove the whipped cream, wrap individual slices tightly, and freeze for up to 1 month. Thaw in the refrigerator and re-top with fresh whipped cream before serving.
- Best practice: To freeze longer, freeze the plain baked cake base (before adding pudding and whipped cream). Wrap tightly and freeze up to 2 months. Thaw and then add ricotta layer, pudding, and whipped cream before serving.
Nutrition Facts (Per Serving)
Calories | Protein | Carbs | Fat | Fiber | Sodium
—|—:|—:|—:|—:|—:
Approx. 320 kcal | 6 g | 40 g | 16 g | 2 g | 220 mg
Estimates vary by brands and portions.
FAQ About Quick & Easy Italian Love Cake
Q: My ricotta layer was grainy — how can I fix it?
A: Use smooth ricotta or blitz it in a food processor before mixing with eggs and sugar. Drain excess liquid first if needed.
Q: The pudding is too thin after spreading — what went wrong?
A: The cake was likely still warm. Always cool fully before adding pudding. Chill the cake and then re-prepare pudding if it’s too thin.
Q: Can I use homemade chocolate cake instead of the box mix?
A: Yes. Any moist chocolate cake batter will work. Keep pan size and bake time similar for the same texture.
Q: How do I prevent the whipped cream from weeping?
A: Stabilize whipped cream with a small amount of powdered sugar or a pinch of instant pudding mix. Chill before serving.
Q: Can I make this gluten-free?
A: Use a gluten-free chocolate cake mix and verify all other packaged ingredients are gluten-free. The ricotta and pudding are typically gluten-free.
Q: How many does this serve?
A: It typically serves 10–12 slices depending on portion size.
Notes
- For a glossy finish, shave chocolate over the whipped cream just before serving.
- Use good-quality instant pudding for the best chocolate flavor; lower-quality mixes can be waxy.
- If you like a denser ricotta layer, reduce the cake batter slightly or use a smaller pan so the cake layer is thicker.
- Chill at least 2 hours, but overnight is better — flavors meld and the layers set perfectly.
- For party plating, place a small mint leaf or a raspberry on each slice for color contrast.
Troubleshooting
- Problem: Cake sank in the middle.
Fix: Oven temperature may be too low or the pan was overloaded. Use correct pan size and check oven temp with an oven thermometer. - Problem: Ricotta layer separated while baking.
Fix: Make sure eggs are well mixed and ricotta is not extremely cold; bring ricotta to room temperature before mixing. - Problem: Cake is dry.
Fix: Don’t overbake. Start checking at 28–30 minutes. Also, follow box liquid measurements exactly and avoid extra flouring in the pan. - Problem: Pudding won’t thicken.
Fix: Use cold milk and follow package amounts. If using non-dairy milk, some brands don’t set as firmly; consider using a small amount of dairy milk. - Problem: Whipped cream melts on the cake.
Fix: Chill the cake thoroughly before applying whipped cream and serve in a cool room. Stabilize whipped cream if it must sit out.
Final Thoughts
This Quick & Easy Italian Love Cake proves you can get layered, elegant desserts without complicated steps. It brings together boxed convenience and simple fresh ingredients for a dessert that looks and tastes special with minimal effort. Make it ahead, chill, and enjoy a crowd-pleasing cake that’s both homey and refined.
Conclusion
For another simple but showy chocolate cake idea and extra inspiration, see this recipe: My Easy Italian Love Cake Is Pure Magic – Simply Recipes
Quick & Easy Italian Love Cake
Ingredients
For the Cake Base
For the Ricotta Layer
For the Pudding Topping
To Serve
Instructions
Preparation
- Preheat the oven to 350°F (175°C). Grease and flour a 9×13 cake pan.
- Prepare the chocolate cake mix according to the package instructions and pour the batter into the prepared pan.
Make the Ricotta Layer
- In a medium bowl, whisk together 1 cup ricotta cheese, 1/2 cup sugar, and 2 large eggs until smooth.
- Pour the ricotta mixture over the top of the cake batter.
Bake
- Bake for 30–35 minutes or until a toothpick inserted into the center comes out clean.
- Allow the cake to cool completely at room temperature.
Add Pudding Topping
- Prepare the instant chocolate pudding mix using 1 cup milk according to package instructions.
- Spread the pudding over the cooled cake evenly.
Finish and Chill
- Top the pudding with whipped cream and garnish with chocolate shavings or cocoa powder.
- Chill for at least 2 hours before serving.
Notes
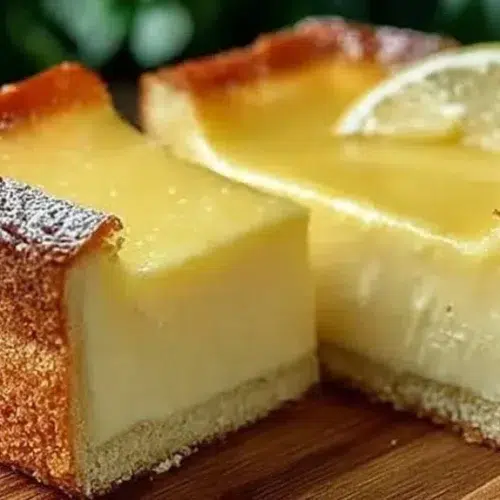
4. Easy Italian Grandma’s Lemon Custard Cake (One Bowl)
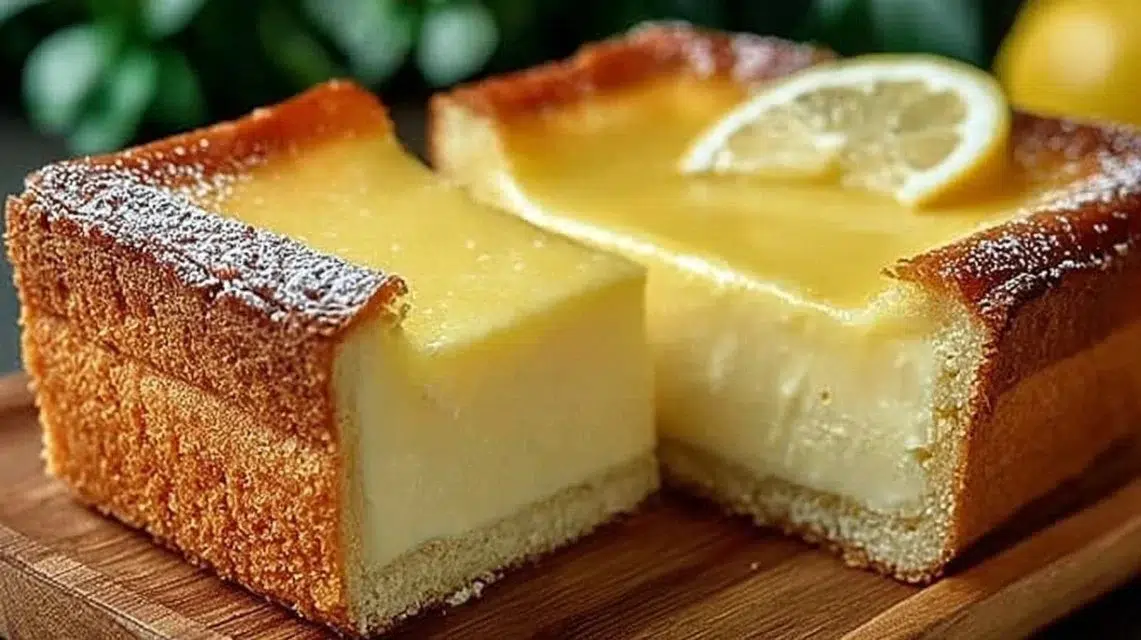
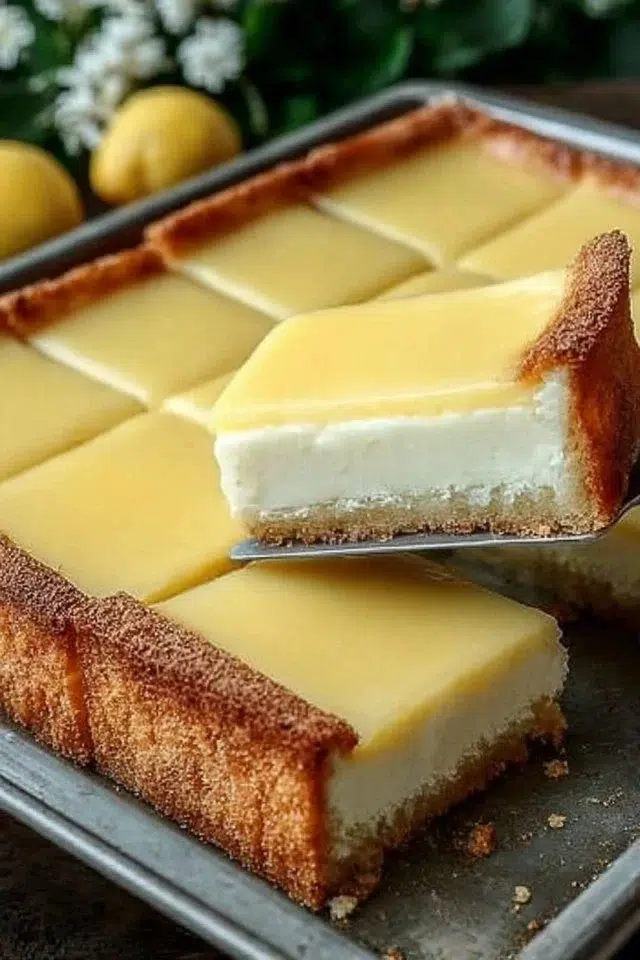
This lemon custard cake is bright, tender, and quietly old-school — a soft cake with a light, lemony custard folded in so it feels moist and a little silky. The crumb is gentle, the lemon zest gives fresh snap, and a dusting of powdered sugar finishes it like a warm memory. It’s simple to make with everyday pantry items and comes together in one pan, so it’s easy enough for a weeknight and special enough for brunch. Serve a thin slice with a cup of coffee or a spoon of plain yogurt for contrast. For another citrus twist, try pairing it with a lemon-blueberry loaf recipe like our best lemon-blueberry cake for a full brunch spread.
Why You’ll Love This Italian Grandma’s Lemon Custard Cake
- Hands-off baking: make the batter quickly and let the oven do the rest.
- Bright lemon flavor from both juice and zest — fresh, not fake.
- Soft, custardy texture that feels both cake-like and slightly creamy.
- Uses simple, pantry-friendly ingredients you likely already have.
- One 9-inch pan, easy to slice and share for family or guests.
- Light powdered sugar finish keeps it elegant without extra fuss.
- Works for brunch, dessert, or an afternoon treat with tea or coffee.
- Flexible to adapt with extra fruit or a simple glaze if desired (optional).
What Is Italian Grandma’s Lemon Custard Cake?
Italian Grandma’s Lemon Custard Cake is a home-style cake with a gentle, custard-like interior and a simple, tender crumb. It tastes of real lemon — a balance of bright acidity from lemon juice and warm citrus notes from fresh zest — and the cake itself stays moist thanks to the milk and eggs. The cooking method is straightforward: mix, alternate flour with milk, add lemon juice, and bake until set. The vibe is classic and comforting — imagine a family kitchen, a warm pan cooling on the counter, and a slice with coffee. It’s not overly sweet and keeps a rustic, honest feel that fits weeknight desserts, brunches, or casual entertaining.
Ingredients for Italian Grandma’s Lemon Custard Cake
For the Cake
- 1 cup unsalted butter, softened
- 1 cup granulated sugar
- 1 cup all-purpose flour
- 4 large eggs
- 1 cup whole milk
- 1/2 cup freshly squeezed lemon juice
- Zest of 2 lemons
- 1 teaspoon vanilla extract
- 1/4 teaspoon salt
To Serve
- Powdered sugar for dusting
Ingredient Notes (Substitutions, Healthy Swaps)
- Butter: you can use salted butter but reduce or skip added salt. Unsalted keeps control over sodium.
- Granulated sugar: to lower sweetness slightly, reduce to 3/4 cup — texture will be similar. For a 1:1 sugar swap, use coconut sugar, though color will be darker.
- All-purpose flour: swap half the flour for whole wheat pastry flour for a nuttier flavor (use by weight if possible). Too much whole wheat will make the cake denser.
- Eggs: large eggs are standard. If using extra-large, beat gently and watch bake time.
- Whole milk: milk can be replaced with 2% in a pinch; texture will be only slightly less rich. For dairy-free, use full-fat canned coconut milk (not watery), but this changes flavor.
- Lemon juice & zest: fresh lemon juice is key for real flavor. Bottled juice will work but tastes flatter. Increase zest for more aroma.
- Vanilla: pure vanilla extract adds depth; imitation will still work but may lack complexity.
- Salt: do not omit entirely — it brightens the flavors.
Step-by-Step Instructions
Step 1 – Prep the oven and pan
Preheat your oven to 350°F (175°C). Grease and flour a 9-inch round cake pan, tapping out excess flour so the cake releases cleanly.
Step 2 – Cream butter and sugar
In a large bowl, cream together the softened butter and granulated sugar until light and fluffy. Use a hand mixer or stand mixer for about 2–3 minutes on medium speed.
Visual cue: mixture should look lighter in color and slightly airy.
Step 3 – Add eggs and flavor
Add the eggs one at a time, mixing well after each addition so the batter stays smooth. Stir in the lemon zest and vanilla extract until evenly mixed.
Step 4 – Alternate flour and milk
Gradually add the flour and salt, alternating with the milk. Start and end with the flour. Mix just until smooth; do not overmix.
Pro cue: stop mixing when no streaks of flour remain — overworking the batter can make the cake tough.
Step 5 – Add lemon juice and bake
Stir in the lemon juice until combined. Pour the batter into the prepared pan and smooth the top. Bake for 40–45 minutes, or until a toothpick inserted in the center comes out clean or with a few moist crumbs.
Pro cue: the cake should spring back lightly when touched. A jiggle in the middle is okay if it’s very slight; a wet batter means more time is needed.
Step 6 – Cool and finish
Let the cake cool in the pan for about 10 minutes before transferring to a wire rack to cool completely. Dust with powdered sugar before serving.
Pro Tips for Success
- Use room-temperature butter, eggs, and milk for even mixing and better rise.
- Zest lemons before juicing to avoid losing zest into the juice; zest adds aroma.
- Measure flour correctly: spoon into the cup and level off, or better yet, weigh it. Too much flour dries the cake.
- Don’t overmix after adding flour — fold gently when possible.
- Check doneness at 40 minutes; ovens vary. If the top browns too fast, tent with foil.
- Cool in pan for 10 minutes to help the cake set and then remove to avoid soggy bottom.
- For sharper lemon flavor, add an extra half-teaspoon of zest (optional).
Flavor Variations
- Optional: Lemon Glaze — whisk 1 cup powdered sugar with 1–2 tablespoons lemon juice and drizzle over the cooled cake.
- Optional: Blueberry fold-in — fold 1 cup fresh or frozen blueberries into the batter gently before pouring (may increase bake time by 5–10 minutes).
- Optional: Almond twist — add 1/2 teaspoon almond extract and sprinkle sliced almonds on top before baking.
- Optional: Lighter citrus — use half lemon and half orange juice for a softer, rounder citrus flavor.
- Optional: Vanilla custard swirl — reserve 1/4 cup batter, mix with 1 egg yolk and 1 tablespoon extra milk, swirl on top before baking for a decorative look.
Serving Suggestions
- Serve slices dusted with powdered sugar and a thin lemon slice for garnish.
- Pair with plain Greek yogurt or a small scoop of vanilla gelato for contrast.
- Offer fresh berries or a bowl of mixed fruit on the side for a brunch spread.
- Plate with strong coffee or an herbal tea like chamomile; the citrus wakes up rich drinks.
- Bring to potlucks — cut into squares and place on a platter for easy sharing.
- For dessert, serve warm with a spoon of whipped cream and a small mint leaf.
Make-Ahead, Storage & Reheating
- Make-ahead: Bake the cake a day ahead and store at room temperature well wrapped or in an airtight container. The flavor develops overnight.
- Refrigeration: Store in the fridge up to 4 days in an airtight container. Wrap tightly to prevent drying.
- Reheating: Warm single slices in a microwave for 8–12 seconds or in a 300°F oven for 5–8 minutes until just warm. Avoid overheating to keep the custardy texture.
- Note on texture: the cake is best within the first 48 hours for tender crumb and fresh lemon brightness; it will firm slightly over time.
Storage and Freezing Instructions
- To freeze: cool the cake completely, then wrap whole cake or individual slices tightly in plastic wrap and foil. Freeze up to 2 months.
- Thawing: thaw in the refrigerator overnight, then bring to room temperature before serving. For a warm slice, reheat gently in a low oven.
- If you plan to freeze, avoid dusting with powdered sugar until after thawing to prevent clumping.
- Freezing is recommended over long refrigeration to preserve moisture and lemon flavor.
Nutrition Facts (Per Serving)
Calories | Protein | Carbs | Fat | Fiber | Sodium
—|—:|—:|—:|—:|—:
320 | 5 g | 36 g | 18 g | 1 g | 150 mg
Estimates vary by brands and portions.
FAQ About Italian Grandma’s Lemon Custard Cake
Q: Why is my cake too dense?
A: Likely overmixing or too much flour. Measure flour correctly and mix just until combined.
Q: Why did my cake come out wet in the center?
A: It may need more bake time. Test with a toothpick; if it comes out wet, bake 5–10 minutes more and tent with foil if the top browns too fast.
Q: Can I use bottled lemon juice?
A: Yes, but fresh lemon juice gives brighter, fresher flavor. Bottled works if fresh isn’t available.
Q: How do I keep the cake from sticking to the pan?
A: Grease and flour the pan well, or use parchment paper under the bottom. Let cool 10 minutes before removing.
Q: Can I halve the recipe for a smaller cake?
A: Yes, scale ingredients proportionally and use a smaller pan. Check baking time — it may be shorter.
Q: What if the top browns before it’s done?
A: Tent loosely with aluminum foil and continue baking until set.
Notes
- Zesting tip: use a microplane for fine zest that blends into the batter.
- Presentation: dust with powdered sugar just before serving for a fresh look.
- Slice cleanly: use a sharp knife warmed under hot water and wiped dry between cuts.
- Room temp eggs: place eggs in warm (not hot) water for 5–10 minutes if you forget to bring them to room temp.
- Adjust sweetness: powdered sugar dusting allows you to keep the cake less sweet if desired.
Troubleshooting
- Bland flavor: add more lemon zest or a touch more vanilla to lift flavors.
- Overcooked and dry: next time reduce oven time slightly and test earlier; check oven accuracy with a thermometer.
- Cake sinks in the middle: underbaked center or opening the oven early can cause sinking. Avoid opening oven door until at least 30 minutes in.
- Too wet or gummy inside: underbaked or too much liquid — check measurements and bake until a toothpick has only moist crumbs.
- Edges too brown: oven too hot or pan placed too close to heating element; move rack to middle and reduce heat by 10–15°F if needed.
- Sticky top after dusting: store uncovered until sugar sets, or dust right before serving.
Final Thoughts
This Italian Grandma’s Lemon Custard Cake is an easy, comforting dessert that highlights fresh lemon and a soft, slightly custardy crumb. It’s forgiving in the kitchen and rewarding on the table, perfect for simple family meals or small gatherings.
Conclusion
For a classic take and extra background on the Italian tradition behind this style of lemon custard cake, see the Torta della Nonna recipe.
Italian Grandma’s Lemon Custard Cake
Ingredients
For the Cake
To Serve
Instructions
Preparation
- Preheat your oven to 350°F (175°C). Grease and flour a 9-inch round cake pan, tapping out excess flour.
- In a large bowl, cream together the softened butter and granulated sugar until light and fluffy. Use a mixer for about 2–3 minutes on medium speed.
- Add eggs one at a time, mixing well after each addition. Stir in lemon zest and vanilla extract until evenly mixed.
- Gradually add flour and salt, alternating with milk, starting and ending with flour. Mix just until smooth.
- Stir in the lemon juice until combined. Pour batter into the prepared pan and smooth the top.
Baking
- Bake for 40–45 minutes, or until a toothpick inserted comes out clean or with a few moist crumbs.
- Let the cake cool in the pan for about 10 minutes before transferring to a wire rack to cool completely.
- Dust with powdered sugar before serving.
Notes
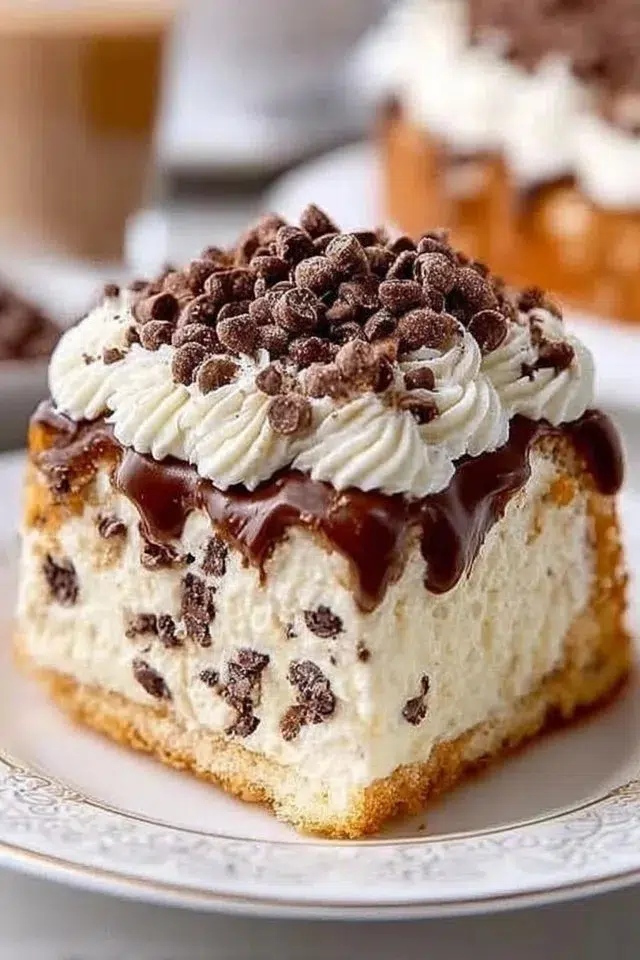
5. Easy Cannoli Cake Simple Italian Dessert Recipe
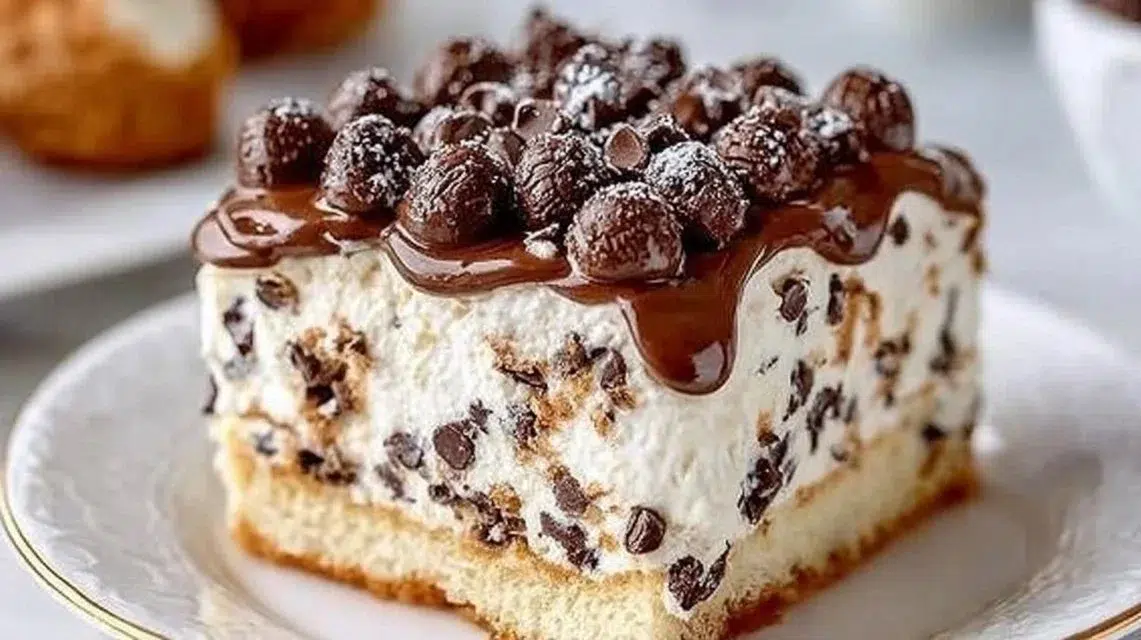
This Easy Cannoli Cake is a creamy, chocolate-studded layered dessert that tastes like a fresh cannoli in every bite. The center is smooth ricotta sweetened with powdered sugar and vanilla, folded with whipped cream for lightness and dotted with mini chocolate chips. The pound cake layers soak up a touch of ganache on top while staying tender and sliceable. It’s special because it uses a frozen pound cake to save time but finishes like a made-from-scratch dessert. Serve chilled with espresso or fresh berries for a simple, elegant touch, or try it alongside an oven-baked breakfast like an apple cinnamon German pancake for a brunch spread.
Why You’ll Love This Easy Cannoli Cake
- Ready fast: uses a frozen pound cake so assembly is quick and hands-off.
- True cannoli flavor: ricotta, vanilla, powdered sugar and chocolate chips mimic classic filling.
- Light and creamy texture from whipped cream folded into ricotta.
- Chocolate ganache adds a glossy, rich finish without complicated tempering.
- Make-ahead friendly: chill several hours for best texture; great for parties.
- Flexible: swap chips or add citrus peel for a flavor twist.
- Kid-friendly and crowd-pleasing — few ingredients, big payoff.
What Is Easy Cannoli Cake?
Easy Cannoli Cake is an assembled, no-bake layered dessert inspired by the classic Italian cannoli filling. Thin slices of frozen pound cake form the base and layers. A sweetened whole milk ricotta filling is lightened with whipped heavy cream, then folded with mini chocolate chips. A simple ganache of hot cream and chocolate chips tops the cake, setting into a glossy layer. The result is creamy, slightly tangy, with bites of chocolate and soft cake — a comfort-food vibe that works for casual family dinners, potlucks, or weekend brunches.
The cooking method is mostly no-heat beyond briefly heating cream for ganache and whipping cold cream. It feels like an easy, homey dessert but looks polished on the table. It’s ideal when you want something impressive without a long baking process.
Ingredients for Easy Cannoli Cake
For the Base
- 16-ounce frozen pound cake
For the Ricotta Filling
- 15-ounce whole milk ricotta cheese
- ¾ cup powdered sugar
- 1 teaspoon vanilla extract
- ½ cup mini chocolate chips (to fold into the filling)
- 1 cup heavy whipping cream (part of the 2 cups; see below)
For the Ganache and Whipped Cream
- 2 cups heavy whipping cream, divided
- 12 ounces mini chocolate chips, divided
Notes: the heavy cream is split — 1 cup to make the ganache and the remaining cup to whip and fold into the ricotta. The 12 ounces of mini chocolate chips are divided for the ganache and for garnish or extra chip folding as desired.
Ingredient Notes (Substitutions, Healthy Swaps)
- Ricotta: whole milk ricotta gives the best creamy texture. For a lighter option, use part-skim ricotta, but expect a slightly less rich mouthfeel.
- Powdered sugar: you can use a natural powdered sugar blend or sift to remove lumps. For less sweetness, reduce to ½ cup (optional).
- Mini chocolate chips: swap for chopped dark chocolate or chopped pistachios for a different texture and flavor.
- Pound cake: use store-bought or your favorite bakery loaf. If you only have fresh cake, freeze briefly to make thin slicing easier.
- Heavy cream: for a lower-fat swap, use 1 cup heavy cream whipped and cold ricotta, but the ganache will be less glossy if you reduce the ganache cream.
- Make it nut-free: avoid any garnish with nuts and stick to chips.
Step-by-Step Instructions
Step 1 – Prepare the pound cake slices
- Slightly freeze the 16-ounce frozen pound cake until firm but still sliceable, about 30–45 minutes if fully frozen.
- Slice into ¼-inch slices and arrange in a single layer on a working board or directly in your serving dish.
Visual cue: Slices should hold shape and not crumble when handled.
Step 2 – Make the ganache
- Heat 1 cup of heavy whipping cream in a small saucepan just until it simmers. Remove from heat.
- Add 1 cup (about half of the 12 ounces) of mini chocolate chips and stir until smooth and glossy.
- Let the ganache cool and chill until slightly thickened but still pourable, about 20–30 minutes.
Pro cue: Avoid boiling the cream; heat only to a simmer to keep the ganache smooth.
Step 3 – Prepare the ricotta filling
- In a bowl, combine 15-ounce whole milk ricotta, ¾ cup powdered sugar, and 1 teaspoon vanilla extract. Mix until smooth.
- Fold in ½ cup mini chocolate chips gently so chips are evenly distributed.
Step 4 – Whip and fold the cream
- Whip the remaining 1 cup heavy whipping cream to stiff peaks.
- Gently fold the whipped cream into the ricotta mixture in two passes so the filling stays light and airy.
Visual cue: Filling should be smooth, fluffy, and hold soft peaks without streaks of whipped cream.
Step 5 – Assemble the cake
- In your serving pan, layer ¼-inch pound cake slices, spread a thin layer of ricotta filling, and repeat until you reach the top. Reserve the top layer of pound cake for a smooth finish.
- Pour the chilled ganache over the top layer, smoothing gently.
- Chill the assembled cake at least 3 hours, or overnight, to set and allow flavors to meld.
Pro cue: Chill time is key — full chill firms the ganache and lets the cake slices soften to the right texture.
Pro Tips for Success
- Use cold tools and bowls when whipping cream; it whips faster and holds peaks better.
- Sift powdered sugar into ricotta to avoid lumps and ensure a smooth filling.
- Chill the ganache until tacky, not rock hard, so it spreads without cracking.
- If pound cake is too frozen to slice, let it sit at room temperature 5–10 minutes; it should be firm but sliceable.
- Fold whipped cream gently to keep the filling light — overmixing will deflate it.
- Use a serrated knife for cleaner slices when serving chilled cake.
- For clean layers, assemble in a rectangular pan with a straight edge and press layers gently.
Flavor Variations
- OPTIONAL: Citrus twist — add 1 teaspoon finely grated orange or lemon zest to the ricotta for a bright note.
- OPTIONAL: Espresso boost — dissolve 1 tablespoon instant espresso in the ganache cream for mocha flavor.
- OPTIONAL: Nutty crunch — sprinkle crushed toasted pistachios or almonds between layers for texture.
- OPTIONAL: Fruit layer — spread a thin layer of raspberry or cherry jam on cake slices before the ricotta for a fruity contrast.
- OPTIONAL: White chocolate ganache — use white chocolate chips in place of part of the mini chips for a sweeter finish.
- OPTIONAL: Cannoli-inspired sprinkle — top with a light dusting of powdered sugar and extra mini chips before serving.
Serving Suggestions
- Serve chilled with a shot of espresso or strong coffee for classic pairing.
- Plate with fresh berries (strawberries or raspberries) to cut the richness.
- Offer a small scoop of vanilla gelato or ice cream on the side for a restaurant-style dessert.
- Cut into squares for a buffet or party; garnish each piece with a few extra mini chips.
- Bring to potlucks in the pan — it travels well and stays neat if chilled.
- Pair with a dessert wine or sweet wine if you want an adult pairing.
Make-Ahead, Storage & Reheating
- Make-ahead: Assemble and chill the cake up to 24 hours in advance. This improves flavor melding and makes serving easier.
- Short-term storage: Keep chilled in the refrigerator for up to 4 days, covered tightly with plastic wrap or in an airtight container.
- Reheating: This dessert is best served cold. If you prefer a slightly softened texture, let slices sit at room temperature for 15–20 minutes before serving. Do not microwave — the ganache will melt and the whipped filling may weep.
- Texture changes: Over time, the cake layers will continue to soften as they absorb moisture from the filling. This makes slices more tender but reduces crispness.
Storage and Freezing Instructions
- Refrigeration: Store in fridge up to 4 days. Keep covered to prevent odor transfer and to protect the creamy filling.
- Freezing: Not recommended to freeze the fully assembled cake. The whipped cream and ricotta texture will become grainy after thawing, and the ganache may separate.
- If you must freeze, freeze unassembled components separately: freeze the pound cake slices tightly wrapped, freeze ganache in a sealed container, and do not freeze the whipped ricotta filling. Thaw cake and ganache in the fridge and assemble fresh for best results.
Nutrition Facts (Per Serving)
Calories | Protein | Carbs | Fat | Fiber | Sodium
— | —: | —: | —: | —: | —:
540 | 6 g | 46 g | 34 g | 2 g | 220 mg
Estimates vary by brands and portions.
FAQ About Easy Cannoli Cake
Q: My ganache is too runny. What went wrong?
A: The ganache needs to cool and thicken before pouring. Chill it 20–30 minutes until it’s slightly spreadable. If still runny, pop it in the fridge for 10-minute intervals, stirring between checks.
Q: The ricotta filling seems watery. How do I fix it?
A: Use well-drained ricotta. If store-bought ricotta is wet, place it in a fine sieve over a bowl for 30 minutes. Also, fold in whipped cream just before assembling to reduce weeping.
Q: Can I use mascarpone instead of ricotta?
A: Yes as an OPTIONAL swap — mascarpone will be richer and smoother. If using mascarpone, reduce powdered sugar slightly to balance sweetness.
Q: How long will this cake keep its texture in the fridge?
A: Best eaten within 2–4 days. Over time, cake layers soften and the filling can lose some whip. Serve within 48 hours for optimal texture.
Q: Can I make this dairy-free?
A: Not easily. This recipe relies on ricotta and heavy cream. For a dairy-free version, you would need specialty dairy-free ricotta and whipped cream substitutes; results will vary.
Q: Why do my slices fall apart when I serve them?
A: Make sure the cake chills long enough so the layers set. Also, slice with a sharp serrated knife and wipe the knife between cuts to keep slices neat.
Notes
- Use a rimmed rectangular pan to keep layers straight and make assembly easier.
- For cleaner slices, chill the cake until the ganache is firm and use a warmed knife (dip in hot water and dry) before slicing.
- If you like a stronger chocolate presence, fold in a few extra tablespoons of mini chips into the filling.
- Garnish with a light dusting of powdered sugar right before serving for a photogenic finish.
- If serving to kids, add a sprinkle of colorful nonpareils on top as an OPTIONAL visual treat.
Troubleshooting
- Bland filling: Increase vanilla to 1½ teaspoons or add a pinch of fine sea salt to lift flavor.
- Overwhipped cream: If cream turns grainy, stop whipping earlier next time. You can try to rescue it by gently folding into the ricotta to disguise texture, but fresh whipping is best.
- Watery ganache: If the ganache separates, cool it, then whisk in small amounts of melted chocolate to re-emulsify.
- Cake too dry: Make sure pound cake slices are slightly thawed but still firm; a thin brush of milk or simple syrup before layering can add moisture.
- Filling weeps: Keep the assembled cake cold and avoid long room-temperature sits. Use well-drained ricotta and fold gently.
Final Thoughts
This Easy Cannoli Cake hits the sweet spot between simple prep and impressive flavor. It uses a few pantry ingredients to deliver the creamy, chocolate-studded experience of a cannoli without deep frying or complicated pastry work. Chill it well, slice cleanly, and enjoy a dessert that feels both homey and special.
Conclusion
For inspiration and a similar easy layered dessert idea, see this version from a trusted source: Easy Cannoli Cake – Nibble and Dine.

Easy Cannoli Cake
Ingredients
For the Base
For the Ricotta Filling
For the Ganache and Whipped Cream
Instructions
Preparation
- Slightly freeze the frozen pound cake until firm but still sliceable, about 30-45 minutes.
- Slice the pound cake into ¼-inch slices and arrange in a single layer in your serving dish.
Ganache Preparation
- Heat 1 cup of heavy whipping cream until it simmers, then remove from heat.
- Add 1 cup of mini chocolate chips and stir until smooth and glossy.
- Let the ganache cool and chill until slightly thickened, about 20-30 minutes.
Ricotta Filling Preparation
- In a bowl, mix the ricotta cheese, powdered sugar, and vanilla until smooth.
- Gently fold in the mini chocolate chips.
Whipping Cream
- Whip the remaining 1 cup of heavy whipping cream to stiff peaks.
- Gently fold the whipped cream into the ricotta mixture until well combined.
Assembly
- Layer the pound cake slices, spreading a thin layer of ricotta filling between each layer until you reach the top.
- Pour chilled ganache over the top layer and smooth gently.
- Chill the assembled cake for at least 3 hours, or overnight, before serving.
Notes
6. Ultimate Sugar Cookie Frosting (For Cut-Out Sugar Cookies)

This frosting tastes creamy, sweet, and buttery with a smooth texture that spreads and pipes easily. It holds its shape well for decorated sugar cookies but stays soft enough to bite into. This recipe is quick, made with common ingredients, and comes together in minutes with a hand mixer or stand mixer. It’s easy to tint with food coloring for holidays or to leave a simple white finish. Try it on sugar cookies, stacked cake layers, or even as a frosting for cupcakes — it pairs especially well with crisp, buttery cookies like my take on brown sugar maple cookies.
Why You’ll Love This Ultimate Sugar Cookie Frosting
- Smooth, creamy texture that spreads and pipes without cracking.
- Reliable flavor: buttery and sweet with a mild vanilla finish.
- Simple method — no cooking or complex steps; ready in under 10 minutes.
- Flexible consistency — add 2–4 tablespoons of cream or milk to suit spreading or piping.
- Easy to color for holidays or themes; food coloring mixes in evenly.
- Uses pantry staples you likely already have.
- Holds shape on cookies but still soft to bite through.
- Scales up or down easily for a small batch or a big cookie tray.
What Is Ultimate Sugar Cookie Frosting?
This is a classic buttercream-style frosting made from softened unsalted butter, powdered sugar, vanilla, and a small amount of heavy cream or milk. It tastes rich and sweet with a buttery mouthfeel and light vanilla notes. The texture is thick but smooth — you can spread it thin or pipe firm borders that keep their shape.
The method is no-cook and mixer-based. You beat the butter until pale and smooth, gradually add powdered sugar to avoid dust, then add vanilla and cream to reach the right consistency. The vibe is homey and practical: a quick finish for cookie decorating, a weeknight dessert upgrade, or a weekend cookie plate for guests.
Ingredients for Ultimate Sugar Cookie Frosting
Main Ingredients
- 1 cup unsalted butter, softened
- 4 cups powdered sugar
- 1 teaspoon vanilla extract
- 2–4 tablespoons heavy cream or milk
- Food coloring (optional)
Ingredient Notes (Substitutions, Healthy Swaps)
- Butter: Unsalted butter gives clean control over salt. You can use salted butter but reduce added salt elsewhere. For a lighter flavor, use a good-quality European-style butter.
- Powdered sugar: Also called confectioners’ sugar. Sifted or unsifted is fine; sift if you want an ultra-smooth frosting without lumps.
- Vanilla extract: Pure vanilla gives the best flavor, but imitation vanilla works in a pinch.
- Heavy cream or milk: Heavy cream makes a richer, creamier frosting; milk thins the frosting more. Use whole milk for better body. For a dairy-free option, try unsweetened soy or oat milk, but the texture will change slightly.
- Food coloring: Gel colors give vibrant hues without watering down the frosting. Liquid food coloring can work but use less to avoid thinning.
Optional realistic swaps:
- Lower-fat option: Use 3 tablespoons milk and 1 tablespoon light sour cream (optional) — note this changes flavor and texture.
- Lower-sugar twist: Use 3 1/2 cups powdered sugar and add 1–2 tablespoons cornstarch to help maintain structure, but sweetness will drop.
Step-by-Step Instructions
Follow the recipe directions exactly for best results.
Step 1 – Beat the butter
Place the softened butter in a mixing bowl and beat on medium speed until smooth and pale (about 2–3 minutes).
Visual cue: Butter will look lighter in color and feel fluffy when the beaters lift cleanly.
Step 2 – Add the powdered sugar
Gradually add the powdered sugar on low speed to avoid a cloud of sugar. Mix until combined and smooth.
Pro cue: Start on low to avoid a sugary dust cloud, then increase speed to medium-low once most sugar is mixed.
Step 3 – Add vanilla
Stir in the vanilla extract and mix until smooth. Scrape the sides of the bowl with a spatula to ensure even flavor.
Step 4 – Adjust consistency
Adjust the frosting’s consistency by adding heavy cream or milk one tablespoon at a time until you reach your desired thickness. Use 2 tablespoons for a firmer, pipe-ready frosting and up to 4 tablespoons for a softer spreadable finish.
Visual cue: Thicker frosting will mound and hold ridges; thinner frosting will level out after spreading.
Step 5 – Color and use
If desired, add food coloring and mix to achieve an even color. Use to frost sugar cookies or other baked goods.
Pro cue: Add color in small amounts and mix fully between additions to reach the exact shade.

Pro Tips for Success
- Start with room-temperature butter: Too cold and it won’t whip; too warm and the frosting will be greasy.
- Add powdered sugar slowly to prevent a cloud and ensure smooth mixing.
- Use a paddle attachment on a stand mixer or medium speed on a hand mixer for even texture.
- Adjust liquid slowly: one tablespoon at a time. It’s easier to thin than to thicken.
- For ultra-smooth frosting, sift powdered sugar before adding.
- When piping, chill frosting 10–15 minutes to firm it slightly for sharper edges.
- For bright colors, use gel food coloring and mix well to avoid streaks.
- If frosting becomes too soft while decorating, chill in the fridge for 10 minutes, then whip briefly.
Flavor Variations
All variations are optional and do not replace the base recipe steps.
- Lemon vanilla (optional): Add 1–2 teaspoons fresh lemon zest and 1/2 teaspoon lemon extract for a bright twist.
- Almond (optional): Substitute 1/2 teaspoon almond extract for part of the vanilla for a nutty note.
- Cocoa (optional): Add 1/2 cup unsweetened cocoa powder and 1–2 extra tablespoons of cream to make a chocolate buttercream; increase powdered sugar slightly if needed.
- Mint (optional): Add 1/2 teaspoon peppermint extract and a drop of green gel food coloring for minty cookies.
- Spiced (optional): Add 1/4 teaspoon ground cinnamon or pumpkin pie spice for a warm fall flavor.
- Citrus glaze (optional): Stir in 1 tablespoon orange juice and 1 teaspoon orange zest for an orange-flavored frosting; use toward the lower end of liquid to keep consistency.
Serving Suggestions
- Classic sugar cookies: Spread thin for a simple look or pipe borders and flood centers for decorated cookies.
- Stacked sandwich cookies: Use thicker frosting to sandwich two cookies together for a sweet bite.
- Cupcakes: Use as a topping for vanilla or chocolate cupcakes; pipe with a star tip.
- Cake layer filling: Thin slightly (add a touch more cream) and use between cake layers.
- Holiday trays: Tint different bowls of frosting to make a colorful cookie platter.
- Dessert dip: Thin with one extra tablespoon of cream and serve with shortbread or fruit slices for dipping.
Make-Ahead, Storage & Reheating
- Make-ahead: Prepare frosting up to 2 days ahead and store in an airtight container in the refrigerator.
- Fridge storage: Keeps well for up to 7 days in the fridge when sealed.
- Reheating/refreshing: Bring chilled frosting to room temperature, then beat with a mixer on medium for 30–60 seconds to restore a smooth, spreadable texture. If it seems thick, add 1 teaspoon of cream at a time and mix until desired consistency returns.
- Texture changes: Refrigeration firms the frosting and may dull shine. Re-whipping returns creaminess.
Storage and Freezing Instructions
- Fridge: Store in an airtight container for up to 7 days.
- Freezing: You can freeze buttercream for up to 3 months in a freezer-safe container. Press plastic wrap directly on the surface before sealing to prevent a crust.
- Thawing: Thaw overnight in the fridge, then bring to room temperature and re-whip to refresh texture.
- If freezing is not desired: Keep in the fridge and use within 7 days for best taste and texture.
Nutrition Facts (Per Serving)
Calories | Protein | Carbs | Fat | Fiber | Sodium
— | —: | —: | —: | —: | —:
180 kcal | 0.3 g | 25 g | 8 g | 0 g | 40 mg
Estimates vary by brands and portions.
FAQ About Ultimate Sugar Cookie Frosting
Q: Why is my frosting grainy?
A: Grainy texture usually means powdered sugar wasn’t fully mixed or the sugar had lumps. Beat longer and sift the powdered sugar next time.
Q: My frosting is too thick. How do I thin it?
A: Add heavy cream or milk one teaspoon at a time and mix until you reach the desired consistency.
Q: My frosting is too thin. How do I thicken it?
A: Add more powdered sugar, 1/4 cup at a time, and beat until thickened.
Q: Can I use salted butter?
A: Yes, but flavor will be slightly saltier. Use unsalted butter to control salt level better.
Q: How long does frosting stay good at room temperature?
A: For short displays (like a cookie tray served within a few hours), it’s fine at room temperature. For long periods, store refrigerated due to butter content.
Q: Can I pipe this frosting?
A: Yes. Use less cream (start with 2 tablespoons) for a stiffer frosting that pipes cleanly.
Notes
- For clean cookie edges, chill frosted cookies for 10 minutes before moving them.
- If you need a very white frosting, use shortening to replace half the butter (optional), but flavor will change.
- For shiny finish, add a teaspoon of light corn syrup and mix well.
- When tinting pale colors, add color a little at a time; colors darken as they rest.
- Use clear or white vanilla for paler color when needed.
Troubleshooting
Issue: Frosting separated or looks greasy.
Fix: Butter was too warm. Chill frosting 10–15 minutes, then re-whip on low.
Issue: Frosting too sweet.
Fix: Add a pinch of salt or a small amount (1/2 teaspoon) of lemon juice to balance sweetness.
Issue: Frosting won’t hold shape when piping.
Fix: Frosting is too soft. Add 2–4 tablespoons more powdered sugar or chill briefly before piping.
Issue: Frosting is lumpy after coloring.
Fix: Mix thoroughly; if lumps persist, strain through a fine mesh and re-whip.
Issue: Frosting dried out in container.
Fix: Add 1 teaspoon cream and re-whip to restore moisture.
Conclusion
If you want another easy sugar cookie frosting idea, compare methods and tips at Sugar Cookie Frosting | Lil’ Luna for more quick variations and decorating ideas.
Final Thoughts
This Ultimate Sugar Cookie Frosting is simple, reliable, and perfect for quick decorating or batch baking. With just five pantry ingredients and fast steps, it’s a go-to for cookies, cupcakes, and cakes. Follow the tips to tweak texture and color, and you’ll have a smooth, tasty finish every time.

Ultimate Sugar Cookie Frosting
Ingredients
Main Ingredients
Instructions
Preparation
- Place the softened butter in a mixing bowl and beat on medium speed until smooth and pale (about 2–3 minutes).
- Gradually add the powdered sugar on low speed to avoid a cloud of sugar. Mix until combined and smooth.
- Stir in the vanilla extract and mix until smooth, scraping the sides of the bowl for even flavor.
- Adjust the frosting’s consistency by adding heavy cream or milk one tablespoon at a time to reach your desired thickness.
- If desired, add food coloring and mix until an even color is achieved.