
Honey Butter Chicken is a simple, sweet-and-savory dish with a glossy honey glaze and a soft, buttery finish. The chicken cooks in a hot skillet so the outside gets golden while the inside stays tender. The sauce is just honey, butter, and garlic — rich but light, with a warm caramel note when the honey hits the hot pan. This recipe is quick enough for a weeknight yet pretty enough for guests. Try serving it over rice or with a green salad for an easy, full plate — or see a warm rice version here: honey butter chicken with rice.
Why You’ll Love This Honey Butter Chicken
- Fast to make: about 20 minutes from start to finish.
- Few ingredients: pantry staples with one fresh item (chicken).
- Balanced flavors: sweet honey, rich butter, and bright garlic.
- Great texture: golden outside, juicy inside.
- Flexible: works with breasts or thighs (optional swap).
- Family friendly: mild and comforting, kids usually like it.
- One-skillet cleanup: everything cooks in one pan.
- Versatile for meals: serves well with rice, vegetables, or salad.
What Is Honey Butter Chicken?
Honey Butter Chicken is pan-seared chicken breasts finished with a honey and butter glaze. The garlic cooks first to flavor the butter, then the seasoned chicken browns in the hot skillet. When you drizzle honey over the cooked chicken, it caramelizes slightly and forms a shiny glaze. The taste is sweet and buttery with a hint of garlic, and the texture is golden and tender. This dish has a cozy, comfort-food vibe but is fast enough for weeknights and mild enough for brunch or easy entertaining.
Ingredients for Honey Butter Chicken
For the Base
- 1 lb chicken breasts
- Salt and pepper to taste
For the Sauce
- 1/4 cup butter
- 1/2 cup honey
- 2 cloves garlic, minced
To Serve
- Chopped parsley for garnish
Ingredient Notes (Substitutions, Healthy Swaps)
- Chicken: You can use boneless skinless chicken thighs instead of breasts for more fat and flavor. Thighs may need slightly longer cooking.
- Butter: Swap with a plant-based margarine or vegan butter to make this dairy-free. The texture will be similar.
- Honey: If you prefer a less-sweet option, use 3 tablespoons honey and 1 tablespoon lemon juice (optional). Maple syrup can work as an optional swap but will change the flavor.
- Garlic: Garlic powder (about 1/2 teaspoon) can work in a pinch, but fresh minced garlic offers a brighter flavor.
- Salt: If reducing sodium, use half the salt called for and taste before serving. You can finish with a pinch of flaky salt for texture if desired.
Step-by-Step Instructions
Step 1 – Prepare the chicken
- Pat the chicken breasts dry with paper towels. Season both sides with salt and pepper.
- Visual cue: The chicken surface should look dry and lightly seasoned before it hits the pan.
Step 2 – Melt the butter and cook the garlic
- Heat a skillet over medium heat. Add the butter and let it melt. Add the minced garlic and sauté for about 1 minute until fragrant.
- Visual cue: The garlic should smell fragrant but not browned or dark.
Step 3 – Sear the chicken
- Add the seasoned chicken breasts to the skillet. Cook for about 5–7 minutes on the first side until the bottom is golden.
- Pro cue: Do not move the chicken while it is searing so you get a good golden crust.
Step 4 – Flip and finish cooking
- Flip the chicken and cook the second side for another 5–7 minutes until golden and cooked through.
- Pro cue: Cook until the internal temperature reaches 165°F (74°C) or the juices run clear.
Step 5 – Add the honey
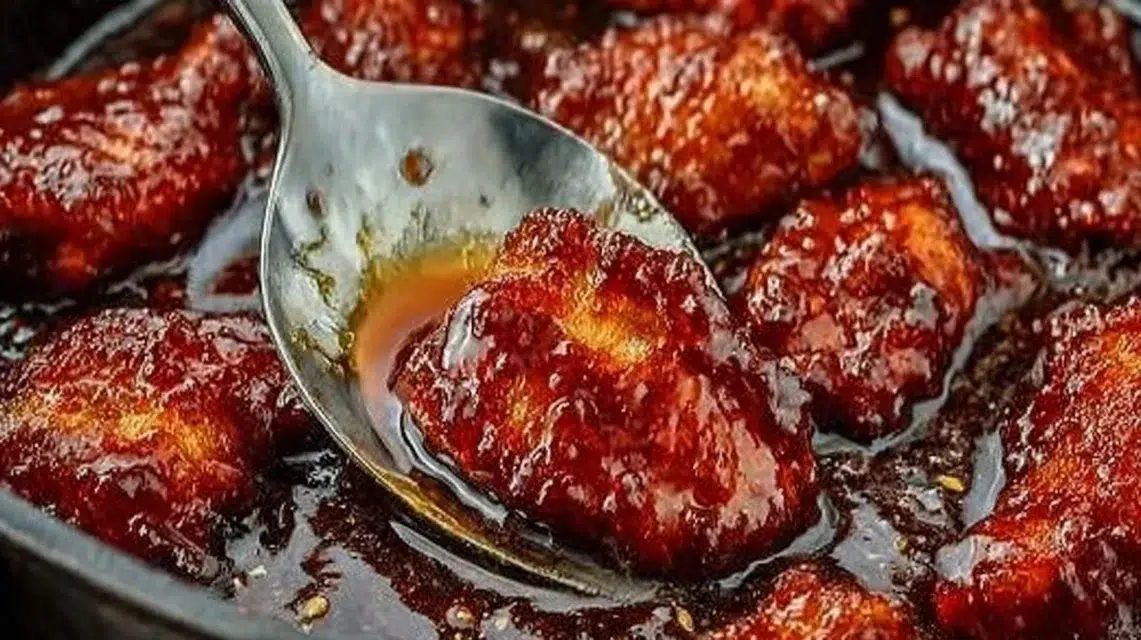
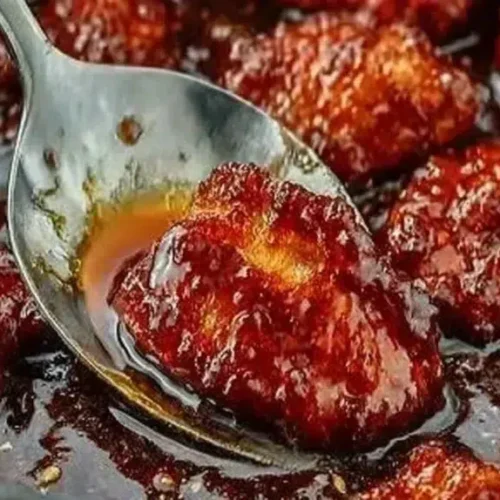
- Drizzle the honey over the chicken in the pan and let it caramelize slightly for about 2 minutes. Spoon the butter and honey sauce over the breasts to coat.
- Visual cue: The sauce should turn glossy and slightly thickened, coating the chicken.
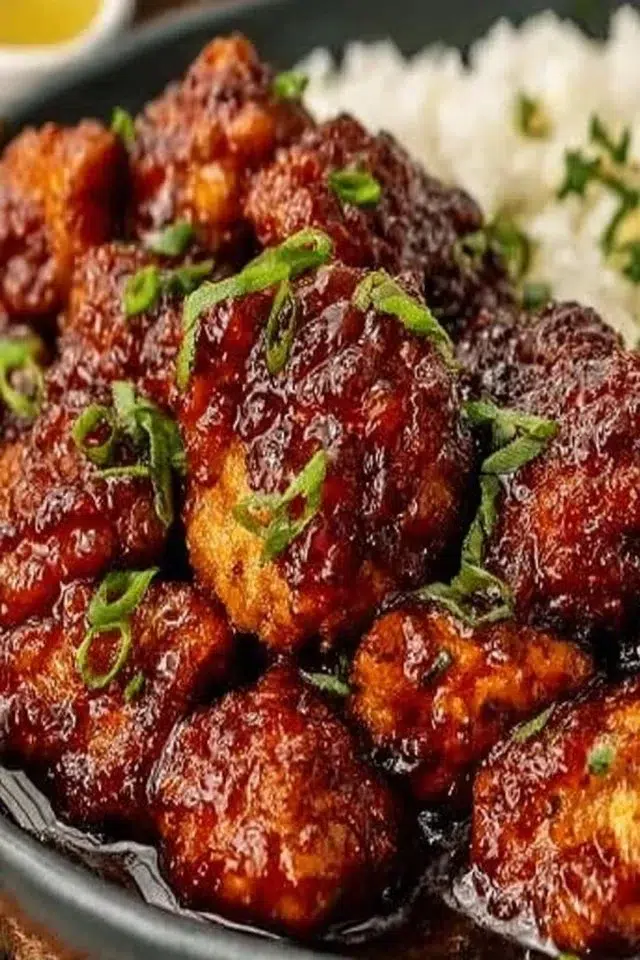
Step 6 – Rest and garnish
- Remove the skillet from heat. Let the chicken rest for a minute, then garnish with chopped parsley and serve.
- Visual cue: Resting keeps the juices locked in. The parsley adds color and a fresh note.
Pro Tips for Success
- Use a heavy skillet (cast iron or stainless steel) for even heat and a good sear.
- Dry the chicken well before seasoning to get a golden crust.
- Preheat the pan so the butter and garlic don’t cool the surface of the chicken.
- Keep heat at medium to avoid burning the garlic or honey.
- If your honey bubbles too quickly, reduce heat immediately; honey can burn fast.
- Rest the chicken 1–2 minutes after cooking to keep it juicy.
- Taste the sauce before serving and adjust with a pinch of salt or a squeeze of lemon if it needs brightness.
Flavor Variations
- Optional Spicy Honey: Add 1/4 teaspoon red pepper flakes to the garlic step for a spicy-sweet finish.
- Optional Lemon Brightness: Stir in 1 teaspoon lemon juice to the sauce after removing from heat for a tangy lift.
- Optional Herb Butter: Add 1 teaspoon chopped thyme or rosemary to the butter when melting for herbal notes.
- Optional Soy Twist: Add 1 tablespoon low-sodium soy sauce to the honey before drizzling for a savory balance (keeps overall flavors similar).
- Optional Nuts: Sprinkle toasted sesame seeds or chopped toasted almonds on top for crunch (optional).
Serving Suggestions
- Serve over steamed white rice or jasmine rice to soak up the sauce.
- Pair with roasted or steamed vegetables like broccoli, green beans, or carrots.
- Place on a bed of mixed greens for a warm salad option.
- Serve with mashed potatoes for a hearty, comfort meal.
- Slice and serve in a warm pita or tortilla with greens for a quick sandwich.
- Add a side of crusty bread to mop up the glaze.
Make-Ahead, Storage & Reheating
- Make-ahead: You can mince the garlic and chop parsley up to one day ahead. Season the chicken and keep covered in the fridge until ready to cook.
- Cooked storage: Store cooked chicken in an airtight container in the fridge for up to 3–4 days.
- Reheating: Reheat gently in a skillet over low heat with a splash of water or a small knob of butter to refresh the sauce. Microwave on medium power in short bursts if needed.
- Texture note: Reheated chicken may be slightly drier than freshly cooked. Use gentle heat and add a small splash of liquid to restore moisture.
Storage and Freezing Instructions
- Refrigerate cooked chicken in an airtight container for up to 3–4 days.
- Freezing: You can freeze cooked chicken, but the honey-butter glaze may change texture when thawed and reheated. If you freeze:
- Cool completely, wrap tightly, and freeze for up to 2 months.
- Thaw overnight in the fridge and reheat gently in a skillet.
- If you prefer to avoid texture changes, freeze raw, seasoned chicken separately and add honey and butter fresh when cooking.
Nutrition Facts (Per Serving)
Calories | Protein | Carbs | Fat | Fiber | Sodium
—|—:|—:|—:|—:|—:
Approx. 560 kcal | 47 g | 45 g | 17 g | 0 g | 420 mg
Estimates vary by brands and portions.
FAQ About Honey Butter Chicken
Q: My sauce is too thin — how do I thicken it?
A: Simmer the honey and butter for a minute or two until it reduces. Remove the chicken and let the sauce thicken on medium-low heat, stirring often. Do not overheat or it will burn.
Q: The honey burned on the pan — what happened?
A: Honey can burn fast at high heat. Turn the heat down, scrape gently with a wooden spoon, and transfer sauce to a new pan if it tastes burnt. Next time use medium heat and watch closely.
Q: How do I know the chicken is cooked through?
A: Use an instant-read thermometer. The safe internal temp is 165°F (74°C). If you don’t have a thermometer, cut into the thickest part; juices should run clear.
Q: Can I make this with bone-in chicken?
A: Yes, but bone-in pieces need longer cooking time. Start in the skillet to brown, then finish in a 375°F oven until cooked through.
Q: Can I reduce the sugar?
A: Yes. Use 3 tablespoons honey instead of 1/2 cup and add a splash of lemon juice for balance.
Q: Is this recipe gluten-free?
A: Yes, as written it is gluten-free. Avoid optional soy sauce variation unless you use a gluten-free soy sauce.
Notes
- Finish with a small sprinkle of chopped parsley for color and freshness.
- For a glossy finish, spoon the sauce over the chicken just before serving.
- Serve immediately after garnishing; the glaze is best warm and shiny.
- If plating for guests, rest the chicken for 1–2 minutes to keep it juicy.
- Use a clean spoon when basting to keep flavors fresh and avoid contamination.
Troubleshooting
- Bland flavor: Add a pinch more salt, or a squeeze of lemon to brighten the sauce.
- Overcooked, dry chicken: Lower your heat and check internal temp earlier; rest briefly after cooking.
- Garlic burned: Remove garlic as soon as it is fragrant and slightly translucent. If it burns, discard and start the butter/garlic step again.
- Sauce too sweet: Stir in a small splash (1 tsp) of lemon juice or a pinch of salt to balance.
- Honey too runny: Reduce the sauce over low heat until it thickens slightly, then coat the chicken.
- Honey crystallizing after cooling: Reheat gently to re-melt and re-glaze before serving.
Final Thoughts
This Honey Butter Chicken is simple, reliable, and full of homey flavor. It works for quick weeknights and small gatherings alike. With a few small swaps or additions, you can make it fit your family’s tastes while keeping the easy method the same.
Conclusion
For another take and serving idea, check this related Honey Butter Chicken resource at Honey Butter Chicken | Don’t Go Bacon My Heart.
Honey Butter Chicken
Ingredients
For the Base
- 1 lb chicken breasts You can use boneless skinless chicken thighs instead for more flavor.
- Salt and pepper To taste.
For the Sauce
- 1/4 cup butter Can be substituted with plant-based margarine or vegan butter.
- 1/2 cup honey For a less-sweet option, use 3 tablespoons honey and 1 tablespoon lemon juice.
- 2 cloves garlic, minced Fresh is preferred, but garlic powder can be used.
To Serve
- Chopped parsley For garnish.
Instructions
Preparation
- Pat the chicken breasts dry with paper towels. Season both sides with salt and pepper.
- Heat a skillet over medium heat. Add the butter and let it melt. Then add the minced garlic and sauté for about 1 minute until fragrant.
Cooking
- Add the seasoned chicken breasts to the skillet. Cook for about 5–7 minutes on the first side until the bottom is golden.
- Flip the chicken and cook the second side for another 5–7 minutes until golden and cooked through.
- Drizzle the honey over the chicken in the pan and let it caramelize slightly for about 2 minutes. Spoon the butter and honey sauce over the breasts to coat.
- Remove the skillet from heat. Let the chicken rest for a minute, then garnish with chopped parsley and serve.