
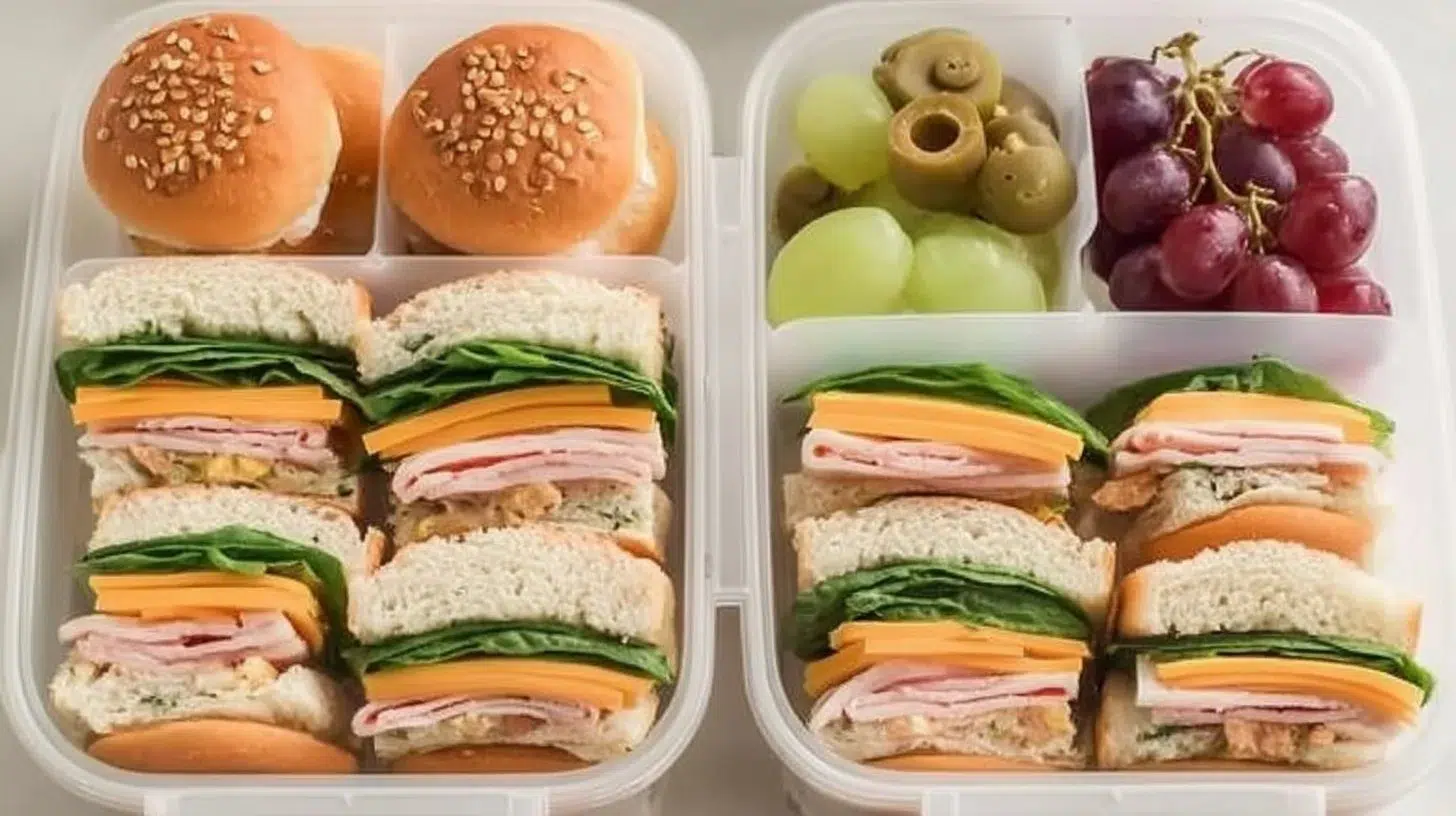
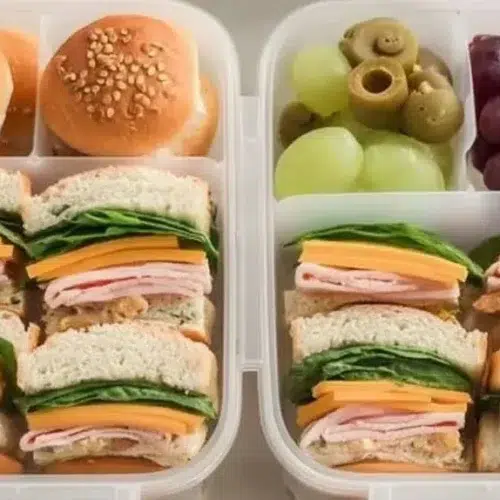
With their delightful combination of flavors and textures, Mini Sandwich Lunchboxes are the perfect meal solution for both kids and adults. These bite-sized sandwiches burst with the savory goodness of deli meats and cheese, paired with crisp lettuce and juicy tomato. The creamy spread adds an extra layer of deliciousness, making each bite feel like a small bite of heaven. Not only are they easy to make, but they are also versatile, allowing you to customize them to your tastes. Perfect for lunch boxes or picnics, these mini sandwiches are guaranteed to please everyone!
Why You’ll Love This Mini Sandwich Lunchbox
- Quick and easy to prepare, perfect for busy days.
- Kids and adults will enjoy their fun, bite-size form.
- Easily customizable with your choice of meats, cheeses, and veggies.
- Healthy snack-sized fruit and chips included for a balanced meal.
- Great for lunch boxes, picnics, or casual get-togethers.
- Can be made ahead of time for added convenience.
What Is Mini Sandwich Lunchbox?
A Mini Sandwich Lunchbox is a fun, bite-sized meal featuring small sandwiches filled with deli meats, cheeses, and fresh veggies. They offer a delightful balance of savory and crisp flavors, all tucked neatly in mini buns. This lunchbox option is perfect for lunch at work or school, bringing comfort food vibes in a convenient format. There’s no cooking involved, making it an easy, no-fuss meal to assemble.
Ingredients for Mini Sandwich Lunchbox
For the Base
- Mini sandwich buns
- Deli meats (ham, turkey, etc.)
- Cheese slices
For the Fillings
- Lettuce
- Tomato slices
- Pickles (optional)
For the Sauce
- Mayonnaise or mustard
To Serve
- Snack-sized fruits (like grapes or apple slices)
- Chips or crackers
Ingredient Notes (Substitutions, Healthy Swaps)
- Buns: You can use whole wheat or gluten-free mini buns if you’re looking for healthier options or accommodating dietary needs.
- Deli Meats: Choose turkey or chicken for lower fat alternatives, or go vegetarian with hummus and roasted vegetables.
- Cheese: Substitute with a dairy-free cheese for a vegan option.
- Sauce: Swap mayo for avocado spread for a healthier fat.
Step-by-Step Instructions
Step 1 – Slice the Buns
Begin by slicing the mini sandwich buns in half.
Visual cue: Ensure you have equal halves for even layering.
Step 2 – Add the Spread
Spread mayonnaise or mustard on one side of each bun.
Pro cue: Use a generous amount to keep the sandwiches moist.
Step 3 – Layer the Fillings
Layer deli meats, cheese, lettuce, and tomato on the bottom half of the bun.
Visual cue: Don’t be afraid to stack high for a hearty sandwich!
Step 4 – Add Pickles
Add pickles if desired for an added crunch.
Step 5 – Close the Sandwiches
Top with the other half of the bun.
Step 6 – Pack the Lunchbox
Pack the mini sandwiches in a lunchbox along with snack-sized fruits and chips or crackers for a complete meal.

Pro Tips for Success
- Use fresh ingredients for the best flavor.
- Consider chilling the fillings for an hour before assembly to enhance flavor.
- If making ahead, store veggies separately to maintain crispness.
- Cut sandwiches in halves or quarters for easier eating.
- Customize the sauces based on personal preference or dietary needs.
Flavor Variations
- Caprese Mini Sandwich: Swap deli meats with fresh mozzarella, fresh basil, and a drizzle of balsamic glaze.
- Mediterranean Delight: Use hummus and roasted red peppers instead of meats and add spinach.
- Tropical Twist: Add pineapple slices and teriyaki sauce for a sweet and savory combo.
- Spicy Kick: Use spicy mustard and add jalapeño slices for heat.
- Protein-Packed: Incorporate hard-boiled egg slices alongside turkey or chicken for a protein boost.
Serving Suggestions
- Serve with a fruit salad for a refreshing side.
- Pair with a light soup for a cozy meal.
- Arrange on a platter for easy sharing at gatherings.
- Add colorful veggie sticks for a crunchy element alongside.
- Make it a themed lunch by pairing with similar flavored snacks, like BBQ chips.
Make-Ahead, Storage & Reheating
You can prepare these mini sandwiches ahead of time. They can be assembled and stored in the fridge for up to 24 hours. For best texture, avoid adding tomatoes or lettuce until just before serving.
When it comes to reheating, these sandwiches are best enjoyed cold or at room temperature. The fresh ingredients may lose their quality if reheated.
Storage and Freezing Instructions
While these sandwiches are best fresh, you can store them in an airtight container in the fridge for up to two days. Avoid freezing as the texture of the bread and veggies may suffer.
Nutrition Facts (Per Serving)
Calories | Protein | Carbs | Fat | Fiber | Sodium
— | — | — | — | — | —
300 | 15g | 32g | 12g | 3g | 600mg
Estimates vary by brands and portions.
FAQ About Mini Sandwich Lunchbox
Q: Can I use different types of bread?
A: Yes! Any bread that fits your style can be used, including wraps.
Q: How do I make them less messy?
A: Keep sauces minimal, and choose sturdier vegetables like cucumbers instead of juicy tomatoes.
Q: What can I substitute for sauces?
A: You can use avocado, pesto, or even a yogurt-based sauce as alternatives.
Q: Can I make these sandwiches gluten-free?
A: Absolutely! Use gluten-free buns to accommodate dietary needs.
Q: How should I store leftovers?
A: Store in an airtight container in the fridge. Consume within two days for best quality.
Q: Are these sandwiches suitable for freezing?
A: Freezing is not recommended as the bread can become soggy. Enjoy them fresh instead!
Notes
- Try drizzling some oil and vinegar over the veggies for extra flavor.
- Using different types of cheese can elevate the taste.
- Consider adding sprouts for a fresh crunch.
- Use a cookie cutter to create fun shapes for thematic lunches.
- Whenever possible, opt for organic produce for enhanced flavors.
Troubleshooting
- Too dry: Ensure a generous layer of spread on each bun.
- Soggy bottoms: Assemble sandwiches just before serving or keep wet ingredients separate.
- Overstuffed: Avoid overfilling to prevent the sandwiches from becoming messy.
- Bland taste: Season fillings with herbs or spices before layering on the bun.
Final Thoughts
Mini Sandwich Lunchboxes are a delightful and versatile meal option that brings joy to any table. With easy preparation and endless customization opportunities, they make lunch exciting for everyone. Give them a try, and watch as they disappear from lunchboxes in no time! For more fun lunch ideas, check out this Mini Sandwich Lunchbox Idea.
Mini Sandwich Lunchboxes
Ingredients
For the Base
- 12 pieces Mini sandwich buns Whole wheat or gluten-free options can also be used.
- 8 oz Deli meats (ham, turkey, etc.) Choose lower fat alternatives like turkey or chicken if desired.
- 8 slices Cheese slices Substitute with dairy-free cheese for a vegan option.
For the Fillings
- 1 cup Lettuce Use fresh varieties for best flavor.
- 1 medium Tomato slices Add just before serving to maintain crispness.
- 1 cup Pickles Optional for added crunch.
For the Sauce
- 4 tbsp Mayonnaise or mustard Can swap mayo for avocado spread for healthier fat.
To Serve
- 2 cups Snack-sized fruits (like grapes or apple slices) Balance the meal with fresh fruits.
- 2 cups Chips or crackers Choose your favorite variety.
Instructions
Preparation
- Begin by slicing the mini sandwich buns in half.
- Spread mayonnaise or mustard on one side of each bun.
- Layer deli meats, cheese, lettuce, and tomato on the bottom half of the bun.
- Add pickles if desired for an added crunch.
- Top with the other half of the bun.
- Pack the mini sandwiches in a lunchbox along with snack-sized fruits and chips or crackers for a complete meal.