
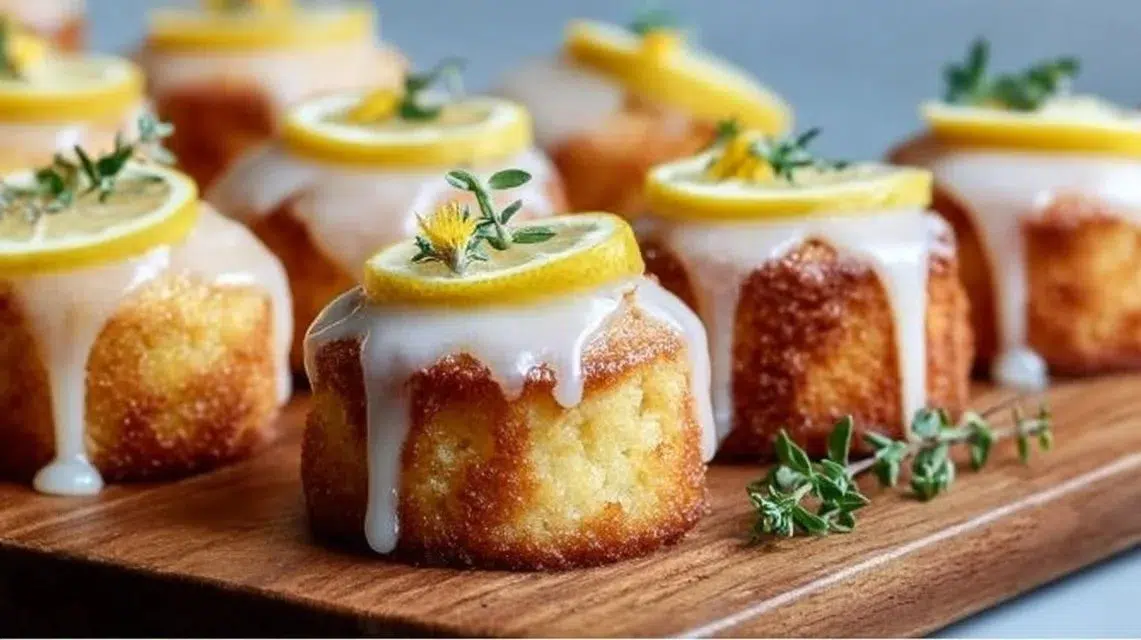
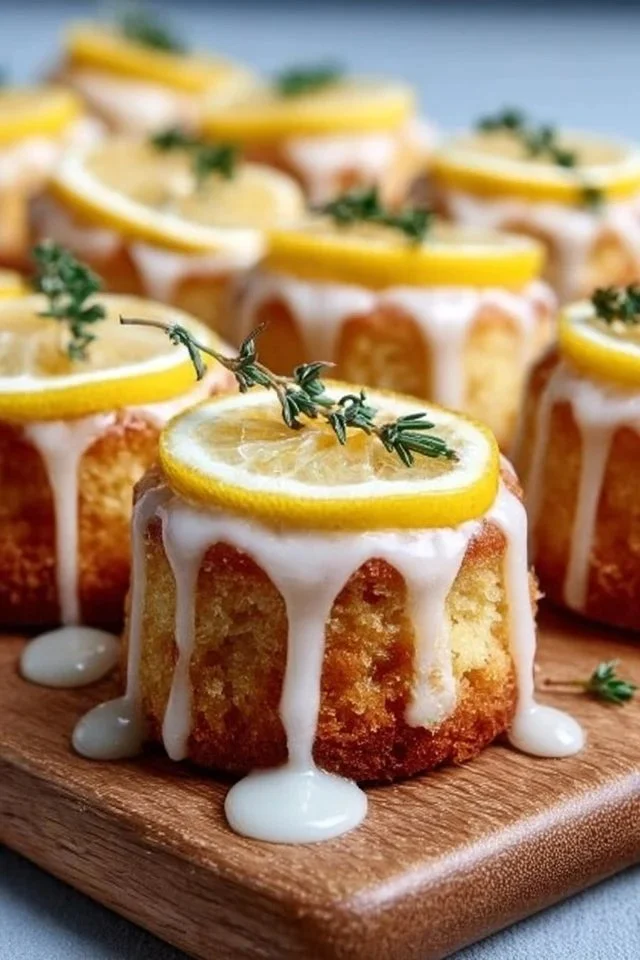
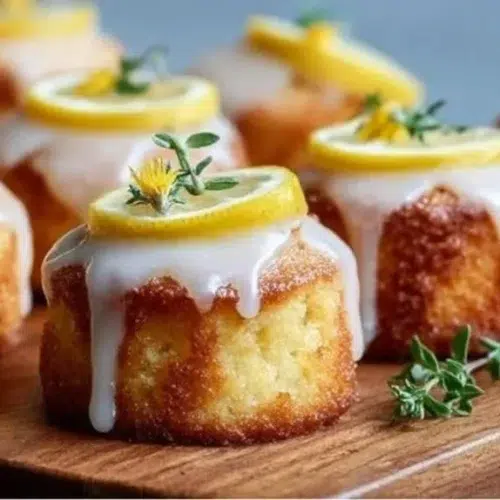
Perfectly moist and zesty, Mini Lemon Drizzle Cakes are a delightful treat that brings brightness to any gathering. These petite cakes boast a light texture, bursting with the vibrant flavor of fresh lemons. A simple recipe, they are easy to whip up and are guaranteed to impress your family and friends. Whether enjoyed as an afternoon snack or as a sweet ending to a casual dinner, these mini cakes are sure to become a favorite.
Why You’ll Love This Mini Lemon Drizzle Cakes
- Bright and Zesty Flavor: The fresh lemon zest and juice lead to a refreshing taste.
- Moist Texture: The combination of butter and milk creates a soft, tender cake.
- Easy to Make: With straightforward steps, this recipe is beginner-friendly.
- Versatile Serving Options: Perfect for parties, brunches, or tea time.
- Customizable Glaçage: Adjust the sweetness of the drizzle to your liking.
- Quick Bake Time: Ready in just 18-22 minutes, so you can satisfy your sweet tooth fast.
What Is Mini Lemon Drizzle Cakes?
Mini Lemon Drizzle Cakes are charming little desserts that pack a punch with their vibrant lemon flavor. They’re known for their moist crumb and a sweet glaze that adds a delightful shine. Baked until golden, these cakes make fantastic comfort food for any occasion, be it a cozy weeknight or a cheerful brunch. The brightness of lemon elevates these treats, filling your home with its enticing aroma.
Ingredients for Mini Lemon Drizzle Cakes
For the Base
- 1 cup unsalted butter, softened
- 1 cup granulated sugar
- 4 large eggs
- 1 ½ cups all-purpose flour
- 1 ½ tsp baking powder
- ¼ tsp salt
- Zest of 2 lemons
- 2 tbsp fresh lemon juice
- ¼ cup whole milk
For the Sauce
- 1 cup powdered sugar
- 2 tbsp fresh lemon juice (for the glaze)
- 1 tsp lemon zest (for the glaze)
- 1-2 tsp milk, as needed for consistency
To Serve
- Thin lemon slices, cut in half (for garnish)
- Fresh thyme sprigs (for garnish)
Ingredient Notes (Substitutions, Healthy Swaps)
- Butter: If you prefer a non-dairy option, coconut oil can replace butter, but it may alter the cake’s flavor slightly.
- Sugar: For a healthier option, try using coconut sugar instead of granulated sugar for a lower glycemic index.
- Flour: Gluten-free all-purpose flour can work well for gluten-sensitive individuals, although the texture may change slightly.
- Milk: Non-dairy alternatives like almond or oat milk can be used in place of whole milk.
Step-by-Step Instructions
Step 1 – Prepare Your Oven and Pan
Preheat the oven to 350°F (175°C). Grease and lightly flour a mini cake pan or a cube cake pan.
Visual cue: Properly greased pans will help with easy removal of the cakes.
Step 2 – Cream Butter and Sugar
In a large bowl, cream the softened butter and granulated sugar together until the mixture is light and fluffy. This will create air pockets, leading to a fluffy cake.
Step 3 – Incorporate Eggs
Add the eggs one at a time, mixing well after each addition. This ensures an even mixture and helps the structure of the cake.
Step 4 – Mix in Wet Ingredients
Combine the lemon zest, fresh lemon juice, and whole milk in a separate bowl. Gradually mix this into the butter-sugar-egg mixture.
Step 5 – Combine Dry Ingredients
In another bowl, whisk together the flour, baking powder, and salt. Gradually add these dry ingredients to the wet mixture, stirring until just combined.
Pro cue: Avoid over-mixing to prevent a tough texture.
Step 6 – Fill the Pans
Pour the batter into the prepared mini cake pans, filling them about ¾ full.
Step 7 – Bake
Place the pans in the oven and bake for 18-22 minutes. A toothpick inserted in the center should come out clean.
Pro cue: If the tops are golden but a toothpick comes out wet, give them a few more minutes.
Step 8 – Cool and Glaze
Allow the cakes to cool completely in the pans before carefully removing them. While they cool, whisk together the powdered sugar, lemon juice, lemon zest, and enough milk to achieve a smooth, pourable glaze. Drizzle over the cooled cakes and finish with a lemon slice and thyme for garnish.
Pro Tips for Success
- Use Room Temperature Ingredients: This helps create a smoother batter and better texture.
- Check Doneness Early: Start checking at 18 minutes to prevent overbaking.
- Sift Dry Ingredients: Sifting flour helps to aerate it, leading to a lighter cake.
- Let Cakes Cool: Proper cooling prevents the glaze from melting and keeps its shape.
- Use Fresh Ingredients: Fresh lemons greatly enhance the overall flavor.
Flavor Variations
- Herb-Infused Cakes: Add a touch of minced rosemary or basil for an herbal twist on the lemon flavor.
- Berry Addition: Toss in some fresh blueberries or raspberries into the batter for added flavor.
- Coconut Twist: Substitute part of the milk for coconut milk and add shredded coconut for a tropical flavor.
- Chocolate Drizzle: Pour melted dark chocolate on top instead of the lemon glaze for chocolate lovers.
Serving Suggestions
- Tea Time: Serve alongside a cup of tea for a delightful afternoon treat.
- Dessert Table: Perfect for parties, displayed on a cake stand for an attractive presentation.
- Breakfast Treat: Great paired with coffee for a sugary start to your day.
- Picnic Favorites: Pack them in a lunchbox for a refreshing dessert outdoors.
- Pairing with Ice Cream: A scoop of vanilla ice cream on the side complements the tartness nicely.
Make-Ahead, Storage & Reheating
These cakes can be made ahead of time; they will store well.
- Storage Duration: Keep them in an airtight container in the refrigerator for up to a week.
- Reheating: Reheat gently in the microwave for a few seconds to enjoy them warm.
- Texture Changes: Note that after refrigerating, the cakes may firm up slightly but will return to a nice texture when warmed.
Storage and Freezing Instructions
Storing these cakes is straightforward:
- Room Temperature: They can be kept in an airtight container for up to three days at room temperature.
- Freezing: While freezing is not ideal due to the glaze, unglazed cakes can be wrapped tightly in plastic wrap and frozen for up to three months. Thaw them in the fridge before serving.
Nutrition Facts (Per Serving)
Calories | Protein | Carbs | Fat | Fiber | Sodium
350 | 3g | 45g | 18g | 0g | 150mg
Estimates vary by brands and portions.
FAQ About Mini Lemon Drizzle Cakes
Q1: Why are my cakes too thick?
A1: Overmixing the batter can lead to thickening. Mix until just combined.
Q2: Can I use bottled lemon juice?
A2: Fresh lemon juice is recommended for the best flavor, but bottled can work in a pinch.
Q3: How do I know when cakes are done?
A3: A toothpick should come out clean when inserted in the center.
Q4: Why did my cakes sink?
A4: Sinking can occur due to overmixing or opening the oven too soon during baking.
Q5: Can I make this recipe gluten-free?
A5: Yes, use a gluten-free baking mix instead of all-purpose flour.
Q6: What if my glaze is too thick?
A6: Add a bit more milk, one teaspoon at a time, until you reach the desired consistency.
Notes
- Garnish Elegantly: For added flair, sprinkle some powdered sugar over the top just before serving.
- Use Zester Sparingly: Be careful not to include too much bitter white pith when zesting the lemons.
- Serve Cold: Cakes can also be stored in the fridge after glazing for a refreshing dessert.
- Flavor Boost: For an added kick, consider adding a splash of vanilla extract to the cake batter.
Troubleshooting
- Cakes Rising Unevenly: Ensure your oven is properly calibrated and pans are in the center.
- Too Dry: Monitor baking time closely and incorporate a kitchen thermometer to check the batter.
- Watery Glaze: If it’s too runny, add more powdered sugar incrementally until it thickens.
- Burning on the Bottom: Position your oven rack in the middle to avoid direct heat from the bottom.
Final Thoughts
Mini Lemon Drizzle Cakes are a sweet indulgence that’s sure to uplift your spirits. Their zesty flavor and moist texture appeal to all, making them a hit on any dessert table. Try making them today and enjoy a comforting slice of sunshine!
Conclusion
If you’re looking for delightful recipes, check out Lemon Drizzle Mini Cakes – Very Nearly Teatime for more lemony inspiration that’s sure to brighten your day!
Mini Lemon Drizzle Cakes
Ingredients
For the Base
- 1 cup unsalted butter, softened
- 1 cup granulated sugar Can substitute with coconut sugar
- 4 large eggs
- 1.5 cups all-purpose flour Can use gluten-free all-purpose flour
- 1.5 tsp baking powder
- 0.25 tsp salt
- Zest of 2 lemons
- 2 tbsp fresh lemon juice
- 0.25 cup whole milk Can substitute with non-dairy milk
For the Sauce
- 1 cup powdered sugar
- 2 tbsp fresh lemon juice For the glaze
- 1 tsp lemon zest For the glaze
- 1-2 tsp milk As needed for consistency
To Serve
- Thin lemon slices, cut in half For garnish
- Fresh thyme sprigs For garnish
Instructions
Preparation
- Preheat the oven to 350°F (175°C). Grease and lightly flour a mini cake pan or a cube cake pan.
- In a large bowl, cream the softened butter and granulated sugar together until light and fluffy.
- Add the eggs one at a time, mixing well after each addition.
- In a separate bowl, combine the lemon zest, fresh lemon juice, and whole milk. Gradually mix this into the butter-sugar-egg mixture.
- In another bowl, whisk together the flour, baking powder, and salt. Gradually add these dry ingredients to the wet mixture, stirring until just combined.
- Pour the batter into the prepared mini cake pans, filling them about ¾ full.
Baking
- Place the pans in the oven and bake for 18-22 minutes until a toothpick inserted comes out clean.
- Allow the cakes to cool completely in the pans before carefully removing them.
Glazing
- Whisk together the powdered sugar, lemon juice, lemon zest, and enough milk to achieve a smooth, pourable glaze.
- Drizzle over the cooled cakes and finish with a lemon slice and thyme garnish.