
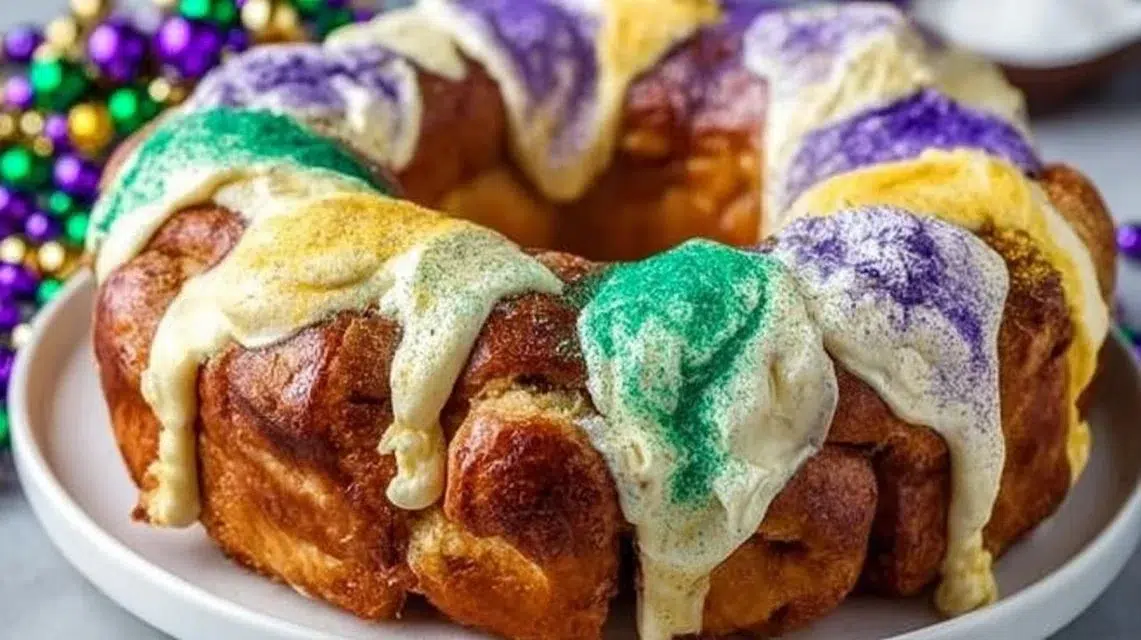
This Easy King Cake is soft, sweet, and bright with classic Mardi Gras colors. The outside is golden and lightly crisp, the inside is pillowy from pre-made cinnamon roll dough, and the simple glaze adds a smooth, sweet finish. It’s special because it turns refrigerated cinnamon rolls into a festive ring in minutes — no yeast, no rolling, no proofing. Serve warm for brunch or cut into wedges for a party snack. If you enjoy quick oven-baked brunch treats, try it alongside a simple baked pancake like Apple Cinnamon German Pancake for a fun spread.
Why You’ll Love This Easy King Cake
- Ready from fridge to oven in minutes — no dough work or rising time.
- Uses one can of refrigerated cinnamon rolls for a reliable, tender base.
- Sweet vanilla glaze is smooth and quick to whisk with only three pantry ingredients.
- Festive look with purple, green, and yellow sugars — great for parties or Mardi Gras.
- Flexible: bake time is short and forgiving, so it works for busy mornings.
- Slice-and-serve format makes it easy for brunch, potlucks, or holiday treats.
- Minimal cleanup — parchment or a lightly greased sheet is all you need.
What Is Easy King Cake?
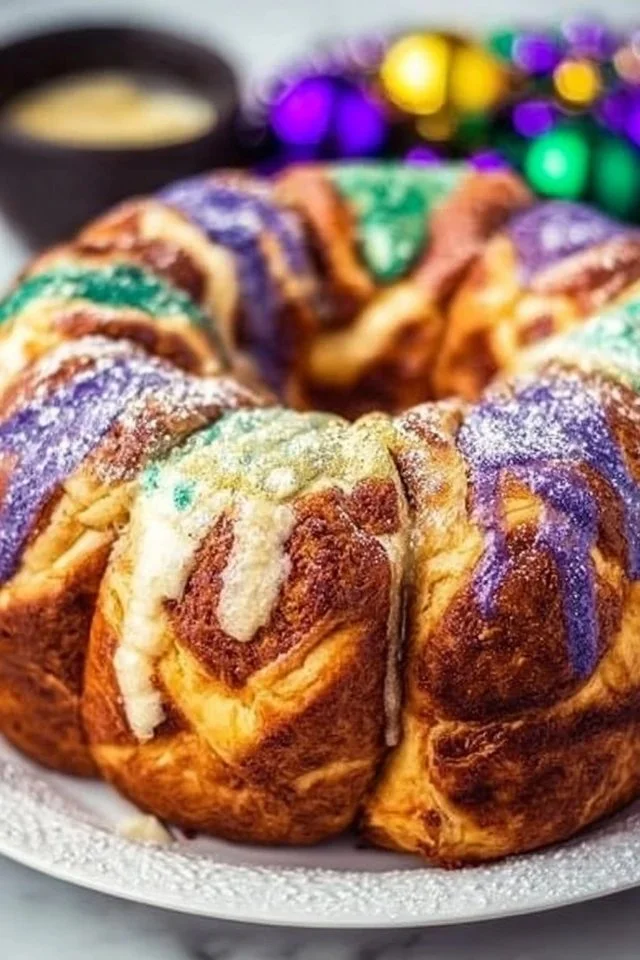
Easy King Cake is a quick, decorative version of the traditional New Orleans King Cake made from pre-made cinnamon roll dough. It tastes like warm cinnamon rolls shaped into a ring with a simple vanilla glaze and bright colored sugar stripes. The texture is soft and fluffy inside with a slightly golden crust. What makes it special is the low effort — you unroll, shape, bake, and glaze. It’s the kind of comfort-baked good that feels festive but is also perfect for a simple weekend brunch or an easy party dessert.
This recipe uses the oven to bake a shaped ring. The vibe is casual and fun — great for family mornings, small gatherings, or last-minute hosting. No special skills are needed, and kids can help with the icing and decorating.
Ingredients for Easy King Cake
For the Base
- 1 can cinnamon rolls (use the pre-made, refrigerated type with icing removed or reserved)
For the Glaze
- 1 cup powdered sugar
- 1 tablespoon vanilla extract
- 2 tablespoons milk
To Serve
- Colored sugars (purple, green, yellow) for topping
Ingredient Notes (Substitutions, Healthy Swaps)
- Cinnamon rolls: Use any brand of refrigerated cinnamon rolls. If your can includes icing, remove it or reserve it for serving — the recipe uses a homemade glaze instead.
- Powdered sugar: Confectioners’ sugar is required for a smooth glaze; a coarser sugar will not give the same texture. No good substitute if you want the classic look.
- Vanilla extract: Pure vanilla gives the best flavor but use imitation vanilla in a pinch.
- Milk: Use any milk you have — dairy or plant-based (almond, oat, or soy) work fine for the thin glaze. For a richer flavor, use half-and-half but reduce the amount slightly.
- Colored sugars: These are optional for decoration. If you don’t have purple, green, and yellow, use regular granulated sugar dyed with food coloring or sprinkles in similar colors. Keep them separate to make stripes.
Optional swaps (keep realistic):
- For a lighter glaze, cut the powdered sugar to 3/4 cup and add a touch more milk, but expect a thinner finish.
- For dairy-free: use plant milk and ensure cinnamon roll dough is dairy-free (check label).
Step-by-Step Instructions
Step 1 – Preheat and prep the pan
Preheat your oven according to the cinnamon rolls package instructions. Line a baking sheet with parchment paper or lightly grease it. This helps the ring release easily and keeps cleanup simple.
Visual cue: The pan should be ready before you unroll the dough so you can shape the ring quickly.
Step 2 – Unroll and arrange the strips
Open the cinnamon rolls and unroll each one into long strips of dough. Lay the strips side by side on the prepared sheet, fitting them into a rough ring shape. Pinch the seams where strips meet so the dough will hold its ring shape while baking.
Pro cue: Work quickly so the dough doesn’t stick to the counter. If dough is very sticky, chill for 5–10 minutes.
Step 3 – Shape into a ring
Move the side-by-side strips into a clean ring shape on the sheet. Press and pinch the ends together and tuck any loose edges under so the ring looks even. Make sure the ring has a hole in the center and that the seams are pinched tightly.
Visual cue: The ring should be even thickness all around so it bakes uniformly.
Step 4 – Bake until golden
Bake the ring in the preheated oven until it’s golden brown and the center is set. Start checking 3–5 minutes before the package time to avoid overbaking. The top should have a light golden color and the center should no longer look raw.
Pro cue: A toothpick pushed into the thicker part should come out with a few moist crumbs, not wet dough.
Step 5 – Make the glaze while it cools
While the cake cools slightly, whisk the powdered sugar, vanilla extract, and milk in a small bowl until smooth. Adjust with more milk for a thinner glaze or more powdered sugar for thicker icing. The glaze should be pourable but not runny.
Visual cue: A smooth ribbon of glaze falling from the spoon will hold shape for a moment.
Step 6 – Glaze and decorate
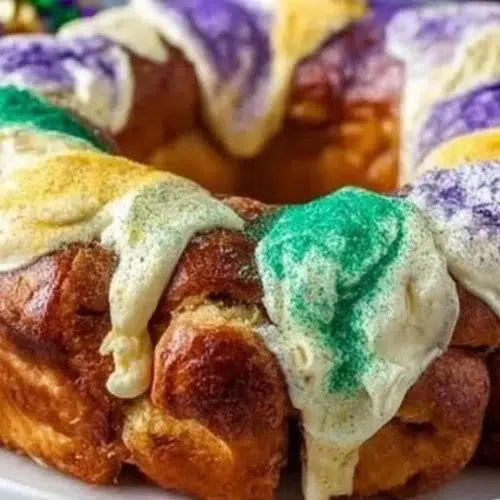
Once the ring is warm (not hot), drizzle the glaze evenly over the top. Immediately sprinkle the colored sugars in stripes of purple, green, and yellow so they stick to the glaze. Let the glaze set for a few minutes before slicing.
Pro Tips for Success
- Use room-cool dough: If the refrigerated dough is too cold, let it sit for 10 minutes so it’s easier to unroll.
- Work on parchment: It prevents sticking and makes sliding the ring to and from the oven simple.
- Keep an eye on bake time: Ovens vary; check a few minutes early to prevent a dry cake.
- Glaze thickness matters: Thicker glaze holds sugar better; thinner glaze spreads more but may run off the sides.
- Decorate immediately: Sprinkle colored sugars right after drizzling the glaze to ensure they stick well.
- Even ring thickness: Try to make the ring uniform to avoid doughy centers or overcooked edges.
Flavor Variations
- OPTIONAL Cinnamon-Sugar Twist: Before baking, lightly brush melted butter on the unrolled strips and sprinkle with extra cinnamon sugar for a deeper cinnamon flavor.
- OPTIONAL Nut Crunch: Sprinkle chopped pecans or walnuts over the glaze for texture (add after glazing, before sugar).
- OPTIONAL Citrus Zest Glaze: Add 1 teaspoon orange or lemon zest to the glaze for a bright citrus note.
- OPTIONAL Cream Cheese Drizzle: If you reserved canned icing, mix it with a tablespoon of cream cheese and thin with milk, then drizzle on top for a tangy finish.
- OPTIONAL Fruit Jam Swirl: Dollop small spoonfuls of apricot or raspberry jam on the strips before shaping and pinch lightly to seal. Keep jams to a small amount to avoid leaking.
Serving Suggestions
- Serve warm with coffee or hot chocolate for a cozy brunch.
- Cut into wedges and place on a platter for parties or potlucks.
- Pair with fresh fruit or a simple fruit salad to balance sweetness.
- Add a side of whipped cream or vanilla yogurt for dipping.
- Bring to any Mardi Gras event for an easy, colorful centerpiece.
- Wrap slices individually for grab-and-go snacks at gatherings.
Make-Ahead, Storage & Reheating
- Make-ahead: You can unroll the dough and assemble the ring on the baking sheet, then cover and refrigerate for up to 4 hours before baking. Keep chilled until ready to bake.
- Storage: Store leftover cake in an airtight container at room temperature for up to 1 day, or in the refrigerator for up to 3 days. The glaze may soften in the fridge.
- Reheating: Warm slices in a 300°F oven for 5–8 minutes or microwave a single slice for 10–15 seconds until warm. This refreshes the texture and brings back that just-baked feel.
- Texture changes: The cake is best the day it’s made. Refrigeration can make it slightly firmer and the glaze may weep; reheat gently to restore softness.
Storage and Freezing Instructions
- Freeze whole ring or slices: Wrap cooled slices or the whole cake tightly in plastic wrap and then foil. Freeze for up to 2 months.
- Thawing: Thaw overnight in the refrigerator, then warm in a 300°F oven for 10–15 minutes to restore texture.
- Note if not freezing: If you prefer not to freeze, store leftovers in the fridge for up to 3 days and refresh by warming before serving. Freezing can slightly change the glaze texture, but the cake itself holds up well.
Nutrition Facts (Per Serving)
Calories | Protein | Carbs | Fat | Fiber | Sodium
—|—:|—:|—:|—:|—:
320 | 4 g | 38 g | 17 g | 1 g | 420 mg
Estimates vary by brands and portions.
FAQ About Easy King Cake
Q: My ring looks pale after baking. How can I fix that?
A: Bake until the top is golden and check a few minutes after package time. You can broil for 30–60 seconds if needed — watch closely.
Q: The dough fell apart when I shaped it. What did I do wrong?
A: Work quickly and pinch seams firmly. If dough is very warm and sticky, chill for 5–10 minutes to firm it up.
Q: The glaze is too thin. How can I thicken it?
A: Add more powdered sugar a tablespoon at a time until it reaches the desired thickness. Let it sit a minute to thicken slightly before drizzling.
Q: Can I use leftover canned icing instead of the glaze?
A: Yes, reserved canned icing can be used. For best results, warm and thin slightly with a teaspoon of milk if too stiff.
Q: How do I prevent the colored sugar from bleeding into the glaze?
A: Sprinkle sugars immediately after drizzling the glaze so they set in place. Avoid a very wet glaze which will dissolve colors.
Q: Can I add a hidden baby or token like in a traditional King Cake?
A: OPTIONAL: If you include a small token, wrap it in plastic and press it into the dough seam before baking to keep it safe. Note: be sure to warn guests.
Notes
- For an even bake, rotate the sheet halfway through the oven time.
- Use light-colored parchment to avoid over-browning the bottom.
- If you want a glossier finish, brush a thin layer of melted butter over the warm glaze before adding sugars.
- For neat stripes, use small bowls for each sugar color and spoon carefully.
- Serve right away for the best texture; reheated slices should be warm and soft.
Troubleshooting
- Pale top: Bake a few minutes longer or use a quick broil, watching closely.
- Dry cake: Check bake time next time; remove a few minutes earlier and test with a toothpick.
- Soggy center: Make sure ring thickness is even and seams are pinched; avoid overloading with jam or wet fillings.
- Glaze too runny: Add powdered sugar by tablespoons until it thickens.
- Colored sugar bleeding: Use slightly thicker glaze and sprinkle right after drizzling.
- Dough sticking to surface: Flour or chill the dough briefly, or work on parchment.
Final Thoughts
This Easy King Cake gives you the look and flavor of a celebration with very little work. It’s fast, forgiving, and perfect for anyone who wants a festive treat without fuss. Try it warm from the oven and enjoy the simple, sweet comfort it brings.
Conclusion
For a step-by-step visual and another easy version, you can compare methods at Easy King Cake – Mom Loves Baking.
Easy King Cake
Ingredients
For the Base
- 1 can cinnamon rolls Use pre-made, refrigerated type with icing removed or reserved
For the Glaze
- 1 cup powdered sugar Confectioners' sugar is required for a smooth glaze
- 1 tablespoon vanilla extract Pure vanilla gives the best flavor
- 2 tablespoons milk Use any milk you have, dairy or plant-based
To Serve
- to taste colored sugars (purple, green, yellow) For topping; optional for decoration
Instructions
Preparation
- Preheat your oven according to the cinnamon rolls package instructions. Line a baking sheet with parchment paper or lightly grease it.
- Open the cinnamon rolls and unroll each one into long strips of dough. Lay the strips side by side on the prepared sheet, fitting them into a rough ring shape.
- Move the side-by-side strips into a clean ring shape on the sheet. Press and pinch the ends together and tuck any loose edges under.
Baking
- Bake the ring in the preheated oven until golden brown and the center is set, checking a few minutes before the package time.
Glazing
- While the cake cools, whisk together the powdered sugar, vanilla extract, and milk until smooth. Adjust the consistency as needed.
- Drizzle the glaze evenly over the top of the warm cake and immediately sprinkle with colored sugars in stripes.