
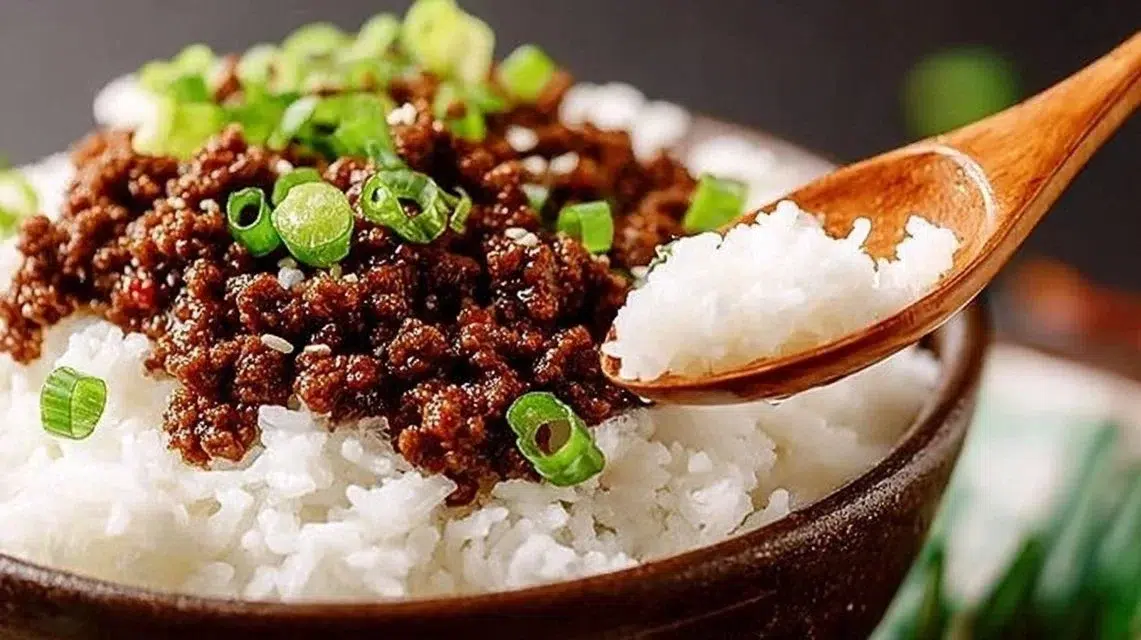
This 20 Minute Korean Ground Beef is a quick, savory weeknight solution with bold umami, a touch of sweet brown sugar, and a toasty sesame finish. The beef cooks fast and stays tender with a slightly sticky, glossy sauce that clings to every bite. Texturally it’s a mix of crumbly ground beef with soft green onion bites — perfect over steaming rice or wrapped in lettuce leaves. This recipe is special because it uses a few pantry staples to deliver big, familiar Korean-inspired flavors in just minutes. For another easy take on the same idea, check this fast Korean ground beef bowl recipe.
Why You’ll Love This 20 Minute Korean Ground Beef
- Ready in about 20 minutes from start to finish — great for busy weeknights.
- Big, balanced flavors: salty soy, warm sesame, mild sweetness, and a touch of heat.
- Uses only one skillet for easy cooking and fast cleanup.
- Flexible: works with rice, noodles, or lettuce wraps.
- Minimal chopping — mostly garlic, ginger, and green onions.
- Family friendly — familiar savory-sweet flavors that kids and adults enjoy.
- Pantry-friendly ingredients you likely already have.
- Easy to scale up or down for meal prep or dinner for two.
What Is 20 Minute Korean Ground Beef?
20 Minute Korean Ground Beef is a simple skillet dish where ground beef is cooked until browned, then tossed in a quick, savory-sweet sauce of soy sauce, brown sugar, sesame oil, garlic, ginger, and a touch of red pepper flakes. The result is a slightly sticky, deeply flavored beef that’s fast to make and very versatile. It tastes savory with a clear soy backbone, mild caramel sweetness, and a faint sesame aroma. The cooking method is stovetop sautéing and simmering; the vibe is comfort-forward and practical — perfect for weeknight dinners, quick lunches, or casual meal prep. Serve it over steamed rice for a classic bowl, spoon it onto warm tortillas for a fusion taco, or wrap it in lettuce for a lighter option.
Ingredients for 20 Minute Korean Ground Beef
For the Base
- 1 lb ground beef
For the Sauce
- 1/4 cup soy sauce
- 2 tablespoons brown sugar
- 1 tablespoon sesame oil
- 3 cloves garlic, minced
- 1 teaspoon ginger, minced
- 1/2 teaspoon red pepper flakes
To Serve
- 3 green onions, sliced (some reserved for garnish)
- Cooked rice, for serving
Ingredient Notes (Substitutions, Healthy Swaps)
- Ground beef: Any grind works. For leaner meat, choose 90/10 or 93/7; expect drier texture and less fat to drain. For richer flavor, 80/20 is ideal.
- Soy sauce: Use low-sodium soy sauce to cut sodium by about half. Tamari works as a gluten-free swap.
- Brown sugar: White sugar or honey work in a pinch; honey will add a slightly different texture and sweetness. Reduce honey slightly if using.
- Sesame oil: Adds toasty aroma. If you don’t have sesame oil, use a neutral oil plus a small sprinkle of toasted sesame seeds as an optional finish.
- Garlic & ginger: Fresh is best for bright flavor; jarred minced garlic or ginger can work but reduce quantity to taste.
- Red pepper flakes: Optional for heat. Use less or omit for no spice, or swap for gochugaru if you have it.
- Rice: Not quantified in the recipe; serve with about 1/2–1 cup cooked rice per person depending on appetite. You can use white, brown, or cauliflower rice for lower carbs.
Step-by-Step Instructions
Step 1 – Brown the beef
- Heat a large skillet over medium heat. Add the ground beef and break it into small pieces. Cook, stirring occasionally, until browned and no longer pink.
- Visual cue: The beef should be uniformly browned with small crisp bits at the edges.
Step 2 – Drain excess fat
- If the skillet has a lot of rendered fat, carefully drain most of it into a heatproof container. Leave a little fat in the pan for flavor.
- Pro cue: Leave about 1 tablespoon of fat to help the sauce coat the beef; drain more if using very fatty meat.
Step 3 – Add sauce ingredients
- Lower the heat and add soy sauce, brown sugar, sesame oil, minced garlic, minced ginger, and red pepper flakes to the pan. Stir well to combine so the sugar dissolves and the beef is evenly coated.
Step 4 – Simmer to thicken
- Let the mixture simmer gently for 2–3 minutes, stirring occasionally, until the sauce thickens slightly and becomes glossy.
- Visual cue: Sauce should reduce and cling to the meat rather than pool in the pan.
Step 5 – Add green onions
- Stir in sliced green onions, reserving a small handful for garnish. Heat for another 30 seconds to blend flavors.
Step 6 – Serve
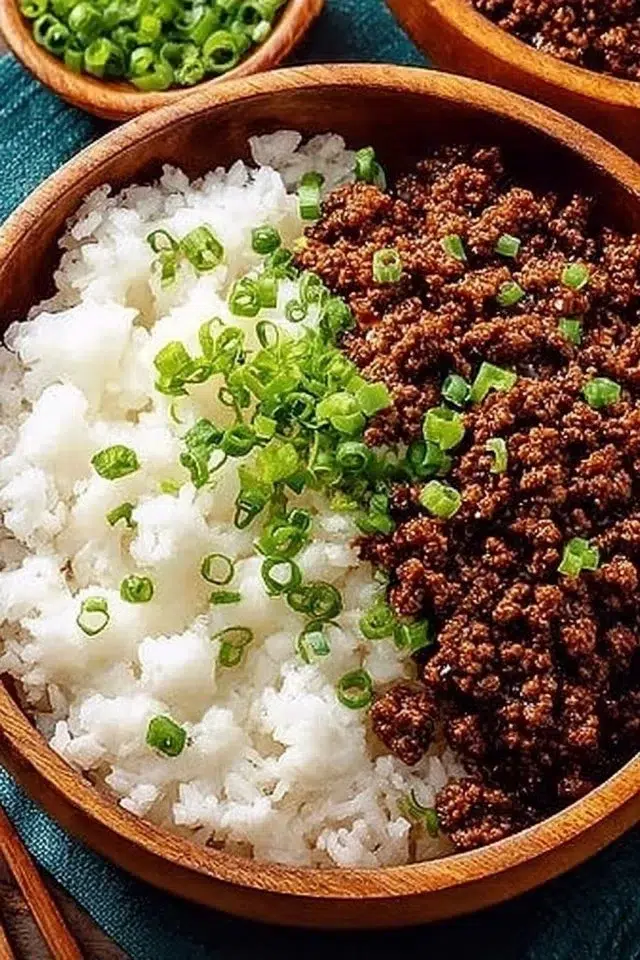
- Remove from heat. Serve the beef over cooked rice and top with the reserved green onions.
- Pro cue: Taste and adjust — add a pinch of salt, another splash of soy, or extra red pepper flakes if needed for your taste.
Pro Tips for Success
- Preheat the skillet well so the beef browns quickly and develops flavor instead of steaming.
- Break the beef into small pieces as it cooks for even browning and quick cook time.
- Drain excess fat if there’s more than a tablespoon to avoid a greasy final dish.
- Keep the heat moderate when adding sauce to prevent burning the sugar. A gentle simmer is best.
- Use fresh garlic and ginger for the best bright aromatics. Minced jarred versions work but are milder.
- For even flavor distribution, stir the sauce into the beef off the heat for 10–15 seconds before returning to low heat.
- If you like more glaze, simmer a little longer; if it gets too thick, add a teaspoon of water to loosen.
- Taste before serving and adjust saltiness with soy sauce or add a squeeze of lime for brightness.
Flavor Variations
- Optional Gochujang Boost: Stir in 1–2 teaspoons gochujang (Korean chili paste) with the sauce for depth and mild heat.
- Optional Veggie Add-In: Toss in thinly sliced bell pepper or shredded carrot during the last 2 minutes of cooking for color and crunch.
- Optional Hoisin Swap: Replace half the brown sugar with 1 tablespoon hoisin for a sweeter, richer sauce (keeps other sauce amounts the same).
- Optional Honey-Garlic: Swap brown sugar for 1 tablespoon honey and reduce heat when simmering to avoid burning the honey.
- Optional Sesame Crunch: Sprinkle toasted sesame seeds on top at the end for extra texture and nutty flavor.
- Optional Low-Sodium Version: Use low-sodium soy sauce and omit the added salt; add an extra splash of sesame oil for aroma.
Serving Suggestions
- Classic bowl: Serve over steamed white rice with sliced cucumbers or kimchi on the side.
- Lettuce wraps: Spoon into butter or romaine lettuce leaves, add sliced scallions and a drizzle of sesame oil.
- Noodle bowl: Toss with warm udon or rice noodles and a handful of spinach.
- Rice cooker meal: Serve on top of plain rice with a soft-boiled egg and a sprinkle of sesame seeds.
- Meal prep: Portion into containers with rice and steamed vegetables for ready lunches.
- Quick taco: Use corn or flour tortillas, top with slaw and a squeeze of lime for fusion tacos.
- Snack or appetizer: Fill small endive leaves or wonton chips for party bites.
Make-Ahead, Storage & Reheating
- Make-ahead: Brown the beef and mix with sauce; cool completely before refrigerating. Prepare rice separately.
- Fridge storage: Store in an airtight container for up to 3–4 days. Keep rice separate for best texture.
- Reheating: Warm gently in a skillet over medium-low heat with a splash of water to loosen the sauce, or microwave covered for 1–2 minutes, stirring halfway. Add fresh green onions after reheating.
- Texture changes: Refrigerated beef can firm up and the sauce may thicken. Reheat slowly and add a teaspoon or two of water to restore a glossy finish.
Storage and Freezing Instructions
- Freezing: This beef freezes well. Cool completely, transfer to a freezer-safe container or bag, and freeze for up to 3 months. Leave a little room for expansion.
- Thawing: Thaw overnight in the refrigerator for best results. Reheat gently on the stove with a splash of water.
- If you prefer not to freeze: Store in the fridge for up to 4 days and use within that time for best flavor and texture.
- Note: Rice does not freeze as well; if freezing portions, separate beef and rice, freeze only the beef, and cook fresh rice when ready to serve.
Nutrition Facts (Per Serving)
Calories | Protein | Carbs | Fat | Fiber | Sodium
—|—:|—:|—:|—:|—:
~350 kcal | ~30 g | ~6 g | ~26 g | ~1 g | ~875 mg
Estimates do not include cooked rice or additional toppings. Estimates vary by brands and portions.
FAQ About 20 Minute Korean Ground Beef
Q: Why is my sauce too watery?
A: The sauce needs a short simmer to reduce. Increase heat slightly and simmer 1–2 more minutes until it thickens and clings to the meat. Drain extra fat first if too much liquid remains.
Q: How do I stop the beef from being greasy?
A: Drain excess fat after browning and leave only about 1 tablespoon in the pan for flavor. Use leaner beef if you prefer less grease.
Q: Can I use turkey or chicken instead of beef?
A: Yes. Ground turkey or chicken works but is leaner. Add 1–2 teaspoons oil when cooking and watch for quicker drying. Adjust seasonings to taste.
Q: How spicy is this recipe?
A: Mild. The recipe uses 1/2 teaspoon red pepper flakes for a gentle heat. Reduce or omit for no spice, or add more for a kick.
Q: Is soy sauce necessary? What can I use instead?
A: Soy sauce provides the core salty, umami flavor. Tamari is a gluten-free alternative. Low-sodium soy sauce reduces salt content.
Q: How many does this recipe serve?
A: It typically serves about 3–4 people as a main when served with rice. Adjust portions based on appetite and sides.
Notes
- Finish with fresh green onions for brightness and color.
- Add a small squeeze of lime or a few drops of rice vinegar at the end to brighten flavors if the dish tastes heavy.
- Toast a few sesame seeds and sprinkle on top for a professional touch.
- For cleaner presentation, serve in shallow bowls with rice on one side and beef on the other.
- If you like a glossy sauce, finish with a teaspoon of water and a quick shake of the pan to emulsify before serving.
- Keep extra soy sauce and brown sugar on hand to quickly adjust sweetness or salt at the end.
Troubleshooting
Problem: Bland flavor.
Fix: Taste and add a splash more soy sauce or a pinch more brown sugar to balance. Fresh garlic and ginger brighten the dish.
Problem: Burnt garlic or sugar.
Fix: Lower the heat as soon as you add the sauce. If it burns, discard and start fresh — burnt sugar tastes bitter.
Problem: Overcooked, dry beef.
Fix: Use a slightly fattier grind or add a splash of water or broth while reheating to restore moisture. Avoid overcooking initially; remove from heat once no pink remains.
Problem: Sauce separates or looks greasy.
Fix: Drain excess fat from browned beef before adding the sauce. Reheat gently and stir to recombine; add a teaspoon of water if needed to re-emulsify.
Problem: Too salty.
Fix: Add a little brown sugar, a squeeze of lime, or more rice to dilute the saltiness. Low-sodium soy sauce is recommended if salt is a concern.
Problem: Not enough glaze.
Fix: Simmer a bit longer to reduce the sauce, or add a small cornstarch slurry (1 tsp cornstarch + 1 tbsp water) and simmer until glossy — optional.
Final Thoughts
This 20 Minute Korean Ground Beef is reliable, fast, and full of satisfying umami flavor — a go-to for busy nights and simple meal prep. Its flexible nature makes it easy to adapt while staying true to the quick, savory-sweet profile that makes it so appealing. For another healthy take and more ideas, see this helpful resource: Korean Ground Beef – Healthy Recipes Blog.