
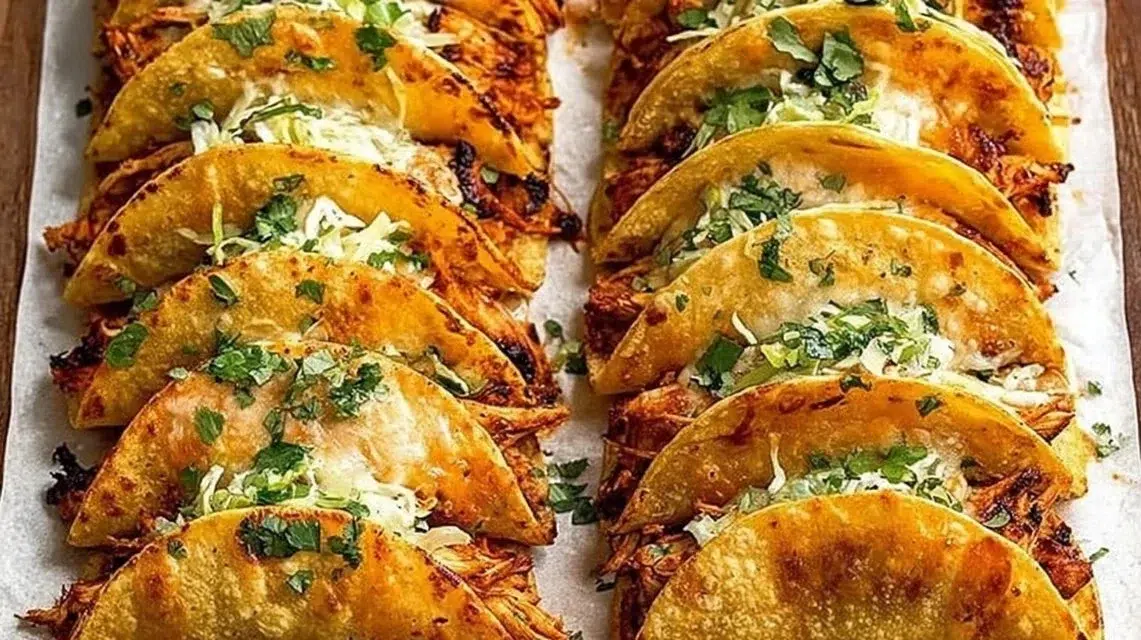
A crisp little bite with warm seasoned chicken and melted cheese, these mini baked chicken tacos are a fast way to get big flavor from a few simple parts. The corn tortillas turn golden and slightly crunchy while the shredded chicken stays tender and juicy under a blanket of cheese. You get a mix of toasted corn aroma, savory taco spice, and gooey cheese in every mini taco. They are easy to make for a weeknight, party tray, or quick snack — and they pair well with salsa, lime, or a simple slaw. For a printable version and quick reference, see the mini baked chicken tacos recipe.
Why You’ll Love This Mini Baked Chicken Tacos
- Hands-off oven bake: assemble, spray, and bake — very little active work.
- Crispy tortilla edges and soft inner filling make a great texture contrast.
- Uses cooked shredded chicken so prep is fast, and leftovers work well.
- Taco seasoning adds bold, familiar flavors without many ingredients.
- Easy to scale: make a few for a snack or a full sheet for a crowd.
- Kid-friendly and easy to serve at parties or game nights.
- Minimal tools and pantry-friendly items make this low-fuss.
- Quick to reheat — great for lunch boxes or last-minute dinners.
What Is Mini Baked Chicken Tacos?
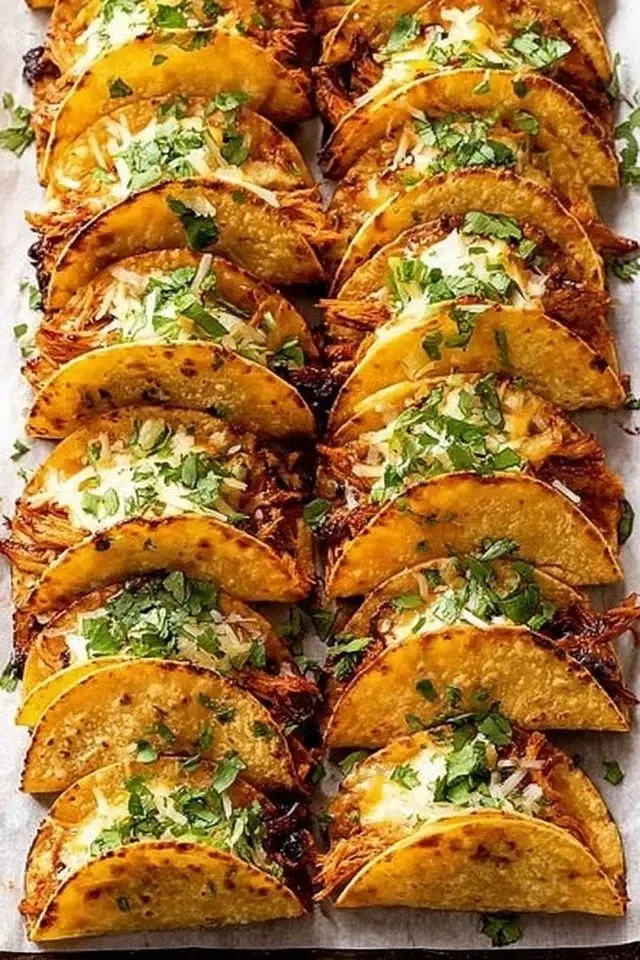
Mini baked chicken tacos are small, filled corn tortillas that are baked in the oven until the shells crisp and the cheese melts. Each tortilla holds a spoonful of shredded cooked chicken tossed with taco seasoning, then topped with shredded cheese. The result is a compact taco with a crisp shell edge and a warm, cheesy center. The cooking method — oven baking at a fairly high temperature — produces more even, hands-off crisping than pan frying and lets you cook many at once. The vibe is casual comfort food: a simple weeknight dinner, easy party finger food, or a warm appetizer for brunch. They taste savory, mildly spiced, and cheesy, and they pair well with bright, fresh sides.
Ingredients for Mini Baked Chicken Tacos
For the Tacos
- Street taco corn tortillas
- Cooked chicken, shredded
- Taco seasoning
- Shredded cheese
- Cooking spray or oil
(These are the base items used in the recipe. Optional toppings and sides are listed later.)
Ingredient Notes (Substitutions, Healthy Swaps)
- Cooked chicken: Use rotisserie chicken, leftover roast chicken, or shredded poached chicken. If you have chicken breast or thighs, cook and shred them first.
- Taco seasoning: Use a store-bought packet or make a small mix of chili powder, cumin, garlic powder, onion powder, paprika, salt, and black pepper. Use less salt if you’re watching sodium.
- Shredded cheese: Cheddar, Monterey Jack, Colby, or a Mexican blend all work. For lower fat, use a reduced-fat cheese, but expect slightly less melt and richness.
- Street taco corn tortillas: Look for small (street taco) size corn tortillas for correct proportions. If you must, small flour tortillas work as an option, but baking time and crisping will differ.
- Cooking spray or oil: Spray helps crisp without adding too much oil. Brushing a little oil gives a richer crunch and flavor.
Optional swaps (keep these optional and realistic):
- For a lower-carb option, use small lettuce cups and warm briefly — texture will be different.
- For dairy-free, skip the cheese or use a plant-based shredded cheese alternative, but texture and melt will change.
Step-by-Step Instructions
Step 1 – Preheat the oven
- Preheat the oven to 400°F (200°C).
- Heat is important so the tortillas crisp quickly and cheese melts without drying out the filling.
- Visual cue: oven should be fully up to temperature before you put the sheet in.
Step 2 – Season the chicken
- In a bowl, mix the shredded cooked chicken with taco seasoning until evenly coated.
- Use enough seasoning to flavor the chicken but not overload it; start with a tablespoon and taste a small bit to adjust.
- Visual cue: chicken looks evenly speckled with spice and smells aromatic.
Step 3 – Fill the tortillas
- Take corn tortillas and fill each with a spoonful of the seasoned chicken.
- Press the filling gently into the center so the taco holds shape on the sheet.
- Visual cue: each tortilla should have a modest mound of chicken, not overstuffed, so edges crisp.
Step 4 – Add cheese
- Sprinkle shredded cheese on top of the chicken in each tortilla.
- Keep cheese amounts consistent so all tacos melt evenly.
Step 5 – Arrange and oil
- Place the filled tortillas on a baking sheet in a single layer.
- Spray lightly with cooking spray or brush with oil to help the shells crisp and brown.
Step 6 – Bake
- Bake in the preheated oven for about 10–15 minutes or until the tortillas are crispy and the cheese is melted.
- Pro cue: check at 10 minutes; you want golden edges and melted cheese but not burned tortillas. Extra time gives more crunch.
Step 7 – Serve
- Remove from oven and serve warm with any optional toppings you like.
- Visual cue: cheese should be melted and slightly bubbly, and tortilla edges golden.
Pro Tips for Success
- Use small tortillas: Street taco-sized corn tortillas cook evenly and yield the right bite size.
- Dry the tortillas briefly: If tortillas feel damp, warm them 30–60 seconds in a dry skillet or microwave wrapped in a towel to remove excess moisture.
- Even spacing matters: Give each mini taco room on the sheet so heat circulates and shells crisp.
- Don’t overfill: Overstuffed tortillas take longer and can stay soft instead of crisping.
- Rotate the sheet: If your oven has hot spots, rotate the pan halfway through baking for even browning.
- Watch the time: Start checking at 10 minutes to avoid burning — ovens vary.
- Use a light spray of oil: A thin coat crisps the shell without making it greasy.
- Shred chicken finely: Smaller shreds heat and blend with seasoning better than large chunks.
Flavor Variations
- Optional: Add a squeeze of lime and a pinch of fresh cilantro to the chicken before filling for a bright finish.
- Optional: Mix in a small spoonful of salsa or pico de gallo into the shredded chicken for extra moisture and flavor; keep it light so tortillas still crisp.
- Optional: Make them smoky by stirring a dash of smoked paprika into the taco seasoning.
- Optional: For a creamy twist, fold a tablespoon of sour cream into the chicken mix before filling (adds richness).
- Optional: Add finely chopped roasted peppers or onions to the filling for more texture and flavor — keep quantities small to avoid sogginess.
- Optional: Use pepper jack or a smoked cheddar for more bite and depth.
Serving Suggestions
- Serve with simple sides: chips and salsa, guacamole, or a fresh green salad.
- Make a build-your-own bar: set out lime wedges, onion, cilantro, salsa, and sliced avocado as optional toppings.
- For parties: place mini tacos on a tray with small bowls of toppings so guests can finish their own.
- For a full meal: add rice and beans on the side to make it heartier.
- For a light lunch: serve 3–4 mini tacos with a crisp slaw and a lime wedge.
- For kids: offer a mild cheese and a side of cut veggies or fruit for a balanced plate.
Make-Ahead, Storage & Reheating
- Make-ahead: Prepare the seasoned shredded chicken up to 3 days ahead and store in an airtight container in the fridge. Keep tortillas and cheese separate until assembly.
- Assembly ahead: You can fill the tortillas and place them on a lined baking sheet, cover tightly with plastic wrap, and bake within 24 hours. If assembled longer, shells may soften.
- Storage duration: Store cooked mini baked tacos in an airtight container in the fridge for up to 3 days.
- Reheating best practice: Reheat in a 350°F (175°C) oven or toaster oven for 6–8 minutes until warmed and the shell crisp returns. Avoid microwave if you want crisp shells; microwave will make them soft.
- Texture changes: Refrigerated tacos can lose some crispness. Reheating in the oven restores crisp edges best.
Storage and Freezing Instructions
- Freezing assembled baked tacos: Freezing baked mini tacos is not ideal because the tortilla texture changes and the cheese can become grainy after thawing. If you freeze, do so only for short-term and expect softer shells.
- Better option: Freeze the seasoned shredded chicken separately in a freezer-safe bag for up to 3 months. Thaw overnight in the fridge and assemble fresh when ready to bake.
- To freeze cooked chicken: cool quickly, place in portions, squeeze out air, and label with date.
- Thawing: Thaw overnight in the refrigerator before reheating and assembling into tortillas.
- If you must freeze assembled tacos: flash-freeze on a sheet, then transfer to a bag. Reheat from frozen in a hot oven (375°F) for 12–18 minutes, watching closely for uneven heating and sogginess.
Nutrition Facts (Per Serving)
Calories | Protein | Carbs | Fat | Fiber | Sodium
— | —: | —: | —: | —: | —:
~240 kcal | 18 g | 14 g | 10 g | 1.5 g | 520 mg
Estimates vary by brands and portions.
FAQ About Mini Baked Chicken Tacos
Q: Why are my tortillas not crisping?
A: They may be too wet or overcrowded. Ensure the oven is fully preheated, use a light oil spray, and give each taco space on the sheet.
Q: Can I use raw chicken?
A: The recipe calls for cooked shredded chicken. If using raw, cook it fully first, shred, season, and then proceed.
Q: How do I keep the tacos from getting soggy?
A: Don’t overfill and avoid wet fillings like heavy salsa inside before baking. Add wetter toppings after baking.
Q: Can I make these gluten-free?
A: Use certified gluten-free corn tortillas and check that your taco seasoning has no gluten-containing additives.
Q: What cheese melts best?
A: Monterey Jack, cheddar, Colby, or a Mexican blend melt well. Pre-shredded cheese often has anti-caking agents that reduce melt slightly; shredding block cheese yourself gives better melt.
Q: How long will leftovers last?
A: Stored in the fridge in an airtight container, up to 3 days. Reheat in the oven for best texture.
Notes
- Use a rimmed baking sheet to catch any cheese drips and make cleanup easy.
- If you like a little char, broil for 1 minute at the end — watch closely to avoid burning.
- Warm tortillas slightly before filling if they feel stiff; this makes folding easier.
- For cleaner serving, place tacos on a wire rack on the sheet for even air circulation and crisping.
- If serving a crowd, work in batches keeping finished tacos warm on a low oven setting (200°F) until serving.
Troubleshooting
- Bland flavor: Increase taco seasoning by small amounts or add a pinch of salt to the chicken. A squeeze of lime at the end brightens flavors.
- Cheese not melting: Your oven may be too cool or the cheese is pre-shredded with anti-caking agents. Use a higher oven temp briefly or a more meltable cheese.
- Tortillas burning on edges: Reduce bake time by a minute or two, or move the tray to a lower rack.
- Tacos too soggy: Reduce wet toppings before baking. Add salsa or avocado only after baking.
- Filling falling out: Don’t overfill and press the filling gently into the center so it stays compact during baking.
- Uneven browning: Rotate the pan halfway through and avoid crowding the baking sheet.
Final Thoughts
Mini baked chicken tacos are a simple, tasty way to turn leftover or rotisserie chicken into a crowd-pleasing snack or quick meal. They crisp up in minutes, are easy to scale, and let you add fresh toppings at the last minute for bright flavor.
Conclusion
For a quick variation and more tips, check out this helpful guide on 20 Minute Mini Baked Chicken Tacos – Midwest Foodie.