
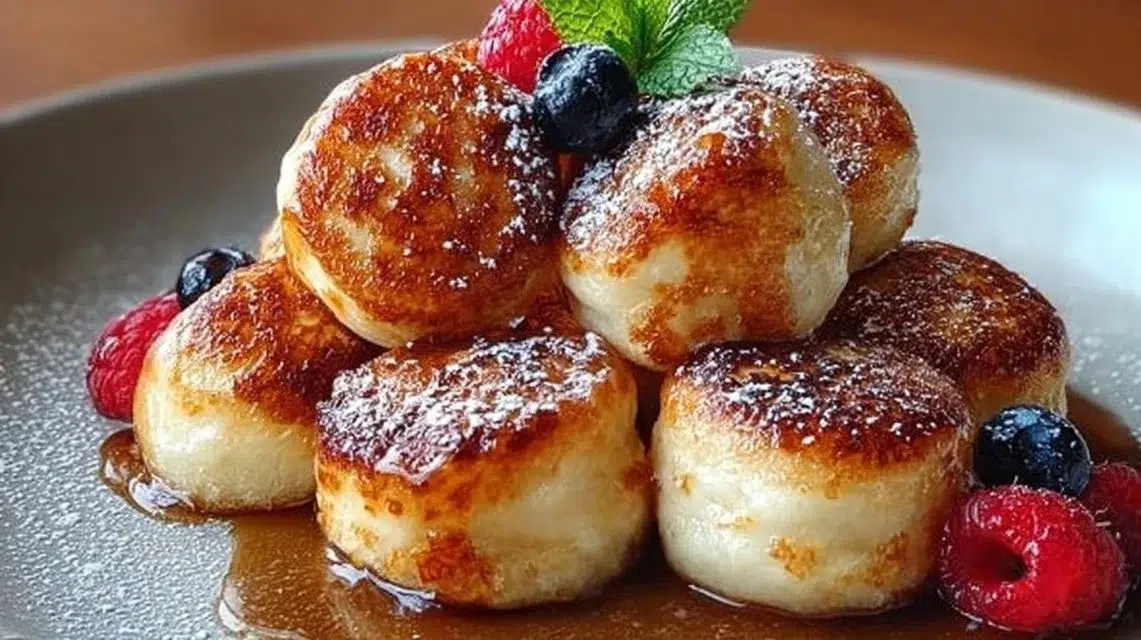
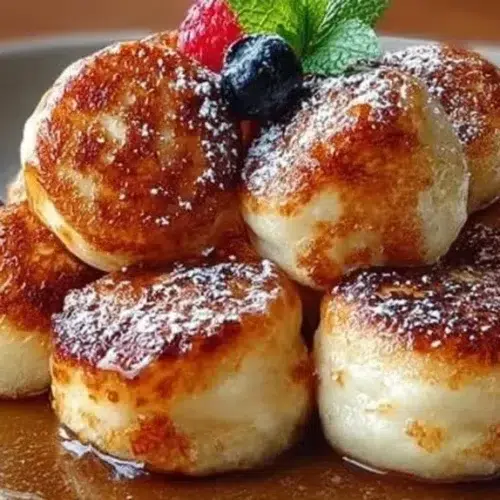
Fluffy pancake balls are small, golden bites with a tender, pillowy interior and a lightly crisp outside. They taste like classic pancakes but in a fun, bite-sized form that is perfect for dipping and sharing. The texture is soft and airy because of the baking powder and gentle mixing, while a bit of melted butter and vanilla adds warm flavor. This recipe is quick and easy — no fancy tools, just a bowl, a whisk, and a non-stick skillet. Serve them warm with maple syrup, a dusting of powdered sugar, or fresh berries for a simple, crowd-pleasing treat. If you like a taller, softer bite, try techniques used for other airy pancakes like fluffy Japanese soufflé pancakes for inspiration.
Why You’ll Love This Fluffy Pancake Balls
- Bite-sized and fun to eat — perfect for kids and parties.
- Quick to make with pantry staples you likely already have.
- Light, airy interior with a gentle crisp on the outside.
- Easy to customize with toppings or mix-ins.
- One-bowl wet/dry method keeps prep simple and fast.
- Great for brunch, snacks, or a weekend breakfast project.
- Minimal equipment — just a skillet and a scoop or tablespoon.
- Quick cook time: ready in about 15–20 minutes from start to finish.
What Is Fluffy Pancake Balls?
Fluffy pancake balls are small, round pancakes made by dropping scoop-sized portions of batter into a hot, greased skillet and cooking them until golden on both sides. They taste like classic pancakes but are smaller and more playful — tender inside, slightly crisp outside, with a mild sweetness from sugar and warm notes from vanilla. The baking powder lifts the batter, creating a soft, fluffy texture. The cooking method is pan-frying on medium heat, which gives each ball an even golden color. The vibe is casual comfort food: perfect for weekend brunch, quick breakfasts, or snack time when you want something simple and satisfying.
Ingredients for Fluffy Pancake Balls
For the Base
- 1 cup all-purpose flour
- 2 tablespoons sugar
- 1 tablespoon baking powder
- 1/4 teaspoon salt
For the Wet Mix
- 1 cup milk
- 1 egg
- 2 tablespoons melted butter
- 1 teaspoon vanilla extract
For Cooking
- Cooking spray or oil for frying
Ingredient Notes (Substitutions, Healthy Swaps)
- Flour: You can use whole wheat flour for a nuttier flavor, but reduce to 3/4 cup and add 1/4 cup all-purpose if texture is too dense (optional).
- Sugar: Swap granulated sugar for a natural sweetener like honey or maple syrup, but cut the milk by 1–2 tablespoons if you use liquid sweeteners. This is optional.
- Baking powder: Make sure it’s fresh. If expired, replace with a 3:1 mix of cream of tartar and baking soda (not ideal, but works in a pinch).
- Milk: Use any milk — cow’s milk, unsweetened almond milk, or oat milk work well. For richer flavor, use whole milk.
- Egg: For an egg-free option, try a flax egg (1 tablespoon flaxseed meal + 3 tablespoons water, let sit 5 minutes) — optional, but texture will be slightly different.
- Butter: You can use melted coconut oil or neutral oil instead of butter for a dairy-free option.
- Cooking fat: Use a neutral oil like canola or vegetable oil, or non-stick cooking spray for easier flipping.
Step-by-Step Instructions
Step 1 – Mix the dry ingredients
In a mixing bowl, whisk together 1 cup all-purpose flour, 2 tablespoons sugar, 1 tablespoon baking powder, and 1/4 teaspoon salt until well combined.
Visual cue: The dry mix should look even with no pockets of baking powder or sugar.
Step 2 – Whisk the wet ingredients
In another bowl, whisk 1 cup milk, 1 egg, 2 tablespoons melted butter, and 1 teaspoon vanilla extract until smooth.
Step 3 – Combine wet and dry
Pour the wet ingredients into the dry ingredients. Stir gently until just combined — small lumps are okay. Do not overmix.
Step 4 – Heat the skillet
Heat a non-stick skillet over medium heat. Lightly grease the surface with cooking spray or a thin layer of oil. Let the skillet warm for about 1–2 minutes so it holds steady heat.
Step 5 – Scoop and cook
Using a tablespoon or a small cookie scoop, drop batter into the skillet to form small balls about 1 to 1.5 inches wide. Leave space between each so you can flip them. Cook for 2–3 minutes on the first side until small bubbles form and the edges set, then flip and cook another 2–3 minutes until golden brown.
Pro cue: Flip once when edges look set and the underside is golden; avoid flipping repeatedly to keep them fluffy.
Step 6 – Finish and serve
Remove cooked pancake balls from the skillet and keep warm on a plate covered with a clean towel if making batches. Serve warm with favorite toppings like syrup, fresh fruit, or a dusting of powdered sugar.
Pro Tips for Success
- Use medium heat: Too hot, and the outside browns before the inside cooks; too low, and they spread too thin.
- Don’t overmix the batter: Stop when dry streaks disappear. Small lumps give a lighter texture.
- Let the skillet preheat: A properly warmed pan helps the balls puff and form a golden crust.
- Use a small scoop or tablespoon for even sizes: Uniform size ensures even cooking.
- Grease lightly between batches: Prevent sticking but avoid too much oil, which can fry instead of brown.
- Keep cooked balls warm: Place finished balls on a plate in a low oven (200°F / 95°C) if making many batches.
- Test one first: Cook a single ball to check heat and texture before making the whole batch.
- Fresh baking powder matters: Replace if older than 6 months for best lift.
Flavor Variations
- Optional: Blueberry lemon — fold in 1/4 cup fresh blueberries and 1 teaspoon lemon zest to the batter.
- Optional: Cinnamon sugar — add 1/2 teaspoon ground cinnamon to the dry mix and roll hot balls in cinnamon sugar.
- Optional: Chocolate chip — fold in 2 tablespoons mini chocolate chips for a kid-friendly version.
- Optional: Banana — mash 1/4 cup ripe banana and mix into the wet ingredients; reduce milk by 2 tablespoons if batter seems thin.
- Optional: Savory herb — omit sugar and vanilla, add 2 tablespoons grated cheese and 1 teaspoon chopped chives for a savory snack.
- Optional: Nut butter swirl — drop a very small dollop (1/2 teaspoon) of peanut or almond butter in the center of each scoop before cooking for a creamy center.
Serving Suggestions
- Serve with warm maple syrup and a side of fresh berries.
- Make a dipping board with honey, jam, and chocolate sauce for a fun party platter.
- Pair with scrambled eggs and bacon or sausage for a full breakfast plate.
- Top with Greek yogurt and sliced bananas for a lighter, protein-rich option.
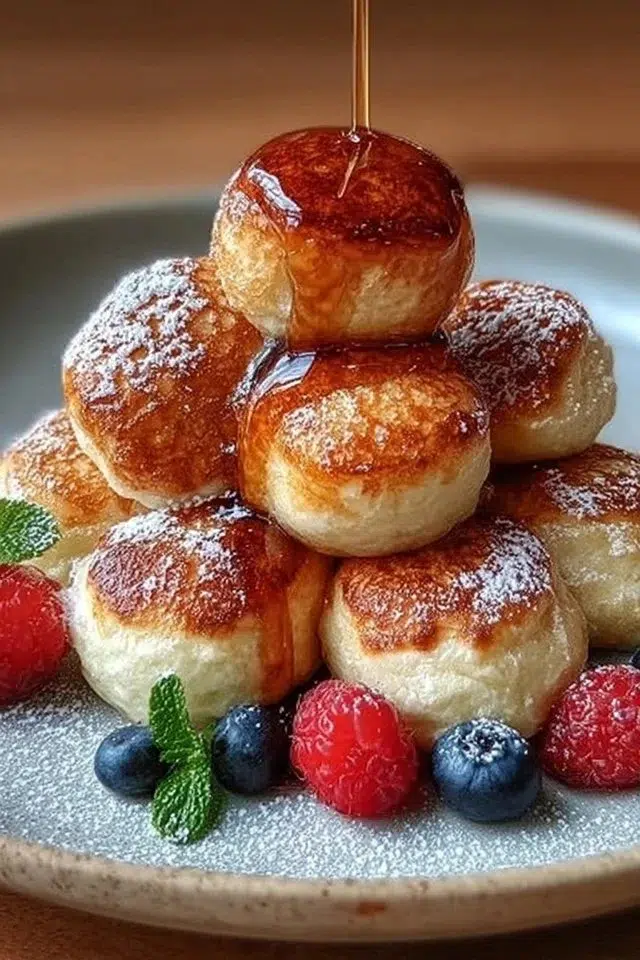
- Use them as a pancake tower: stack 4–6 and drizzle with syrup and a pat of butter.
- Serve at brunch buffets — guests can pick a few and choose their favorite dips.
Make-Ahead, Storage & Reheating
- Make-ahead: You can mix the dry ingredients and store them in an airtight container for up to 1 week. Keep wet ingredients separate and combine just before cooking.
- Fridge storage: Store cooked pancake balls in an airtight container in the refrigerator for up to 3 days. They will soften slightly but remain tasty.
- Reheating: Reheat in a skillet over low heat for a few minutes, turning so all sides warm evenly. You can also microwave briefly (10–20 seconds per serving) but texture will be softer.
- Texture changes: Refrigeration can make them denser; reheat gently in a skillet to restore a bit of crispness.
Storage and Freezing Instructions
- Freezing: Freeze cooked pancake balls in a single layer on a baking sheet until firm (about 1 hour), then transfer to a freezer bag or airtight container. Store up to 2 months.
- Thawing and reheating: Reheat from frozen in a preheated 350°F (175°C) oven for 8–10 minutes, or in a skillet over low heat until warmed through. Avoid microwave reheating from frozen for best texture.
- If you prefer not to freeze: Keep in the fridge and eat within 3 days. Freezing preserves them better than long fridge storage.
Nutrition Facts (Per Serving)
Calories | Protein | Carbs | Fat | Fiber | Sodium
—|—:|—:|—:|—:|—:
150 | 4 g | 20 g | 6 g | 0.5 g | 250 mg
Estimates vary by brands and portions.
FAQ About Fluffy Pancake Balls
Q: Why are my pancake balls flat instead of fluffy?
A: Likely overmixed batter or expired baking powder. Mix only until just combined and use fresh baking powder.
Q: Why do they burn on the outside before cooking inside?
A: The skillet is too hot. Lower heat to medium and test one ball first.
Q: My batter is too thick or too thin — what do I do?
A: If too thick, add milk 1 tablespoon at a time. If too thin, add 1 tablespoon flour at a time until scoopable.
Q: Can I make them without eggs?
A: Yes, use a flax egg (1 tbsp flax + 3 tbsp water). Texture will be slightly different and less lift.
Q: How do I keep them warm while finishing a batch?
A: Place finished balls on a baking sheet in a 200°F (95°C) oven covered loosely with foil.
Q: Can I use a non-stick spray instead of oil or butter?
A: Yes, cooking spray works well, but reapply lightly between batches to prevent sticking.
Notes
- For even browning, rotate the skillet halfway through a batch so hot spots don’t overcook some balls.
- Use a small ice cream scoop for perfectly uniform balls.
- If you like a richer flavor, brown the butter before melting and cool slightly before mixing into the wet ingredients.
- Dust with powdered sugar right before serving for a classic look.
- Serve on a warm plate to keep them from cooling too fast.
Troubleshooting
- Bland flavor: Add an extra 1/4 teaspoon vanilla or increase sugar by 1 teaspoon.
- Overcooked outside, raw inside: Lower the heat and cook slightly longer; test one ball first.
- Batter too runny: Stir in 1 tablespoon flour at a time until it holds shape.
- Sticking to pan: Clean and re-grease the skillet; ensure it is properly preheated and lightly greased.
- Soggy texture after refrigeration: Reheat in a skillet to restore some crispness; avoid microwaving if possible.
- No rise: Check expiration date on baking powder; replacing it usually fixes the issue.
Final Thoughts
These fluffy pancake balls are an easy, fun twist on classic pancakes that work for busy mornings and relaxed weekends alike. Small changes to mix-ins or toppings let you make them sweet or savory, and simple technique keeps them light and tender. Try the quick tips here to get consistent results and enjoy a warm, shareable breakfast.
Conclusion
If you want a tidy background on the Danish-style pancake ball technique for more shape and lift ideas, see this helpful resource on Æbleskiver (Danish Pancake Balls) – Scandinavian Cookbook.
Fluffy Pancake Balls
Ingredients
For the Base
- 1 cup all-purpose flour
- 2 tablespoons sugar
- 1 tablespoon baking powder
- 1/4 teaspoon salt
For the Wet Mix
- 1 cup milk
- 1 piece egg
- 2 tablespoons melted butter
- 1 teaspoon vanilla extract
For Cooking
- Cooking spray or oil for frying
Instructions
Preparation
- In a mixing bowl, whisk together all-purpose flour, sugar, baking powder, and salt until well combined.
- In another bowl, whisk milk, egg, melted butter, and vanilla extract until smooth.
- Pour the wet ingredients into the dry ingredients. Stir gently until just combined; small lumps are okay. Do not overmix.
Cooking
- Heat a non-stick skillet over medium heat. Lightly grease the surface with cooking spray or a thin layer of oil.
- Using a tablespoon or a small cookie scoop, drop batter into the skillet to form small balls about 1 to 1.5 inches wide. Leave space between each so you can flip them.
- Cook for 2–3 minutes on the first side until small bubbles form and the edges set, then flip and cook another 2–3 minutes until golden brown.
- Remove cooked pancake balls from the skillet and keep warm on a plate covered with a clean towel if making batches. Serve warm with toppings.