
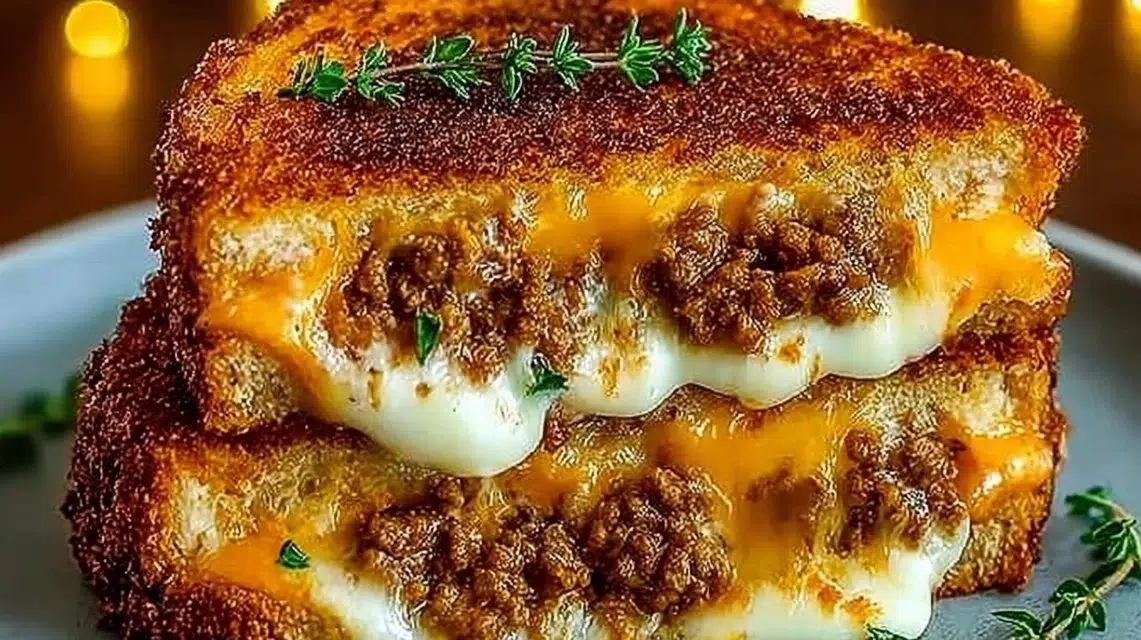
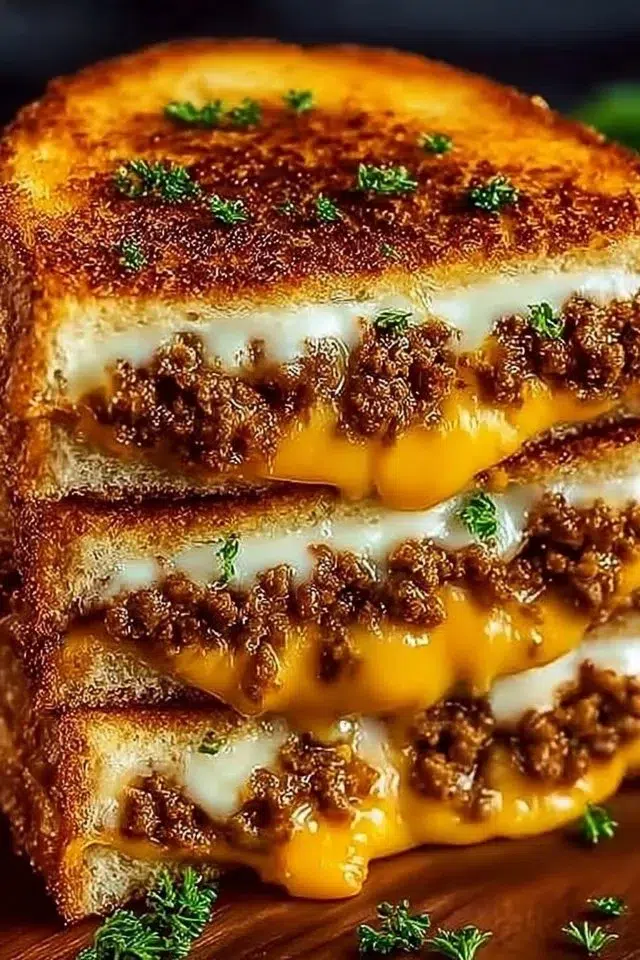
This Ultimate Cheesy Ground Beef Melt is a hot, savory sandwich that pairs juicy, seasoned ground beef with melty cheese and crisp, buttered bread. The beef is browned with soft onion and garlic, then piled onto toasted bread and grilled until the cheese oozes and the crust is golden. The texture is a pleasing contrast: tender meat, creamy melted cheese, and a crisp outer crust. It’s a simple skillet-ready meal that comes together in about 20–30 minutes, perfect for weeknights or a lazy weekend lunch. Try serving it with pickles or a side salad for a quick, satisfying plate. For a printable version and extra photos, see the Ultimate Cheesy Ground Beef Melt recipe page.
Why You’ll Love This The Ultimate Cheesy Ground Beef Melt
- Fast to make: ready in under 30 minutes from stove to table.
- Big, bold flavor: seasoned beef with garlic and onion gives deep savory notes.
- Gooey cheese: melts into the beef for creamy, comforting bites.
- Simple pantry ingredients: uses basic items you likely have on hand.
- Flexible toppings: add pickles, mustard, or lettuce to change the profile.
- Hands-on control: you can make it as juicy or as crispy as you like.
- Great for leftovers: makes a hearty next-day lunch when reheated properly.
What Is The Ultimate Cheesy Ground Beef Melt?
The Ultimate Cheesy Ground Beef Melt is a grilled sandwich built on seasoned ground beef and slices of cheese tucked between toasted bread. It tastes rich and savory, with the deep beef flavor balanced by sweet onion, fragrant garlic, and the smooth melt of cheese. What makes it special is its simplicity: no complex sauces, just good technique—browning the beef, toasting the bread, and grilling the buttered sandwich to a crisp, golden finish. The cooking method is stove-top skillet assembly and pan-grilling, which gives a diner-style patty-melt vibe. It’s classic comfort food, ideal for weeknight dinners, quick lunches, or a casual brunch.
Ingredients for The Ultimate Cheesy Ground Beef Melt
Main ingredients
- 1 lb ground beef
- 1 onion, diced
- 2 cloves garlic, minced
- 1 teaspoon seasoning (e.g., salt, pepper, paprika)
- 4 slices of cheese (e.g., cheddar, American)
- 4 slices of bread
- 2 tablespoons butter
Optional toppings
- Optional toppings (e.g., pickles, mustard, lettuce)
Ingredient Notes (Substitutions, Healthy Swaps)
- Ground beef: Use leaner beef (90/10) for less fat, or 80/20 for juicier results. Turkey or chicken can replace beef, but expect a milder flavor.
- Onion: Yellow or white onions work best for browning; use red onion for a slightly sharper taste.
- Garlic: Fresh minced garlic gives the best aroma; garlic powder can work in a pinch—use about 1/4 teaspoon.
- Seasoning: The recipe lists a single teaspoon; split it into 1/2 teaspoon salt plus 1/2 teaspoon pepper or paprika for balanced heat. Add a pinch of cayenne if you want a kick.
- Cheese: Cheddar or American melts well. Swiss or provolone are fine swaps for a milder, nutty tone. Avoid very hard cheeses unless shredded first.
- Bread: Any sandwich bread works. For a heartier sandwich, use sourdough or Texas toast. For lower carbs, use a thin, firm bread or a low-carb option.
- Butter: Use olive oil or mayonnaise on the outside of the bread if you prefer a different crust finish. Margarine works too.
Step-by-Step Instructions
Step 1 – Cook the beef and onion
Heat a skillet over medium heat. Add the ground beef and diced onion. Cook, breaking the beef into pieces, until the beef is browned and the onion is translucent, about 6–8 minutes. Drain excess fat if needed.
Visual cue: The beef should be browned with no pink bits and the onion should look soft and clear.
Step 2 – Add garlic and seasoning
Push the beef to one side or create a small well. Add the minced garlic and the 1 teaspoon seasoning to the beef. Cook for an additional minute, stirring so the garlic does not burn and the seasoning coats the meat evenly.
Step 3 – Toast the bread
Lightly toast the slices of bread in a toaster or under a broiler until golden. You want a light toast so the bread holds up to the filling but still absorbs some butter.
Step 4 – Build the sandwiches
Layer the warm beef mixture evenly over one slice of toasted bread. Top the beef with a slice of cheese, then place another slice of toasted bread on top to form a sandwich.
Step 5 – Butter and grill
Spread butter on the outside of each sandwich. Heat the same skillet over medium-low heat. Grill the sandwiches for about 3–4 minutes per side, pressing gently with a spatula, until each side is golden brown and the cheese is melted.
Pro cue: Keep the heat medium-low so the bread browns slowly and the cheese melts fully without burning the crust.
Step 6 – Rest and serve
Remove the sandwiches from the skillet, let them sit for a minute, then slice in half and serve with any optional toppings like pickles, mustard, or lettuce.
Pro Tips for Success
- Use medium-low heat when grilling to allow cheese to melt without burning bread.
- Drain excess fat after browning the beef to prevent greasy sandwiches.
- Dice the onion small so it cooks evenly with the ground beef in 6–8 minutes.
- Toasting bread first helps it hold up to the moist beef and keeps the sandwich from getting soggy.
- Press gently with a spatula while grilling to get even contact and a good crust.
- If cheese isn’t melting, cover the skillet with a lid for 30–60 seconds to trap heat.
- Taste and adjust seasoning after cooking the beef—add a pinch more salt or pepper if needed.
Flavor Variations
- Optional BBQ Melt: Mix 2 tablespoons BBQ sauce into the cooked beef before assembling for a smoky-sweet twist.
- Optional Tex-Mex: Add 1/4 cup chopped jalapeño and 1/2 teaspoon cumin to the beef; swap cheddar for pepper jack.
- Optional Mushroom & Onion: Sauté 1 cup sliced mushrooms with the onion for an earthier flavor.
- Optional Italian Melt: Stir in a pinch of dried oregano and swap cheese for provolone; add a smear of marinara for dipping.
- Optional Breakfast Style: Top with a fried egg after grilling for a hearty brunch sandwich.
- Optional Veggie Boost: Add fresh spinach or shredded lettuce after grilling for a bit of freshness.
Serving Suggestions
- Serve with dill pickles and mustard on the side for a classic diner feel.
- Pair with a simple green salad dressed with lemon vinaigrette to cut the richness.
- Offer potato chips, fries, or sweet potato fries for a casual meal.
- For dipping, serve with warm marinara or a simple ketchup-mayo mix.
- Plate with raw carrot and celery sticks for crunch and color.
- Bring to a picnic: wrap sandwiches in foil to keep warm and the crust intact.
Make-Ahead, Storage & Reheating
- Make-ahead: Cook the beef mixture up to 24 hours ahead and keep it refrigerated in an airtight container. Toast bread and assemble just before grilling.
- Storage duration: Keep cooked sandwiches or beef mixture in the fridge for up to 3–4 days. Store assembled but ungrilled sandwiches wrapped tightly for 1–2 days.
- Reheating best practices: Reheat in a skillet over low heat, flipping occasionally until warmed and cheese is soft. Alternatively, reheat in a toaster oven at 350°F (175°C) for 8–10 minutes. Avoid microwaving if possible, as it can make the bread soggy and the texture uneven.
- Texture changes: Refrigeration will firm up the beef and make cheese set. Reheat slowly to restore creaminess and to crisp the bread.
Storage and Freezing Instructions
- Freezing assembled grilled sandwiches is not recommended because the bread can become gummy after thawing. Instead, freeze the cooked beef mixture in a freezer-safe container for up to 3 months.
- Thaw overnight in the fridge, reheat the beef in a skillet, then assemble and grill fresh bread for best texture.
- If you must freeze assembled sandwiches, wrap tightly in foil and freeze up to 1 month. Reheat from frozen in a 350°F (175°C) oven for 20–30 minutes, checking to avoid dried-out edges.
Nutrition Facts (Per Serving)
Calories | Protein | Carbs | Fat | Fiber | Sodium
— | — | — | — | — | —
Approx. 550 kcal | 28 g | 30 g | 33 g | 2 g | 720 mg
Estimates vary by brands and portions.
FAQ About The Ultimate Cheesy Ground Beef Melt
Q: Why is my sandwich soggy?
A: Sogginess usually comes from too-wet filling or un-toasted bread. Drain excess fat, toast the bread, and assemble just before grilling.
Q: How do I know when the beef is fully cooked?
A: The beef is done when it’s no longer pink and reaches an even brown color. Use a quick cut to check for any pink inside.
Q: Can I use shredded cheese instead of sliced?
A: Yes. Shredded cheese melts faster and can cover the beef more evenly. Just use about 1/2 cup per sandwich.
Q: My bread burns before the cheese melts. What should I do?
A: Turn the heat down to medium-low, cover the skillet for 30–60 seconds to trap heat, or finish in a low oven at 300°F until cheese melts.
Q: What can I use instead of butter on the outside?
A: Lightly brush olive oil or mayo on the outside of the bread; both brown nicely and add flavor.
Q: Can I make this dairy-free?
A: Yes. Use a non-dairy cheese that melts well and a dairy-free spread for the outside of the bread. Texture will vary by product.
Notes
- Serve immediately after grilling for the best cheese pull and crisp crust.
- If you like a sharper finish, add a small spoon of mustard directly on the cheese before topping with the bread.
- For even cooking, spread the beef in an even layer on the bread rather than mounding it.
- Use a heavy skillet (cast iron is ideal) to get an even, golden crust.
- Slice diagonally for easy handling and a better presentation.
Troubleshooting
- Bland flavor: Taste the cooked beef and add a pinch more salt, pepper, or a dash of paprika before assembling.
- Greasy sandwich: Drain excess fat after browning the beef and blot with a paper towel. Use leaner ground beef next time.
- Burned bread, unmelted cheese: Lower the heat and cover the skillet briefly to let the cheese melt without burning the bread.
- Filling spilling out: Don’t overfill the sandwich—use an even, thin layer of beef to avoid leaks.
- Cheese not melting evenly: Use a lid for the skillet or cover briefly to trap steam and help the cheese melt completely.
- Bread too hard after toasting: Toast lightly; heavy toasting can make bread too crisp and break when assembling.
Final Thoughts
This Ultimate Cheesy Ground Beef Melt works because it pairs simple ingredients with basic technique to make a rich, satisfying sandwich. It’s fast, flexible, and easy to tweak for different tastes. Once you master the cook-to-toast balance, you’ll have a go-to meal for busy nights and easy entertaining.
Conclusion
For a similar twist on a grilled beef-and-cheese sandwich, check out this take on a patty melt at Easy Cheesy Patty Melt – Simply Delicious Food.