
Easy Homemade Chicken Katsu is a crisp, golden chicken cutlet with a tender, juicy inside and a crunchy panko crust that makes every bite satisfying. The taste is mild and savory with a light, toasted breadcrumb flavor that pairs perfectly with tangy katsu sauce. Texture is the star here: the outside gives a sharp crunch while the inside stays soft and moist. This version is quick and simple — just flour, egg, panko, and a hot skillet — which keeps it ideal for weeknights or a casual dinner. Serve it over rice with shredded cabbage for a classic plate, or slice it and tuck into a sandwich for a tasty lunch. If you enjoy comfort-fried chicken, try a related country fried chicken breast recipe for another homemade favorite.
Why You’ll Love This Easy Homemade Chicken Katsu
- Ready with just a few pantry staples: flour, egg, and panko make it fast and simple.
- Crispy panko coating gives a light, airy crunch that stays crisp longer than regular crumbs.
- Juicy chicken breasts inside contrast with the crunchy shell for great eating texture.
- Minimal hands-on time — dredge, fry, and rest — no complicated steps.
- Very flexible: slice for sandwiches, serve over rice, or make mini cutlets for appetizers.
- Kid-friendly and crowd-pleasing; familiar fried flavor without deep frying or long prep.
- Uses common oil and a skillet, so no special equipment is required.
- Easy to portion and reheat for weekday lunches or next-day meals.
What Is Easy Homemade Chicken Katsu?
Chicken katsu is a Japanese-style breaded chicken cutlet that is pan-fried until golden and crispy. It tastes savory and lightly nutty from the panko breadcrumbs, with a gentle salt-pepper seasoning that lets the chicken shine. The cooking method is simple: lightly flour the chicken, dip in beaten egg, and press into panko before frying in a shallow layer of oil. The vibe is classic comfort food — perfect for quick weeknight dinners, casual weekend lunches, or a low-effort meal when you want something satisfying and a little special. Serve it with katsu sauce on the side to add a tangy, sweet-savory finish.
Ingredients for Easy Homemade Chicken Katsu
Main Ingredients
- 2 chicken breasts
- 1/2 cup all-purpose flour
- 1 egg, beaten
- 1 cup panko breadcrumbs
- Salt and pepper to taste
- Oil for frying
- Katsu sauce (for serving)
To Serve (optional)
- Cooked rice, shredded cabbage, lemon wedges, or sandwich bread (not required)
Ingredient Notes (Substitutions, Healthy Swaps)
- Chicken breasts: Use boneless, skinless chicken breasts as written. For quicker cooking, you can butterfly thick breasts or pound to even thickness. Do not swap to bone-in or skin-on unless you adjust cooking time.
- All-purpose flour: You can use gluten-free flour 1:1 for a gluten-free version, but check that panko is gluten-free if needed.
- Egg: Use one large egg as the binder. For an egg-free option, try a beaten mixture of 2 tablespoons milk + 1 tablespoon cornstarch as an alternative binder (labeled optional).
- Panko breadcrumbs: Panko gives the signature light crunch. Regular breadcrumbs will work in a pinch but the texture will be denser.
- Oil for frying: Use a neutral oil with a high smoke point like canola, vegetable, or sunflower oil. Olive oil is not recommended for high-heat frying due to flavor and smoke point.
- Katsu sauce: Store-bought or homemade. If you don’t have katsu sauce, a mix of ketchup and Worcestershire in equal parts is a simple substitute.
Step-by-Step Instructions
Step 1 – Prepare the chicken
- Pat the chicken breasts dry with paper towels.
- Season both sides with salt and pepper.
- If breasts are uneven, place between plastic wrap and pound to an even thickness (about 1/2 inch) for even cooking.
Visual cue: The chicken should look even and flat, not lumpy or very thick.
Step 2 – Set up the dredging station
- Place the 1/2 cup flour in a shallow dish, the beaten egg in a second dish, and the 1 cup panko in a third dish.
- Have everything within reach so you can move quickly from flour to egg to panko.
Step 3 – Bread the chicken
- Dredge each chicken breast in flour, shaking off excess.
- Dip into the beaten egg until fully coated.
- Press into the panko breadcrumbs, coating all sides and pressing gently so the crumbs adhere.
Visual cue: The chicken should have a dry, even breadcrumb layer with no wet spots showing.
Step 4 – Heat the oil and fry
- Heat a thin layer of oil in a skillet over medium heat until shimmering.
- Add the breaded chicken and fry 4–5 minutes on each side until golden brown and cooked through.
Pro cue: Flip only once and avoid crowding the pan. Maintain medium heat; if browning too fast, reduce the heat slightly.
Step 5 – Drain and rest
- Transfer fried chicken to a paper towel-lined plate to drain excess oil.
- Let the cutlets rest for 2–3 minutes before slicing.
Visual cue: The crust will set and stay crisp after resting.
Step 6 – Slice and serve
- Slice the chicken into strips and serve with katsu sauce on the side.
- Plate with rice, shredded cabbage, or inside a sandwich as desired.
Pro cue: Resting ensures juices stay inside and the coating stays attached.
Pro Tips for Success
- Even thickness matters: pound or butterfly thicker breasts so cooking time is uniform.
- Dry the chicken well before breading; surface moisture prevents the coating from sticking.
- Use fresh panko: older crumbs can be stale and will not crisp as well.
- Maintain medium heat: too hot and the crust burns before the inside cooks; too cool and the cutlet absorbs oil.
- Don’t crowd the pan: fry in batches if needed to keep the oil temperature steady.
- Press the panko gently into the egg-coated chicken — firm pressure helps adhesion without crushing the crumbs.
- Let the cooked cutlets rest briefly; slicing too soon can cause juices to run out and make the crust soggy.
- Use a thermometer if unsure: aim for an internal temperature of 165°F (74°C) for doneness.
Flavor Variations
- Optional — Spicy Kick: Add 1/2 teaspoon cayenne or chili powder to the flour for a gentle heat.
- Optional — Garlic-Parmesan: Mix 1 tablespoon grated Parmesan and 1/2 teaspoon garlic powder into the panko.
- Optional — Sesame Crunch: Stir 1–2 tablespoons toasted sesame seeds into the panko for extra nutty flavor.
- Optional — Herb Panko: Add 1 tablespoon chopped fresh parsley or 1 teaspoon dried Italian seasoning to panko.
- Optional — Lemon Zest: Add a teaspoon of lemon zest to the panko for a bright finish; serve with lemon wedges.
- Optional — Sticky Katsu Glaze: Brush katsu sauce on cutlets in the last 30 seconds of frying to caramelize slightly (watch closely to avoid burning).
Serving Suggestions
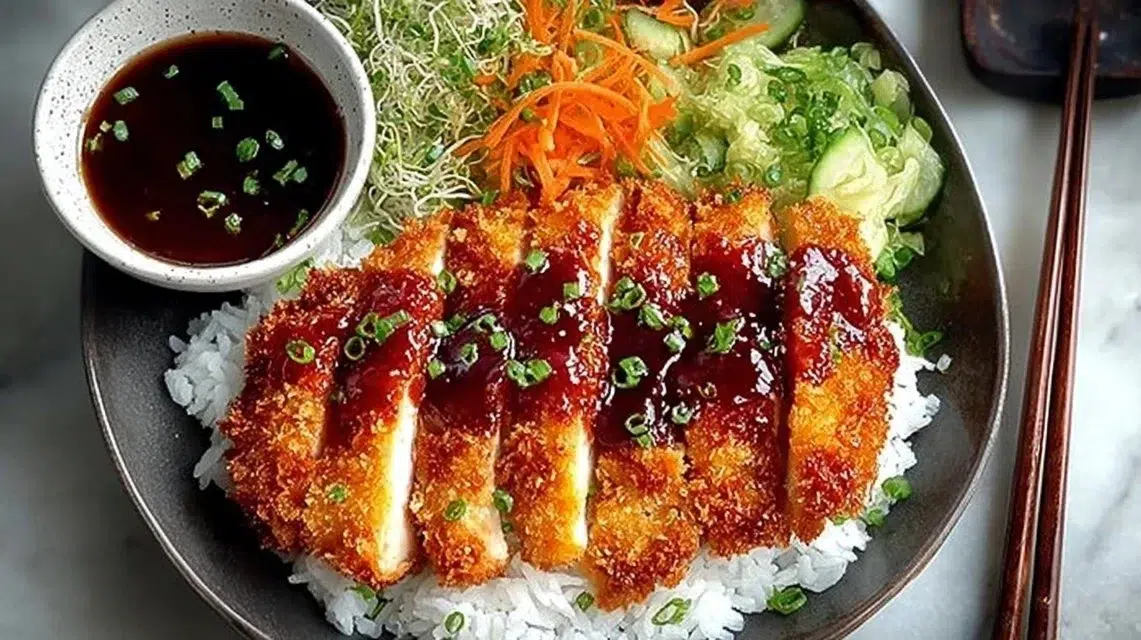
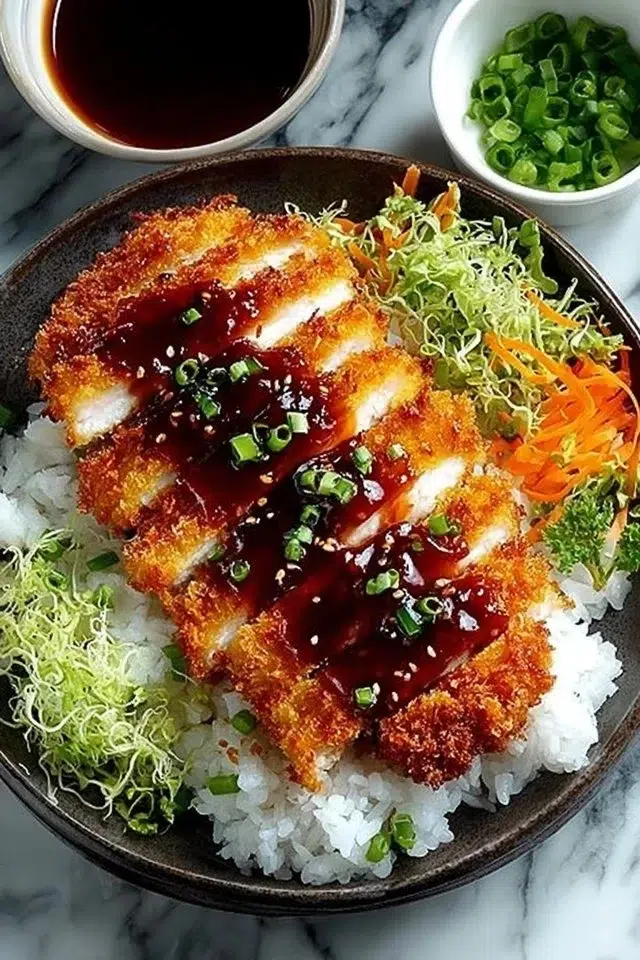
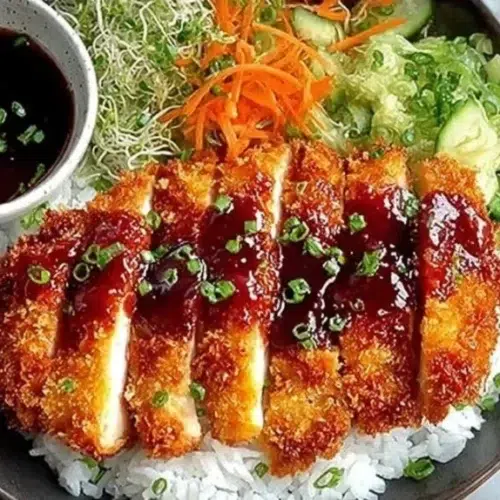
- Classic Plate: Serve over steamed white rice with shredded cabbage, a lemon wedge, and katsu sauce on the side.
- Sandwich: Slice the katsu and place in a soft roll with mayo, shredded lettuce, and pickles.
- Rice Bowl: Top steamed rice with sliced katsu, scallions, and a drizzle of katsu or tonkatsu-style sauce.
- Salad Topper: Slice thin and add to a mixed greens salad for a crispy protein boost.
- Bento Style: Pair with pickled vegetables, rice, and a hard-boiled egg for a simple bento box.
- Kid-Friendly Meal: Cut into strips for dipping in sauce and serve with fries or roasted veggies.
Make-Ahead, Storage & Reheating
- Make-ahead: Bread the chicken and place on a tray covered lightly with plastic wrap in the fridge for up to 4 hours before frying.
- Fully cooked storage: Cool to room temperature, then store in an airtight container in the refrigerator for up to 3 days.
- Reheating best practice: Reheat in a 350°F (175°C) oven or toaster oven on a wire rack for 8–10 minutes until warmed through to restore crispness. Avoid the microwave if you want to keep the crust crunchy.
- Texture changes: Refrigeration will soften the crust over time; crisping in the oven revives texture but won’t be exactly like fresh-fried.
Storage and Freezing Instructions
- Short-term fridge: Store cooked cutlets in an airtight container for up to 3 days.
- Freezing cooked katsu: You can freeze cooked, cooled cutlets individually wrapped in plastic wrap and placed in a freezer bag for up to 1 month. Thaw overnight in the fridge and reheat in a 350°F oven until warmed through and crisp.
- Freezing raw breaded chicken: Not recommended because the panko can become soggy during freezing and thawing. If you must, flash-freeze breaded cutlets on a tray until solid (about 1–2 hours), then transfer to a freezer bag and use within 2 weeks. Thaw in the refrigerator and fry immediately.
- If freezing is not recommended: Prefer to freeze after cooking rather than raw breaded for better texture retention.
Nutrition Facts (Per Serving)
Calories | Protein | Carbs | Fat | Fiber | Sodium
— | —: | —: | —: | —: | —:
Approx. 420 kcal | 38 g | 20 g | 18 g | 1 g | 520 mg
Estimates vary by brands and portions.
FAQ About Easy Homemade Chicken Katsu
Q: My katsu is soggy after sitting. How can I fix that?
A: Reheat in a hot oven on a wire rack to restore crispness. Avoid microwaves which make the crust soggy.
Q: How do I know the chicken is fully cooked?
A: The safe internal temperature is 165°F (74°C). Use a quick-read thermometer inserted into the thickest part.
Q: Can I use chicken thighs instead of breasts?
A: Yes, boneless, skinless thighs work. Adjust frying time since thighs may cook faster or need slightly longer depending on thickness.
Q: Why aren’t the panko crumbs sticking?
A: Ensure you shake off excess flour before egg, and press panko into the egg-coated chicken. Too-wet or too-dry conditions prevent adhesion.
Q: Can I bake instead of fry?
A: You can bake at 425°F (220°C) on a wire rack for 15–20 minutes, flipping once, but the crust will be less crisp than pan-fried.
Q: What sauce pairs best with chicken katsu?
A: Traditional katsu sauce is ideal. If you don’t have it, a simple mix of ketchup and Worcestershire sauce works in a pinch.
Notes
- Use a shallow skillet with about 1/8–1/4 inch oil — enough to shallow-fry and crisp without deep-frying.
- For even browning, turn the heat down a little if the crust darkens too quickly.
- Plate on a warm dish to keep the cutlets hot longer at the table.
- Serve the sauce on the side so the crust stays crunchy until eaten.
- If you want thinner cutlets, butterfly the breasts and pound lightly rather than slicing thin after cooking.
Troubleshooting
Problem: Crust falls off while frying.
Fix: Dry the chicken well, shake off excess flour, and press panko firmly. Do not flip too often; flip once with a thin spatula.Problem: Chicken is raw in the center but golden outside.
Fix: Reduce heat slightly and cover briefly for 30–60 seconds, or finish in a 350°F oven. Better: pound to even thickness before frying.Problem: Oil splatters too much.
Fix: Pat chicken dry to reduce moisture. Use a splatter screen or reduce heat slightly.Problem: Panko burns before chicken cooks.
Fix: Lower the heat; the oil is too hot. Allow oil to cool and test with a small piece of panko — it should brown in about 30–45 seconds, not instantly.Problem: Breaded chicken is greasy.
Fix: Use the right oil temperature and drain on paper towels or a rack. Don’t overcrowd the pan which cools oil and increases absorption.
Final Thoughts
This Easy Homemade Chicken Katsu is a quick, reliable way to get a crunchy, tender chicken meal on the table with everyday ingredients and minimal fuss. It’s a simple recipe that delivers big on texture and comfort, and it adapts easily to many serving styles for lunches, dinners, or gatherings. For a classic reference and more tips, see Easy Chicken Katsu (Japanese Chicken Cutlet) – Cookerru.
Chicken Katsu
Ingredients
Main Ingredients
- 2 pieces chicken breasts Boneless and skinless.
- 1/2 cup all-purpose flour Can use gluten-free flour 1:1.
- 1 piece egg, beaten Use a large egg; for egg-free, substitute with milk and cornstarch.
- 1 cup panko breadcrumbs Use fresh for best texture.
- to taste Salt and pepper To season the chicken.
- as needed Oil for frying Use canola, vegetable, or sunflower oil.
- as needed Katsu sauce For serving.
To Serve (optional)
- as needed Cooked rice For serving.
- as needed Shredded cabbage For serving.
- as needed Lemon wedges For serving.
- as needed Sandwich bread Optional for sandwiches.
Instructions
Preparation
- Pat the chicken breasts dry with paper towels. Season both sides with salt and pepper. Pound to an even thickness if necessary.
Dredging Station
- Set up three shallow dishes: one with flour, one with beaten egg, and one with panko.
Breading the Chicken
- Dredge each chicken breast in flour, then dip into the beaten egg, and finally press into panko until well-coated.
Cooking
- Heat oil in a skillet over medium heat until shimmering. Fry chicken for 4–5 minutes on each side until golden brown.
Draining and Resting
- Transfer fried chicken to a paper towel-lined plate to drain excess oil, and let it rest for 2–3 minutes.
Serving
- Slice the chicken into strips and serve with katsu sauce, rice, and shredded cabbage, or in a sandwich.